Tuesday, October 31, 2006

Just checking

Painting day! I started getting some details in place on Lydia's portrait today. I thought I'd snap a quick photo to check my work -- I am always amazed how reducing a piece to 2 dimensions gives me such a MUCH clearer picture of flaws. And there usually are flaws... sigh...

On the whole though, I am not unhappy with where I am so far! I need to add the shadows that will define the ball of her nose and add quite a bit of color to her lips. The background above her head needs to be toned down too. Her right pupil got away from me and is too big, but I won't touch it until the paint dries a bit. I have learned that it is almost as easy to make mud with oil paints as it is with watercolors!

The likeness is good though. Her hair is about perfect and I can't believe how easy it was to put in her necklace. I had been worrying about that little detail -- it's one of her signature pieces -- but I think I got it right in about 5 minutes.

I have to start thinking about another picture to paint next.

Monday, October 30, 2006

I seem to be even worse than usual lately about taking off in 47 different directions at once. This time though, I can't help it -- I'm taking a live class and 2 online classes all at the same time. Trying to keep up with the homework in each is preventing me from actually *finishing* anything. Just wait... in a little while I'll be posting lots of FO's.

Yes, I will!

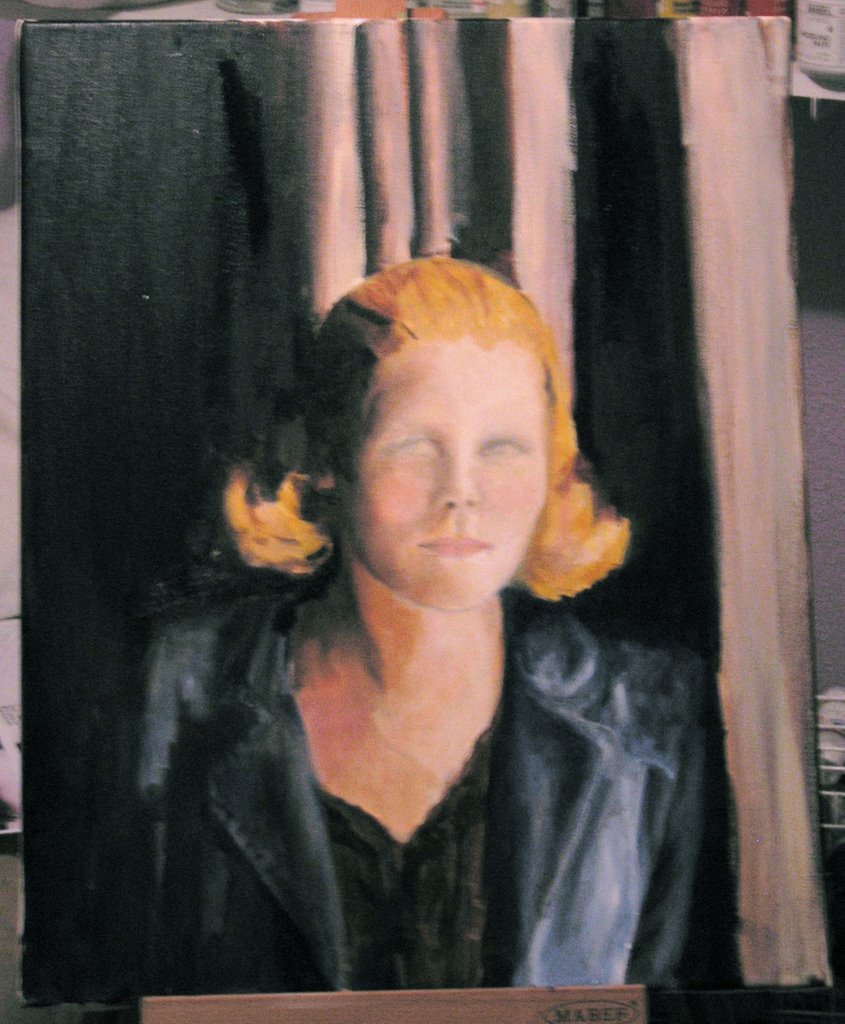
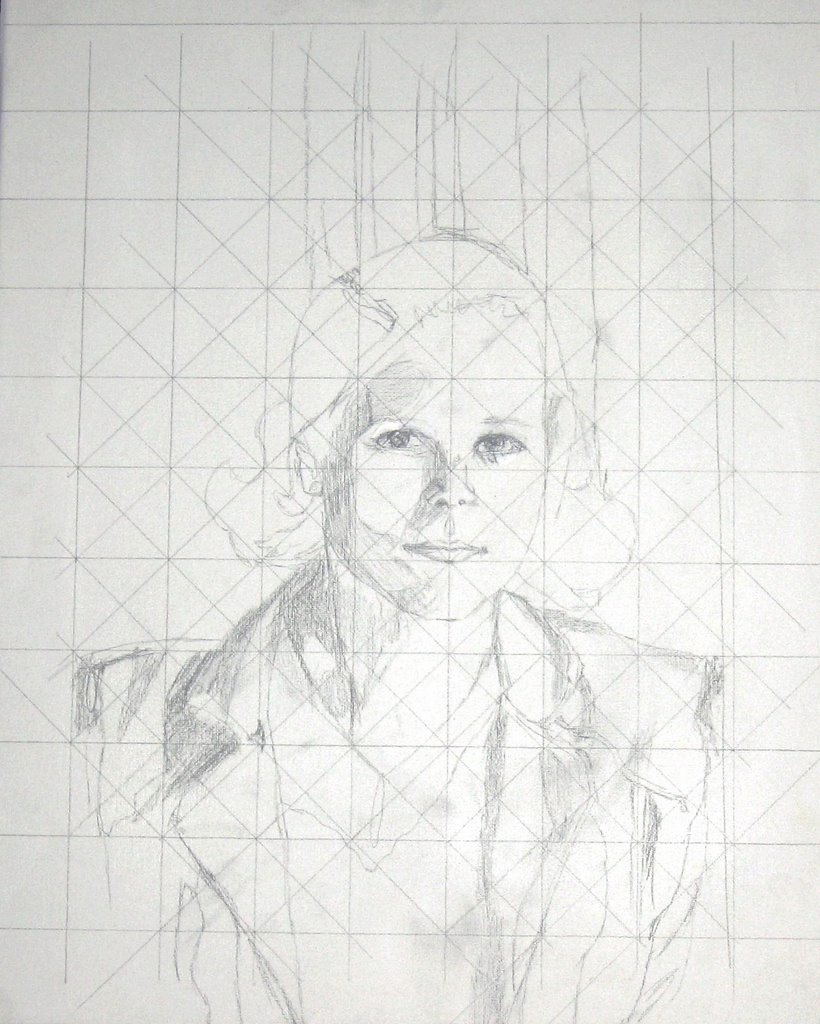
No progress to report on the portraits. We had a guest demonstrator in class last week. It was absolutely amazing to watch him go from a blank canvas to a portrait over the course of 3 hours. I learned a lot, but didn't get any painting done. I'm not sure what to do next, so I'll get started again after tomorrow's class.

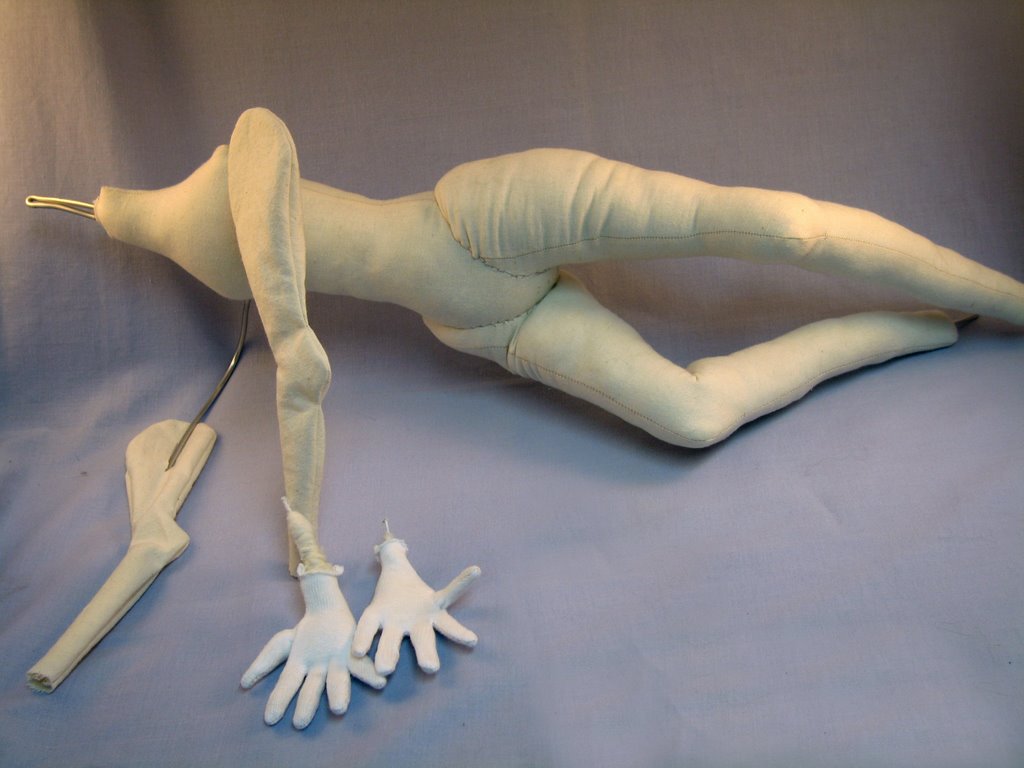
I did make some progress on my Pam Grose doll. I had to order a different "skin" fabric for her as the stuff I had on hand just wasn't right. The new stuff came this weekend, so I'll try to get her skinned and photographed today or tomorrow. This pattern is becoming quite a challenge.

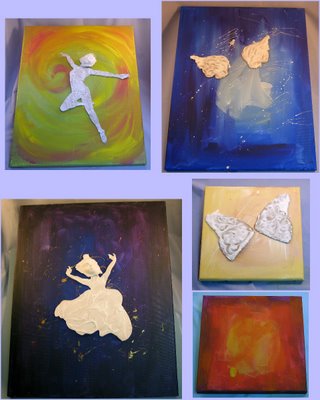
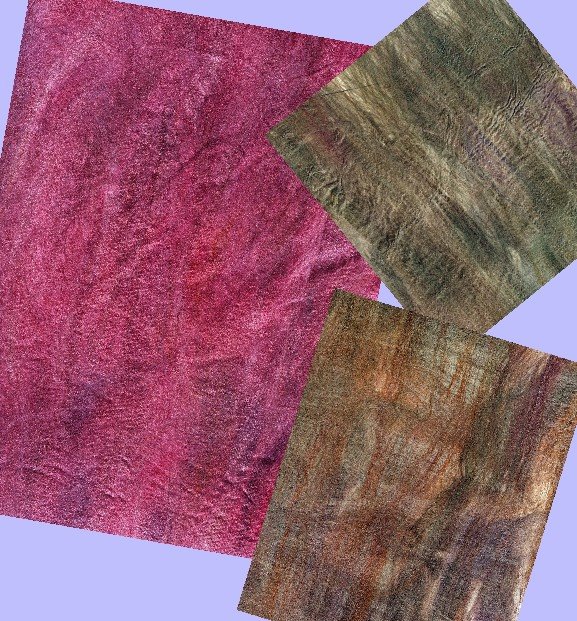
I am taking an online class called "Inner Child" by Sherry Goshon at Joggles. It's a multi-media assemblage using all kinds of materials selected around a theme. I had so much fun painting the background canvasses that I couldn't stop at 1. I have 5 begun at the moment... The larger ones are 11x14 and 16x20 inches. The 2 smaller ones are each 8 inches square. I really like that size.

I also have some tiny canvasses to play with, but I haven't painted them yet. I think I have enough going at the moment!

The faces are lifted from molds I took of my own sculpts. Hmmm... I see now that the face on the purple canvas is too big for its shape. I'll have to play with that one a bit more. The shapes are cut from cardboard and covered with acrylic texture medium.

I want to wait now before I do any more to them until the last class is posted. I need to be able to *see* where all this is going before I make any more choices. I DON'T want to screw these up!

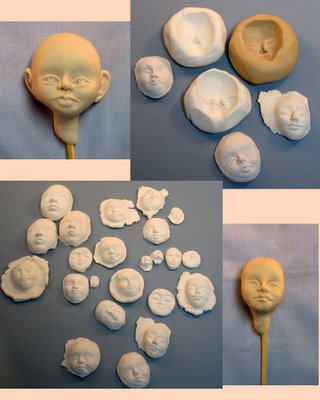
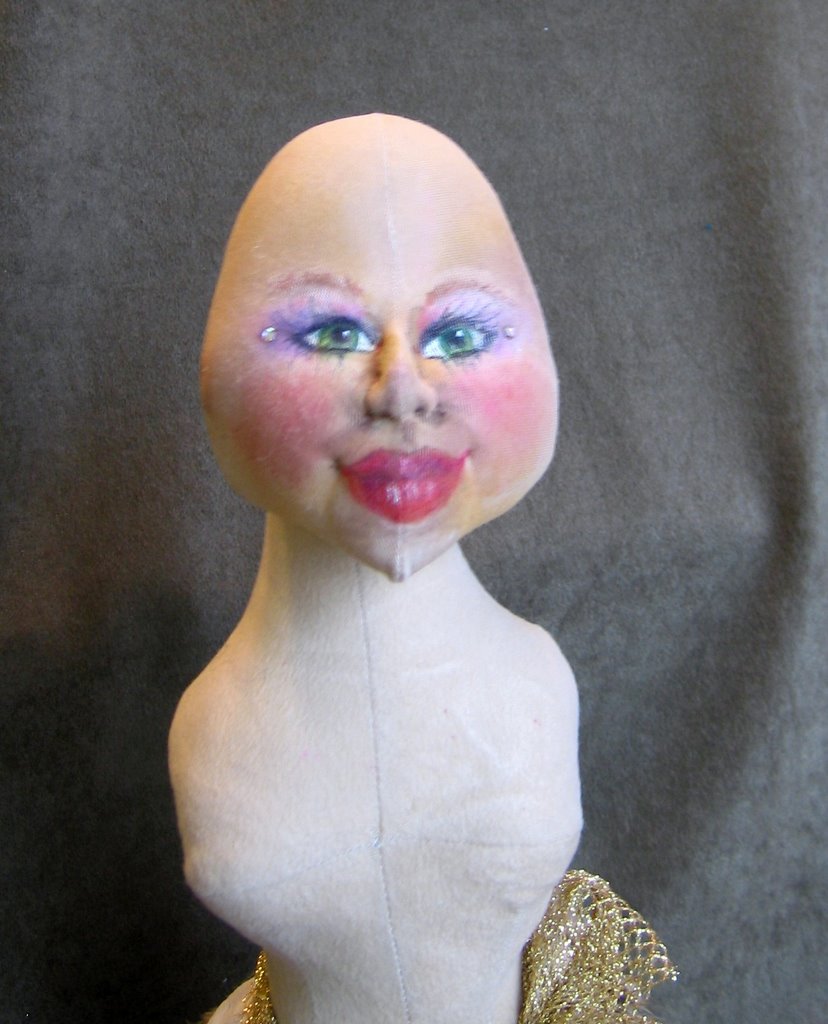
These are two of the sculpts I made to take molds of. The third one is misplaced this morning. I'll have to hunt her down as she's my favorite and I want to make a complete figure out of her later. Not all of the faces are from my original sculpts. I have a few commercial molds as well, but I don't know if I will be using them. Maybe some of the tiny ones on the smaller canvasses...

The faces are all pressed out of either paper clay or La Doll. Can't stand working with either one but they make nice castings so as long as I have it I might as well use it up.

Now the hunt is on for related objects to add in. The last lesson will be posted on Thursday. I am DYING to see how we are going to be wrapping this up!
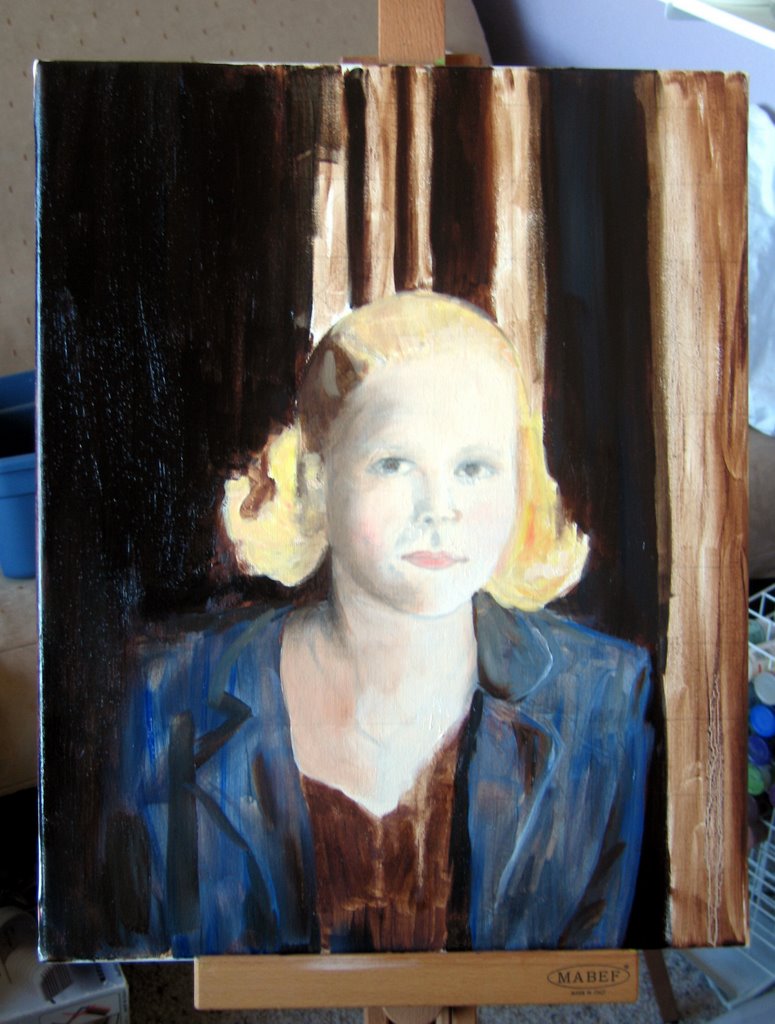
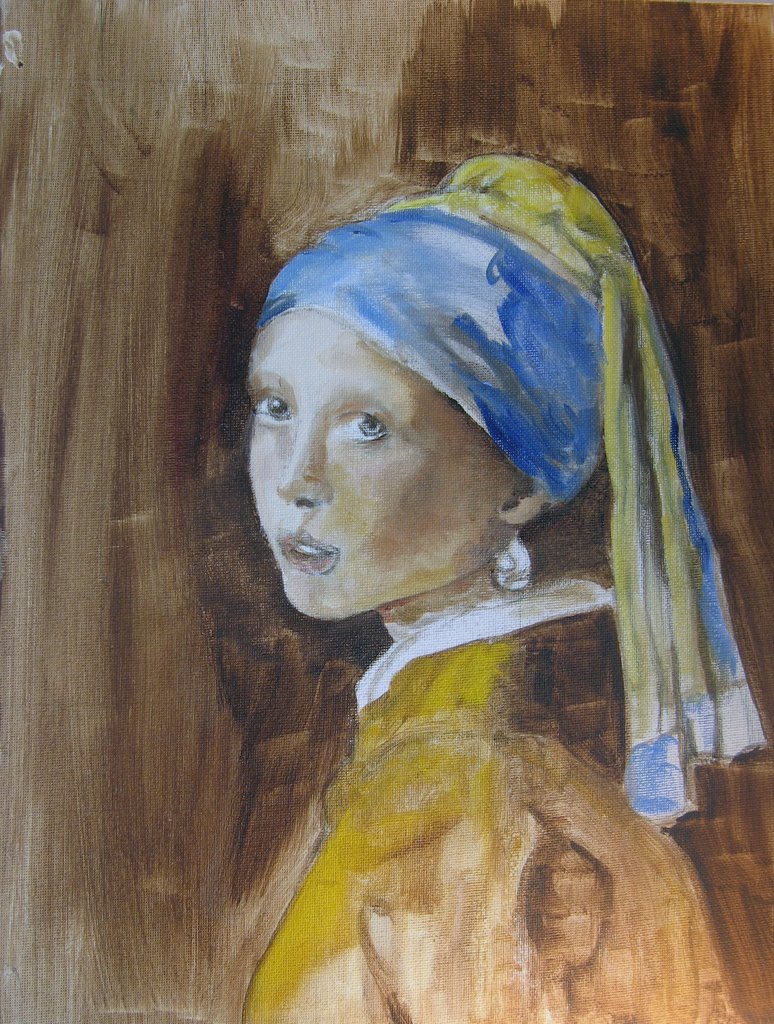
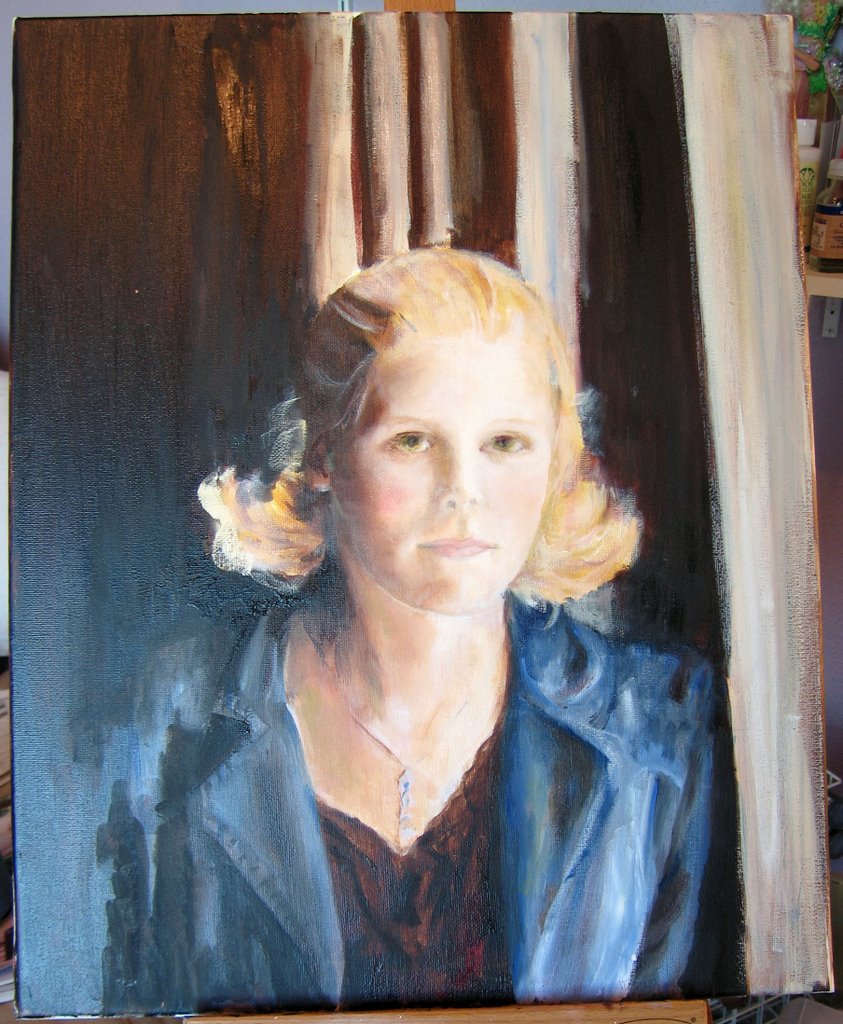
Monday, October 23, 2006

Second layer of color added


I got quite a good long time to myself yesterday afternoon by electing NOT to go to the gym with Jake so I could paint instead. I added the next layer of color to Lydia's portrait.

I see that I need to correct the line of the shoulder on the left, and add the highlight that will give her the hint of a smile on the left side of her mouth. There is something not quite right about the line of her chin on the right side too -- she does NOT have that stubborn of a set to her mouth, though she can be quite stubborn at times...

The undercolor of her hair is just right, as is the beginning of the background. I love the way the denim of her jacket turned out. Now I need to add in her necklace.

I hope I haven't lost too much of the first drawing for when it comes time to add in the details of the face.

Yay! It's class again tomorrow -- I can't wait!

Saturday, October 21, 2006

I certainly have had ample opportunity for making messes this week. These are sample images from the three large sheets of silk paper I made from some roving I have never gotten around to spinning. Oh yum! I can using see these in scrapbooking, paper art, and maybe even in the mixed media collage class I am taking online.

HUGE mess though. Very wet!

I also started an oil portrait of my oldest daughter. My painting instructor set us the tast this week of starting a second portrait to work on at home, while we kept our class project for class. So...

I applied what I have learned so far to a copy of one of Lydia's senior portrait shots.


This is the undersketch, complete with grid. The diagonal lines make getting a faithful copy particularly easy.


This is where I am stopping until the next lesson. I laid down an underpainting in very thin burnt umber, let that dry, then added a layer of local color. I really REALLY wanted to keep going, but I was beginning to make mud in my attempts to blend colors, so I will try to contain myself until this layer dries.

It's so cool to see the canvas in a photo like this. I like the modeling I have achieved on the left side of her face, but I need to correct the shape of her mouth on the right. The lines of her clothing look good too, but the shadow under her left lapel needs to be darker

It amazes me how fast time goes when I have a brush in my hand...

Tuesday, October 17, 2006

I have gotten a lot done this week, even though there isn't much in the way of tangible objects to show for it. My main accomplishment was actually getting a small light tent set up for object photography. I still have some fine tuning to do -- I need better background material and a bigger sheet for the tent -- but the hard part is finished. Now I need to practice!

Just to test it out, I threw in these parts of a doll I am working on. This is Pam Grose's "Female" -- easily the most complicated doll I have ever attempted. By the way, her leg isn't really that wrinkley. I tried to bend the leg to fit it into the tent and it didn't work very well.

I haven't even started the head yet...

I have also begun working toward a long-held dream: I want to learn to paint. The Silverton Art Association is offering a Beginning Portrait Painting Class for 5 weeks this fall, so I decided to take it. Last week we learned how to lay down a grid to transfer our portrait to the canvas. I am attempting to copy Vermeer's "Girl with a Pearl Earring." I've done this sort of drawing before, so this week's homework was a piece of cake. Fun!

This morning we finally got to start painting. Here's what I have so far. When class ended, I couldn't believe that 3 hours had passed so quickly.

I think I am in love with the smell of oil paint!

Sunday, October 08, 2006

A Quiet Sunday

We stayed home and slept in this morning -- the whole family has been so on-the-go this week that it has been the height of luxury to simply do nothing. I could get used to this...!

I did get bored after a while though, so I decided to do the last finishing touches on my Dungeon Master. Here he is. I gave him a very ornate key chain, a bejeweled turban, and his very own dungeon steps to pose on. I am so happy with the bent leg pose -- it gives him better balance and a more active look.

Who would have thought that the funny little head with the mismatched eyes I posted a few weeks ago could become such a figure?! I am aware of his flaws -- oh, those hands! -- but I am still happy with the outcome.

This little lady is "Spring Chicken", a round robin doll it was my turn to work on. I thought I would be brave and give her a face. (Someone has to!) The head itself had rather full lips sewn in to the outline, so I decided to go for an "Ethnic Bird" look in keeping with the theme that has already been set. I'm not sure I entirely suceeded in what I was attempting to do -- her eyes ended up a little too close together -- but I don't think I need to be ashamed of my contribution.

To tell the truth, I kind of wish I could keep her. I have a zillion ideas as to how she should be finished. I look forward to seeing a photo of her when she has made the rounds of all the artists who are to contribute to her creation and see how she turns out.

And finally, I want to share my wonderful "Living Dolls". Last night was the big Homecoming Dance at the High School, so of course I had to get pictures of the girls in their gowns. I did get some nice ordinary "stand still and smile" photos, but this one is by far and away my favorite picture as it captures their personalities so well. Alice is SUCH a diva, and Lydia was elected to be a Senior Class representative on the Court this year -- oh my, and isn't she proud of her tiara!

I'M proud of THEM!

Wednesday, October 04, 2006

Just a quick update today -- I think I have finished his over tunic. Once I get started beading, I can't seem to find a good place to stop. I love this tunic, especially the color. Everyone else in the challenge is seems to be working in black. I think the brown/plum, especially combined with the smoky quartz stones in the beading, give a good "dark" effect that is something different.

Trust me to be the one wanting to do something different...

I need to go through my idea files yet and find a good look to do for a hat. I am NOT good at applying hair -- there has to be a better way! -- so his head must be covered. I think a good hat will also help to balance out the fact that his skull isn't *quite* full enough on top. Learning, learning...

Here he is from behind. I was going for a kind of cape-like effect with the beads and stones draping off the top of the arm holes. I used matching beads to make a closure for the front, as well as a cover for the gathering I did at the back waist to give the tunic a little more shape.

It's a pity I didn't take a photo of his body without clothes AFTER I did the sculpting stitches. He has quite a realistic figure and a great butt. Especially once I remembered that he is, in fact, male, and that males do not usually have waists and hips. Ooops... Can you tell I usually do females, LOL??

Tuesday, October 03, 2006

SO NOT a Father Christmas!

Jake *told* me his face was all wrong for a Father Christmas character -- I should have listened. I dug out every last reasonable shade of hair I own, as well as one not so reasonable, and he wasn't happy with anything but the black. Honestly, this guy is turning out to be as autocratic as his face. So I guess Jake will get gloating rights for being right THIS time. Instead of Father Christmas, he is going to be entered in Doll Street's "Dungeon Master" challenge. He tells me he will be a great "Keeper of the Keys".

(People who don't play with dolls will probably think I have lost my marbles, but trust me -- they do TOO talk!)

I am pretty happy with his clothing so far. Everything fits! He will also be wearing a hat of some sort and a long over tunic. I am hand sewing the tunic right now. The main fabric is a velvet which is too wriggly to sew accurately by machine, and then there are a few coordinating fabrics that set it off just right.

I wanted the tunic to be in black and silver, but I found an old brownish plum velvet formal at the thrift store that was such a delicious color I knew I would have to use it.

His accessories will include a belt with a key chatelaine, and perhaps a staff or a whip of some kind. Hmmm... his hands aren't really posed to hold either of those things though... I'll have to think about it some more.


Just for fun I have included this close-up of his boots. They are modeled after a photo I found on the 'net of a pair of boots worn by a woman surgeon from the Civil War. They turned out well, but next time I will know to leave more of a "slot" around the top edge in which to tuck pants. These have barely enough of a ridge to conceal the raw edges of the pants fabric.

I keep learning!