This is "Gracie", designed by Sherry Goshon and made by me. I adore her little Mona Lisa smile, don't you? Sherry's faces are so expressive! Just look at those gorgeous green eyes. :-)
Gracie herself has been sitting (hatless) in my collection for several years, while the figure of her little rag doll has been languishing on the floor under my cutting table for just as long. (poor baby...!)
I cleaned my sewing room this week, and now have 9 (!) unfinished dolls sitting on my cutting table. I didn't even count the ones sitting in the laundry basket where I store my supply of doll hair. (Ooooh, ouch... cringing!)
This morning I picked up the little raggedy, dressed her, gave her some hair, and made Gracie's hat. I think I put in maybe 2 hours work total. A bunch of the other beings awaiting completion are just as near to being finished. Hmmmm... I am seeing a pattern here, but I'm not sure quite what it means...
Perhaps I just like to go shopping for more patterns and supplies!
A couple of them were false starts; they have been dismantles and reduced to their parts for recycling. Some are stalled due to "operator error" -- I hating fixing mistakes! -- these have had the mistakes undone and are ready to resume progress. Whew!
I think I might just finish some dolls this week.
Thursday, April 27, 2006
Saturday, April 22, 2006
Could it Possibly Be... Spring?!
If you live in the Willamette Valley of Oregon, you come to expect rain, especially in April. So, when the sun shines in April, it is a Big Deal indeed!
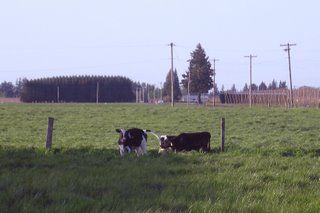
We opened the door to the outside for the weaned calves -- this is the first time in their lives these little girls have been out of the barn, and most were staying quite firmly inside, thank you very much. A few were a bit more adventurous. These calves have it figured out. Don't they look happy?
These particular tulips are volunteers in the window box on the back porch. My mother-in-law never planted any but red and yellow tulips when she lived here. Even though tulips are one of my favorite flowers of all time, I am so burned out on gardening by the time the fall rolls around that I have never gotten around to planting bulbs ever... Who knows where these beauties came from -- but they are a special gift from life to my garden and I just love looking at them. Fortunately, from this angle you can't see the mass of weeds that is taking over the flower bed in the background!
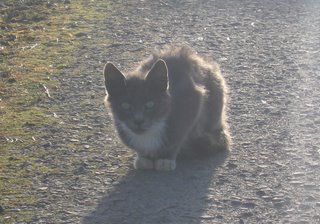
This is "Fili", Alice's favorite barn cat. He doesn't like me much because I never bring him food. This is about as close as he ever lets me get to him -- I think he was just curious to see what the heck I was doing (taking photos of the calves) and came up close in spite of his better judgement! I know this is a horridly lit photo, but hey! he was gone 2 seconds later so I am lucky to have caught him at all! He isn't much to look at -- none of the barn cats are except for Pretty Momma -- but he is a nice little boy.
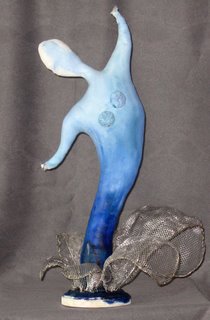
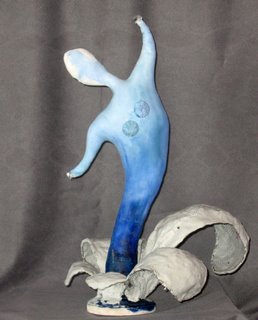
This is what I grabbed to work on while waiting for the apoxy clay to harden on my Water Spirit
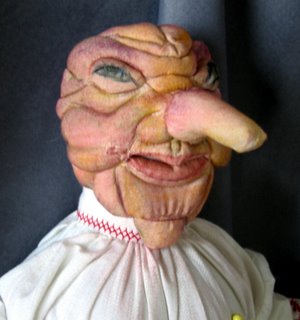
In my ongoing effort to FINISH a few of the major projects I have underway, I decided to pick up and do the hand sewing on the Baba Yaga mask of my Smallworks topsy turvy doll. The mask is made in 3 pieces (upper face, lower face, and nose)using an interesting and unique trapunto technique; it took some fussy work, but it wasn't difficult and the results are fantastic. I still want to sharpen up the detail around the eye area and add a few more "age spots".
The next step will be her headdress, which will give her head a more finished look, and perhaps make her seem a touch more human -- this view is just scary! I doubt I will get to it this week -- I want to keep going on my Water Spirit figure -- and working on her in bits and pieces is the only way to keep my sanity on this project. This doll has already taken a HUGE investment in time and energy, but she will be worth it in the end I think.
Wednesday, April 19, 2006
Blessed Easter!
We had a lovely holiday weekend -- busy but very fulfilling, and a blessing in every way. Unfortunately, it also meant 3 entire days with no art at all! With the many distractions of church, family, dairy business (ASK me about my audit with the gentleman from the State Employment Department yesterday!) and general holidaying, my attention has been more fragmented than I would have liked. Fortunately, my faithful spinning wheel is always there to keep my hands busy when my mind isn't able to focus on what they are doing.
The three pink skeins are a blend of romney wool and mohair from a farm just north of here. It was a delight to spin -- almost spun itself! -- but a little more coarse than I had anticipated. This will go nicely into a future weaving project, I'm sure
The brown is a wool/luxury fiber blend that is softness itself, but a bit lumpy. Definitely a character yarn.
I got a little work done on my Water Spirit on Friday as planned. I put in a DVD and made the "splash" armatures. These were constructed in the same way as the wings of my dragon bust.
(I have to think of a name for that guy yet...)
It took the entire movie to make the 5 armatures, but I am very pleased with the form so far. Alas, they aren't quite sturdy enough to bear the weight of the polyclay, so I will reinforce them with some Aves Apoxy.
This is not a hardship as I have been dying for an excuse to give the Aves a try. I loved the Magic Sculpt, and I am eager to see how the Aves compares.
.
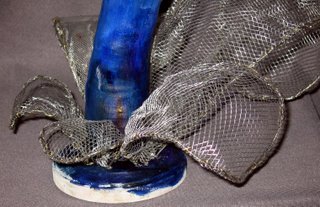
This is a close up of the armature. You can see how well it fits the base and the figure form.
I didn't measure or plan, just "eyeballed" it. I get in trouble sometimes with my "seat of the pants" approach to planning a project, but it worked for me this time.
.
This morning I finally got a chance to get back to work on it and cover the armatures with the Aves. Interesting stuff... stickier than the Magic Sculpt, but easier to blend and perhaps a touch easier to handle. When you come right down to it, it's about exactly the same though.
OK, now what! The day has barely begun, and I am stuck waiting for my clay to harden. Growl!
I COULD always go clear off the top of my work table, which became the universal repository of stuff when the carpet cleaner was here last week...
Thursday, April 13, 2006
Miniscule progress... grrrrr!
As much as I love spending Thursdays with Jake, I do begrudge the time away when I have an idea hot on the burner. I managed to get a bit of work done on my Water Spirit, and I do have to wait on the arrival of my epoxy clay before I can begin sculpting the base embellishments... No matter -- tomorrow is Friday so I will have the entire morning and afternoon for uninterrupted work!
Oh my, I think I got more accomplished than I thought. This is quite wonderful! I put on the first layer of paint on the figure itself. I like the shading of the blues, but I think I want to see a little more variation in the hues themselves. Perhaps some green and purple...
Oh geez, not again. Listen to me. No, no, not again! I have GOT to get away from that color scheme. The next Spirit Elemental is going to have to be Fire for sure!
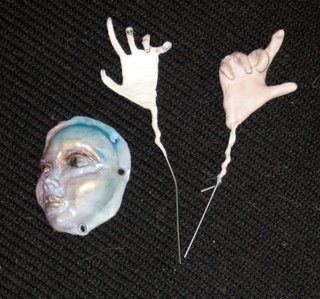
Here is the painted face ready to be attached to the form. I am pleased with the way the colors turned out -- the first attempt was too awful to show. Isn't it amazing what a little Pearl-Ex powder can do??!
I also managed to shape and tape the hand armatures. The one on the right has the first layer of clay added. Now for some real sculpting challenges! I haven't attempted realistic hands yet.
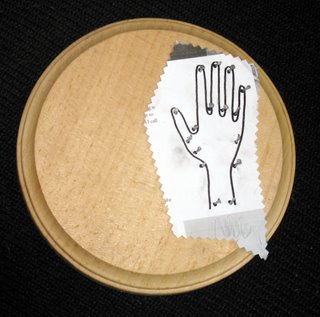
I learned a cool trick for making hands the same size from Maureen Carlson's Family and Friends in Polymer Clay. This jig is just so slick!! The pattern in the book was an exact fit for my figure, but it would be as easy as anything to size it up or down for a larger or smaller figure. The only problem I encountered was in the size of the wire -- the author recommended 18 gauge, but I found it to be much too heavy for a hand this size.
Tuesday, April 11, 2006
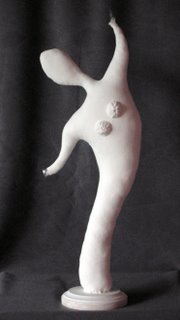
Here we go... something *totally* new for me. I've never worked abstractly before, but ignorance is bliss and I am just charging in regardless. I want to do a series of elementals, and I am beginning with my own element, "water".
The figure is just a suggested female form in a fluid pose. The face and hands will be sculpted. I also plan on doing some wave-like forms around the base, but I used up all my epoxy clay on the dragon, so I have to order some of that ASAP.
Thoughts of pearls, peridots, and aquamarines are swirling around the edges of my thoughts, but I don't quite know how I want to encorporate them yet...
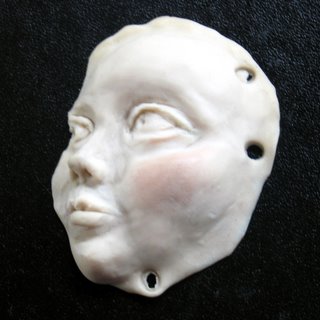
Her mask came out a little more realistic than I wanted, but I love it so much that I am determined to use it anyway. I had an AWFUL time sculpting a profile -- there is a lot more space between the center of the nose and the edge of the cheekbone than shows in a photograph, that's for sure! I finally had to get Lydia to let me stare at her face for few minutes to get a feel of how a profile is put together.
I long for the day when I just *know* the stuff I need to know and I don't always have to be figuring out the little things from scratch.
I can see from this macro shot that she isn't nearly as smooth as I thought when she went into the oven either. I spent what seemed like ages smoothing that clay too, darn it! That's OK though, sandpaper is cheap, and paint covers a multitude of sins, LOL!
Monday, April 10, 2006
Painting a Dragon
The first coat of paint is a layer of Genesis Viridian Blue (a dark greenish bluish black -- gorgeous color!)
The idea was that I would drybrush over it so that this lovely rich shade would remain in the creases of the texture.
Didn't happen. Sigh...
I mixed up nice blues and greens and dabbed them on with a mop brush. The colors blended beautifully this way.
A dark purple fills in the shadows in the creases and the cuts of the muscles.
I don't like those white eyes though.
And...
TA DAAAaaaaa!!
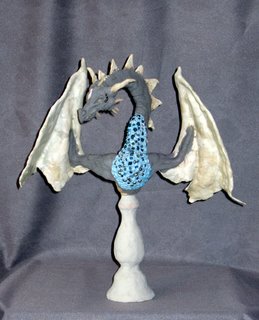
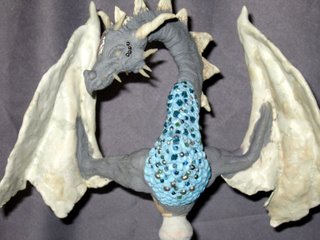
HERE HE IS! I can't believe I made this guy. All he needs now is a coat of varnish and he is ready for display.
The spikes are accented with Pearl-Ex bright gold mixed with Genesis glazing medium. I thought it would be shinier, but now that I look at it, I prefer the more subtle effect.
And darn it! I see that I got some green paint smeared on the base. Grumble...
I think I want to add one more layer to the pedestal. It will be more stable and will also look a little more finished.
Saturday, April 08, 2006
Well, well... how often does this happen -- my photos actually loaded in the order in which I wanted them to appear! Yes, I know, I AM way too easily amused!
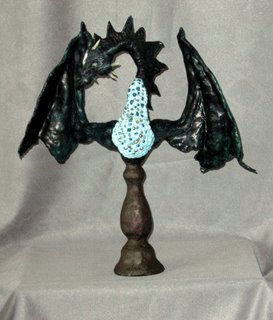
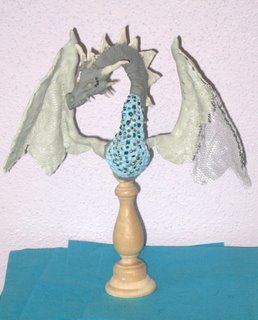
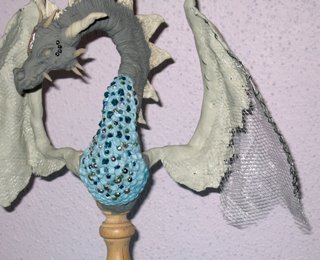
My dragon has wings and is ready for painting. I don't know what I was so stressed about -- the wings were actually easier than I thought they would be. This does not usually happen, in case you are wondering why I am so excited. I usually underestimate (by a mile!) the time and effort a project will take.
I wish I had made the wings a little bigger, but I would have run out of clay if I had, so oh well! I had *just* exactly enough Magic Sculpt to finish covering the wire mesh that is the armature for the wing web and the candlestick, which I decided was pretty dorky looking as the base for a Majestic Dragon such as this is becoming.
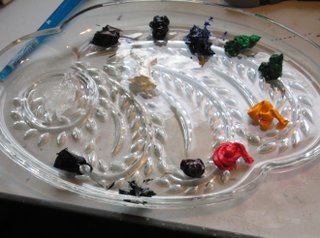
Ready to paint! I got an old luncheon plate from Goodwill to use as a pallette. Decorative as well as functional -- I like it! The Genesis paints are so pleasant to work with. If I were independently wealthy, I'd have one of each color. Good thing I know how to mix what I need!
By the time you check this spot again, my dragon should be finished!
Thursday, April 06, 2006
Homage to a Good Friend
This photo of me was taken in 1997 at a fire lookout station in South Dakota. I post it here today for 2 reasons, the first of which is in loving memory of my beautiful little dog Theo, who left me yesterday after a brief illness. He was 17 years old, which is VERY old for dog.
Not old enough for me, alas.
I also put it here to remind myself of what I CAN be when I take care of myself. I will NOT use my grief as an excuse to eat too much or to shirk my exercise. I WILL use it as an excuse to cry instead, because I must, and because his life was worth the tears his death costs me now. Wasn't he the cutest thing???
It took effort, but I made myself stay busy (and out of the kitchen!) yesterday afternoon by getting back to work on my dragon. I had been dreading this step for fear of ruining what I had already created. I wish I could get over that...
So I shaped the wing wires in a pose, then wired on some metal mesh to act as a support for the clay. Magic Sculpt epoxy clay makes up the bones and the "skin" of the wing web.
Here is a close up of the wing before I cover it completely. I am nearly out of the Magic Sculpt -- I hope I have enough to finish this step, or it will be days again before I can get back to it. I really REALLY want to get this dragon finished!
I don't know if I mentioned it before, but I am so glad that I decided to paint around the pearls and crystals on his breastplate BEFORE adding the wings. Those wings are just *in the way* of everything and from every angle. They have also compromised his balance, though I posed them as carefully as I could to keep him stable. This guy is now very VERY top heavy. I am going to need to add something as a base to keep him from being so tippy.
Saturday, April 01, 2006
Crayola Rain
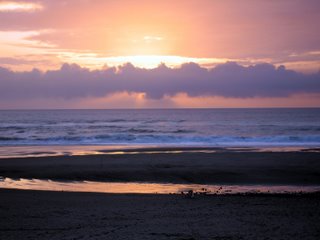
I love Spring Break, if for no other reason that it IS a lovely break in a routine gone dull over the winter. This year we returned to the Sea Gypsy in Lincoln City, OR. I never ever get tired of looking out to sea and listening to the waves. It rained most of the times we were there. This is a shot of the rare spot of sunshine we saw. I took about 7 photos of this sunset and none of them were the same. I get so excited by all the colors!
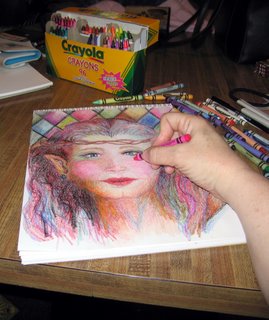
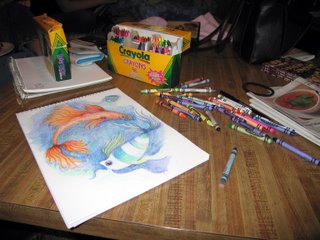
OK, so it usually rains -- and this year was no different -- but that's why I always bring along something to do that doesn't need to be done outside. I usually bring along my knitting, and sometimes drawing supplies. This year I didn't feel like knitting, and for some reason known only to the spirit that inspired my hand to move, I threw in a box of crayons with my drawing supplies.I guess I was in the mood for crayons! I had so much fun just playing with the c0lors. The 2 ladies just sort of grew out of playing around with what I know about average facial proportions. The fish is the only "planned" drawing in the group. I hope to do a painting from this design once I get the idea down a little better.
I never did get out my Official Artist's Tools...
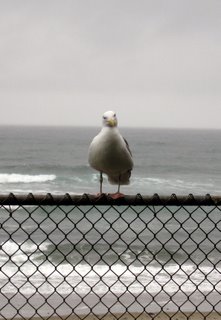
This is one of our "neighbors" for the week. I don't know what we were doing that he found so fascinating, but he sat there on the fence outside our door for quite a while watching us!
I love love LOVE going to the Coast, but I am happy to be home again now. It was wonderful to spend such a good amount of time together as a family. It was a little hard to have Jake go back to work today, and then Monday the girls will be back to school too. Sigh...
On the other hand, it will also be fun to get back to my projects in progress. That is, IF I catch up with the laundry, LOL!
Subscribe to:
Posts (Atom)