Tuesday, October 31, 2006

Just checking

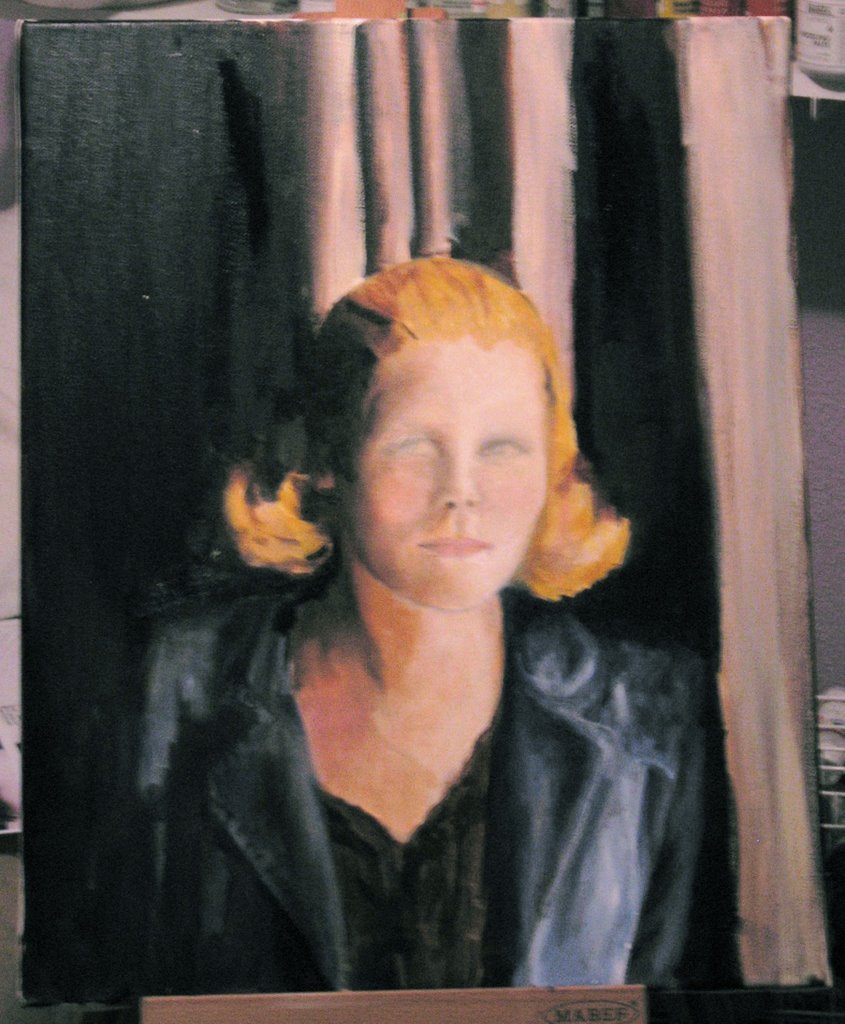
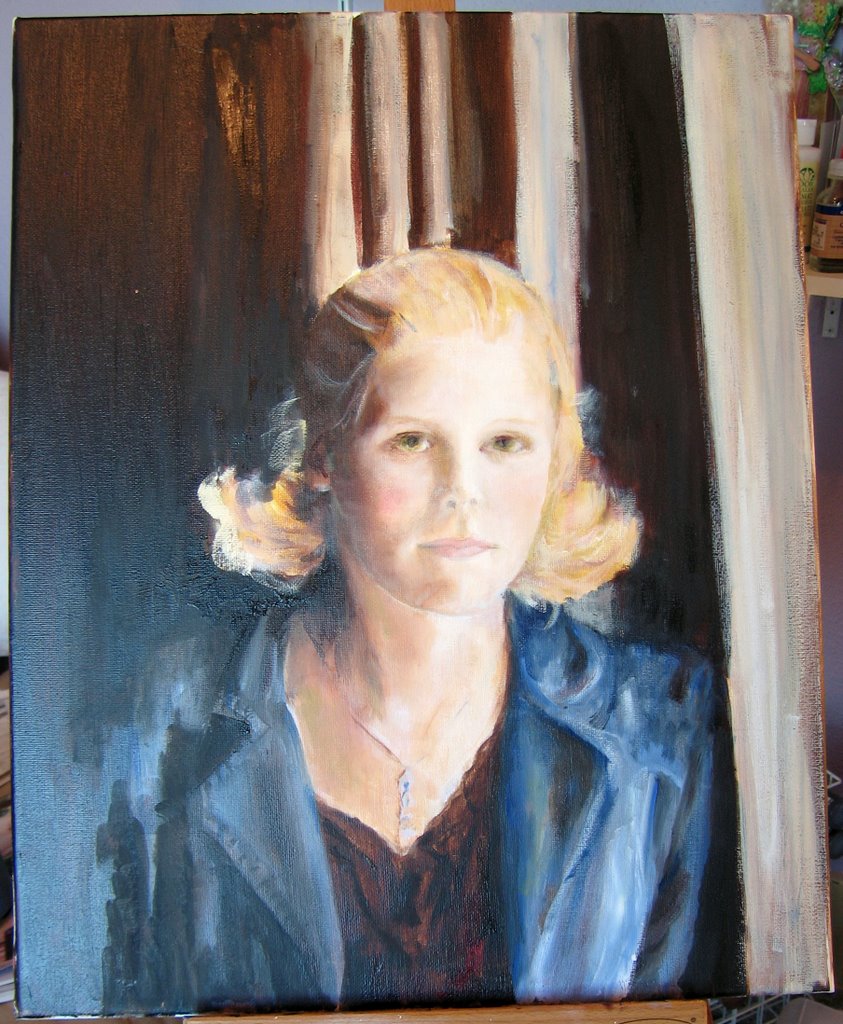
Painting day! I started getting some details in place on Lydia's portrait today. I thought I'd snap a quick photo to check my work -- I am always amazed how reducing a piece to 2 dimensions gives me such a MUCH clearer picture of flaws. And there usually are flaws... sigh...

On the whole though, I am not unhappy with where I am so far! I need to add the shadows that will define the ball of her nose and add quite a bit of color to her lips. The background above her head needs to be toned down too. Her right pupil got away from me and is too big, but I won't touch it until the paint dries a bit. I have learned that it is almost as easy to make mud with oil paints as it is with watercolors!

The likeness is good though. Her hair is about perfect and I can't believe how easy it was to put in her necklace. I had been worrying about that little detail -- it's one of her signature pieces -- but I think I got it right in about 5 minutes.

I have to start thinking about another picture to paint next.

Monday, October 30, 2006

I seem to be even worse than usual lately about taking off in 47 different directions at once. This time though, I can't help it -- I'm taking a live class and 2 online classes all at the same time. Trying to keep up with the homework in each is preventing me from actually *finishing* anything. Just wait... in a little while I'll be posting lots of FO's.

Yes, I will!

No progress to report on the portraits. We had a guest demonstrator in class last week. It was absolutely amazing to watch him go from a blank canvas to a portrait over the course of 3 hours. I learned a lot, but didn't get any painting done. I'm not sure what to do next, so I'll get started again after tomorrow's class.

I did make some progress on my Pam Grose doll. I had to order a different "skin" fabric for her as the stuff I had on hand just wasn't right. The new stuff came this weekend, so I'll try to get her skinned and photographed today or tomorrow. This pattern is becoming quite a challenge.

I am taking an online class called "Inner Child" by Sherry Goshon at Joggles. It's a multi-media assemblage using all kinds of materials selected around a theme. I had so much fun painting the background canvasses that I couldn't stop at 1. I have 5 begun at the moment... The larger ones are 11x14 and 16x20 inches. The 2 smaller ones are each 8 inches square. I really like that size.

I also have some tiny canvasses to play with, but I haven't painted them yet. I think I have enough going at the moment!

The faces are lifted from molds I took of my own sculpts. Hmmm... I see now that the face on the purple canvas is too big for its shape. I'll have to play with that one a bit more. The shapes are cut from cardboard and covered with acrylic texture medium.

I want to wait now before I do any more to them until the last class is posted. I need to be able to *see* where all this is going before I make any more choices. I DON'T want to screw these up!

These are two of the sculpts I made to take molds of. The third one is misplaced this morning. I'll have to hunt her down as she's my favorite and I want to make a complete figure out of her later. Not all of the faces are from my original sculpts. I have a few commercial molds as well, but I don't know if I will be using them. Maybe some of the tiny ones on the smaller canvasses...

The faces are all pressed out of either paper clay or La Doll. Can't stand working with either one but they make nice castings so as long as I have it I might as well use it up.

Now the hunt is on for related objects to add in. The last lesson will be posted on Thursday. I am DYING to see how we are going to be wrapping this up!

Monday, October 23, 2006

Second layer of color added


I got quite a good long time to myself yesterday afternoon by electing NOT to go to the gym with Jake so I could paint instead. I added the next layer of color to Lydia's portrait.

I see that I need to correct the line of the shoulder on the left, and add the highlight that will give her the hint of a smile on the left side of her mouth. There is something not quite right about the line of her chin on the right side too -- she does NOT have that stubborn of a set to her mouth, though she can be quite stubborn at times...

The undercolor of her hair is just right, as is the beginning of the background. I love the way the denim of her jacket turned out. Now I need to add in her necklace.

I hope I haven't lost too much of the first drawing for when it comes time to add in the details of the face.

Yay! It's class again tomorrow -- I can't wait!

Saturday, October 21, 2006

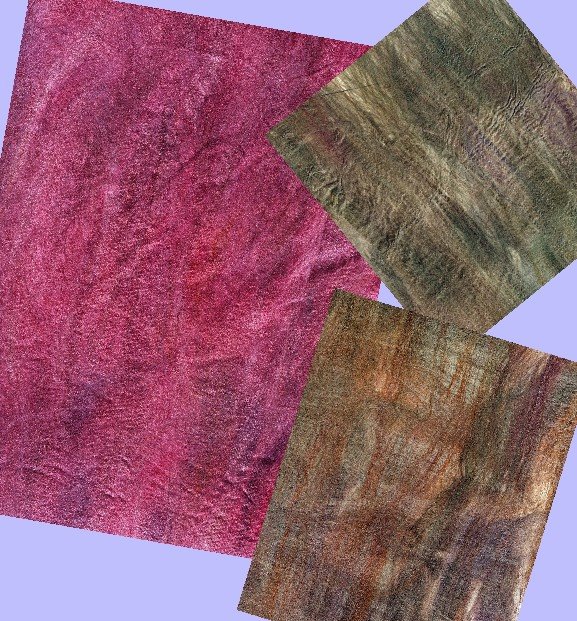
I certainly have had ample opportunity for making messes this week. These are sample images from the three large sheets of silk paper I made from some roving I have never gotten around to spinning. Oh yum! I can using see these in scrapbooking, paper art, and maybe even in the mixed media collage class I am taking online.

HUGE mess though. Very wet!

I also started an oil portrait of my oldest daughter. My painting instructor set us the tast this week of starting a second portrait to work on at home, while we kept our class project for class. So...

I applied what I have learned so far to a copy of one of Lydia's senior portrait shots.


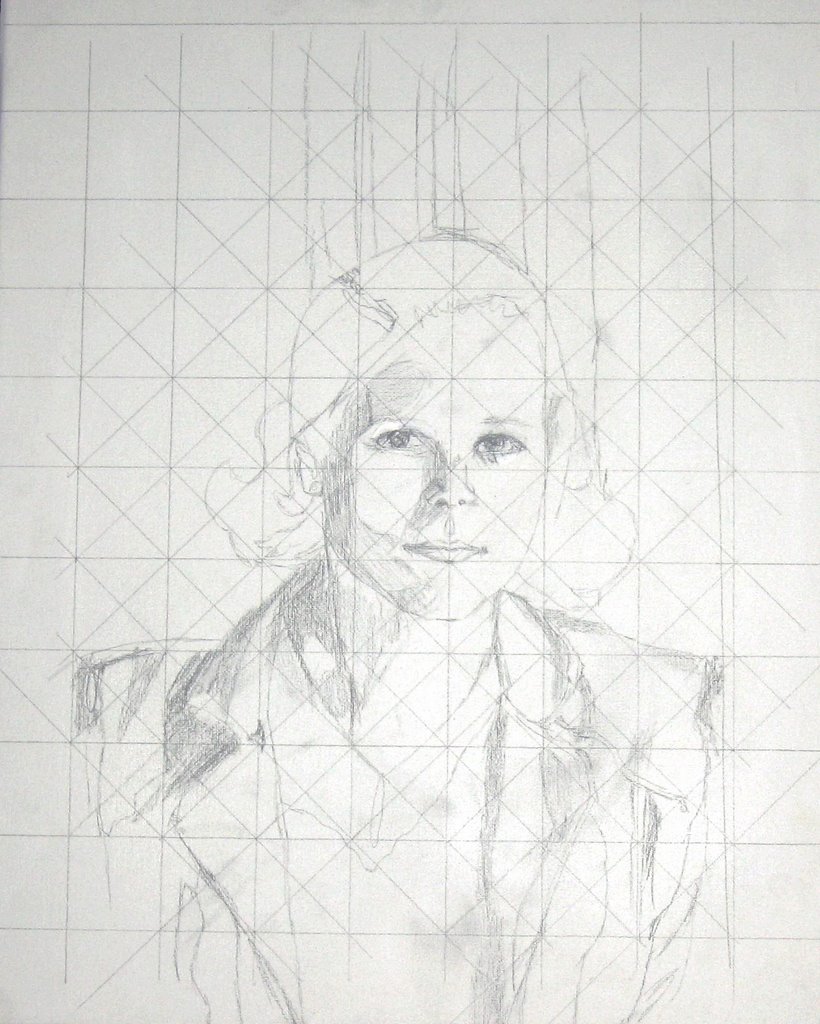
This is the undersketch, complete with grid. The diagonal lines make getting a faithful copy particularly easy.


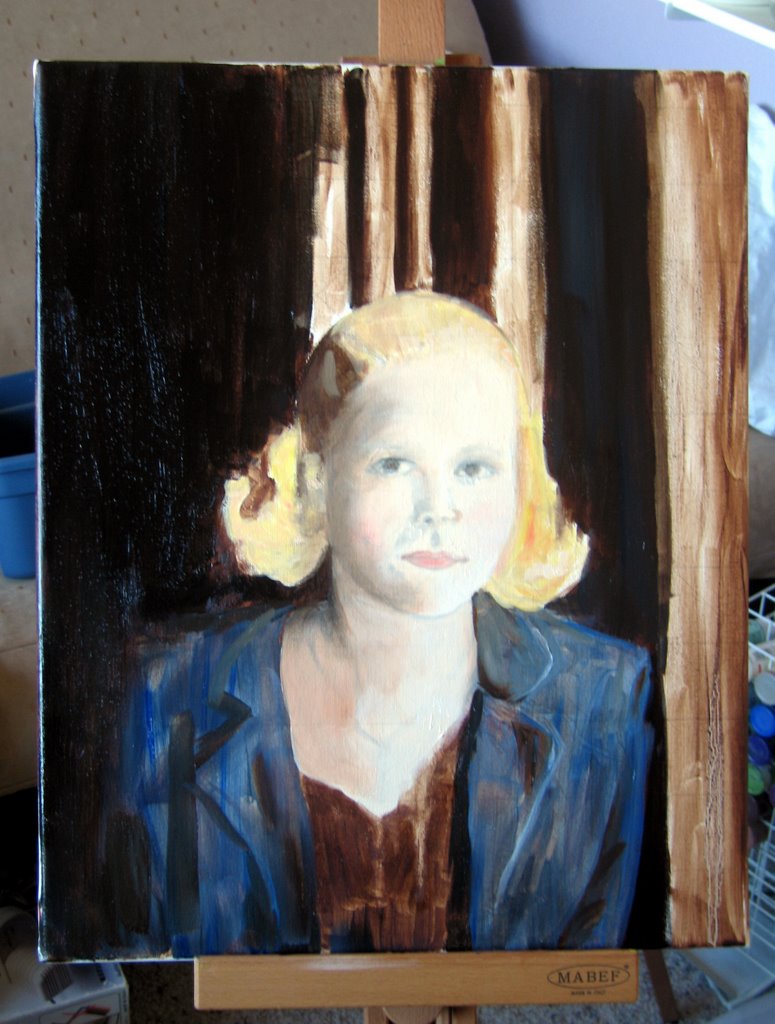
This is where I am stopping until the next lesson. I laid down an underpainting in very thin burnt umber, let that dry, then added a layer of local color. I really REALLY wanted to keep going, but I was beginning to make mud in my attempts to blend colors, so I will try to contain myself until this layer dries.

It's so cool to see the canvas in a photo like this. I like the modeling I have achieved on the left side of her face, but I need to correct the shape of her mouth on the right. The lines of her clothing look good too, but the shadow under her left lapel needs to be darker

It amazes me how fast time goes when I have a brush in my hand...

Tuesday, October 17, 2006

I have gotten a lot done this week, even though there isn't much in the way of tangible objects to show for it. My main accomplishment was actually getting a small light tent set up for object photography. I still have some fine tuning to do -- I need better background material and a bigger sheet for the tent -- but the hard part is finished. Now I need to practice!

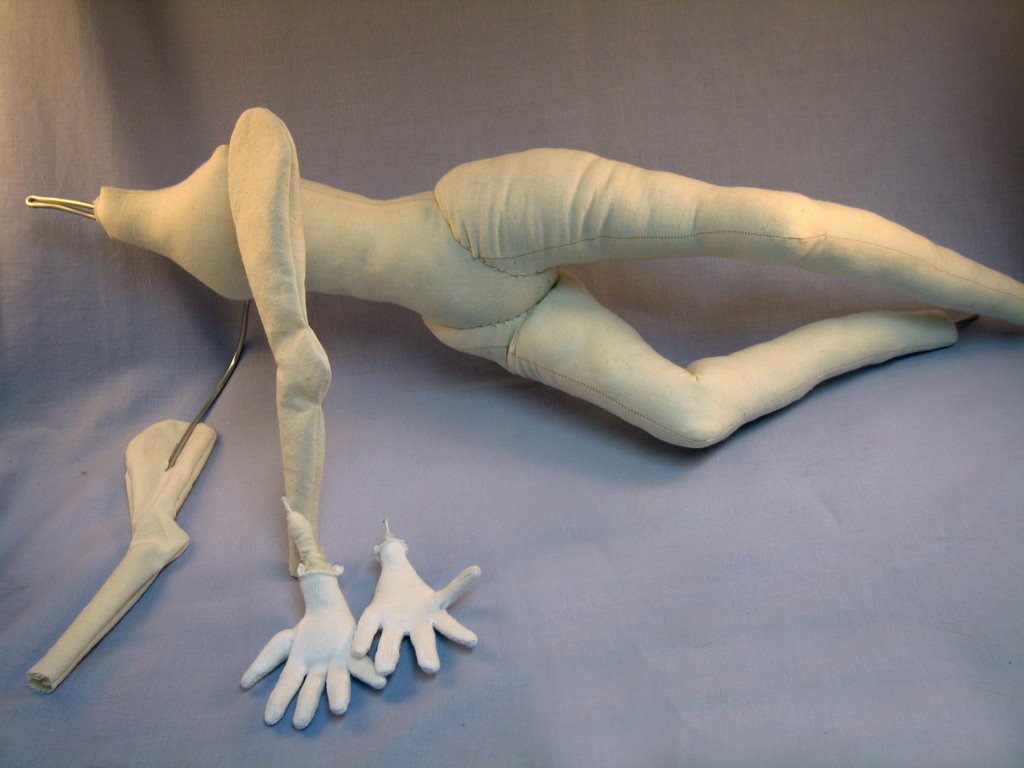
Just to test it out, I threw in these parts of a doll I am working on. This is Pam Grose's "Female" -- easily the most complicated doll I have ever attempted. By the way, her leg isn't really that wrinkley. I tried to bend the leg to fit it into the tent and it didn't work very well.

I haven't even started the head yet...

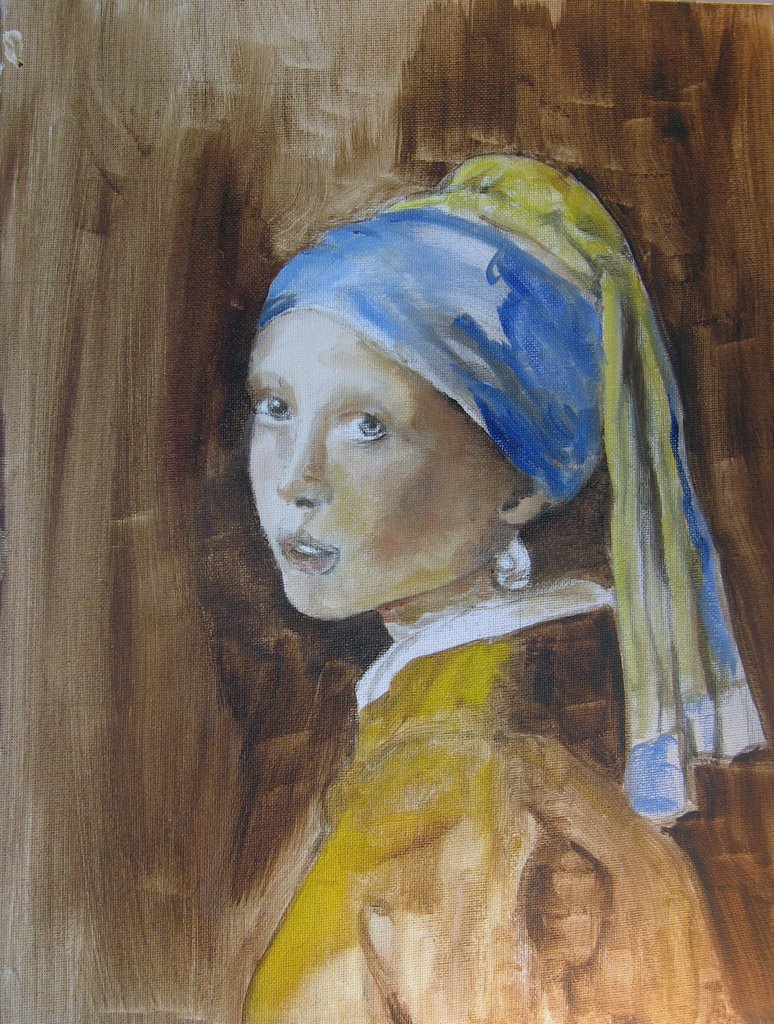
I have also begun working toward a long-held dream: I want to learn to paint. The Silverton Art Association is offering a Beginning Portrait Painting Class for 5 weeks this fall, so I decided to take it. Last week we learned how to lay down a grid to transfer our portrait to the canvas. I am attempting to copy Vermeer's "Girl with a Pearl Earring." I've done this sort of drawing before, so this week's homework was a piece of cake. Fun!

This morning we finally got to start painting. Here's what I have so far. When class ended, I couldn't believe that 3 hours had passed so quickly.

I think I am in love with the smell of oil paint!

Sunday, October 08, 2006

A Quiet Sunday

We stayed home and slept in this morning -- the whole family has been so on-the-go this week that it has been the height of luxury to simply do nothing. I could get used to this...!

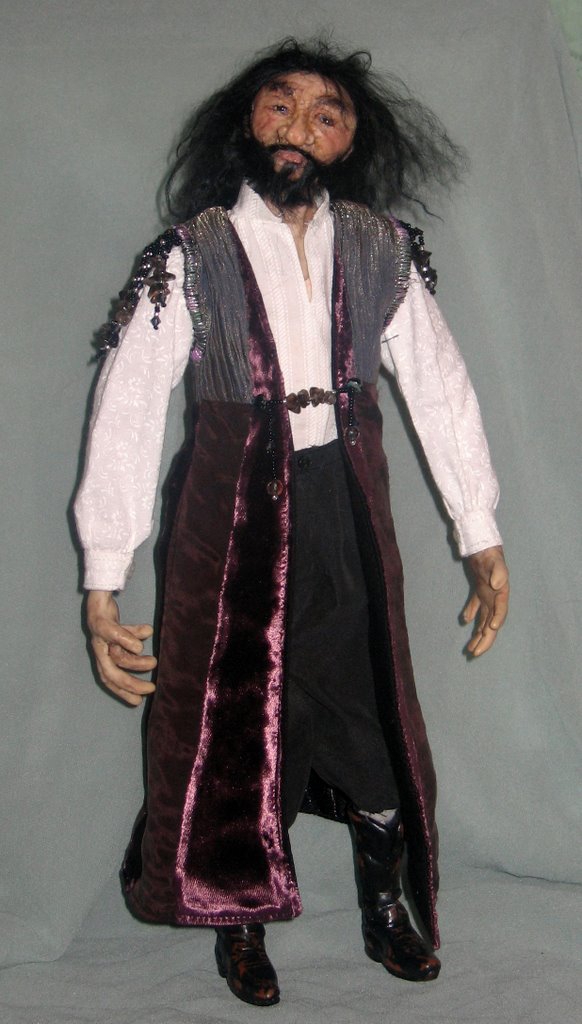
I did get bored after a while though, so I decided to do the last finishing touches on my Dungeon Master. Here he is. I gave him a very ornate key chain, a bejeweled turban, and his very own dungeon steps to pose on. I am so happy with the bent leg pose -- it gives him better balance and a more active look.

Who would have thought that the funny little head with the mismatched eyes I posted a few weeks ago could become such a figure?! I am aware of his flaws -- oh, those hands! -- but I am still happy with the outcome.

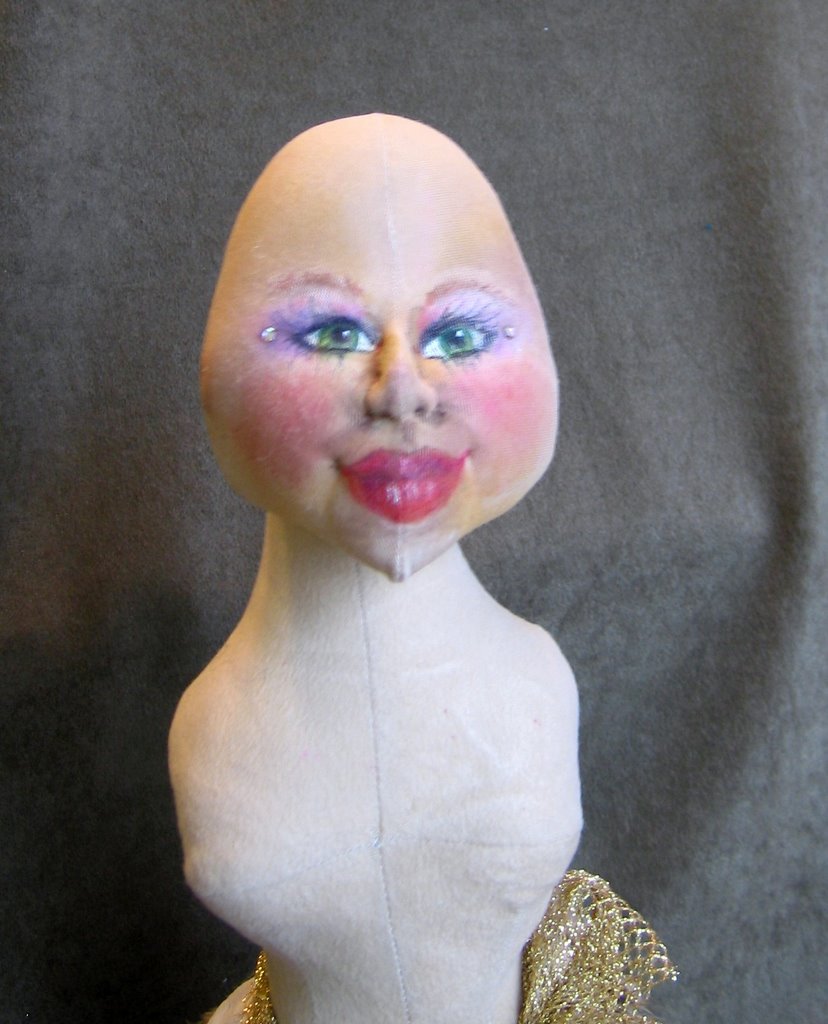
This little lady is "Spring Chicken", a round robin doll it was my turn to work on. I thought I would be brave and give her a face. (Someone has to!) The head itself had rather full lips sewn in to the outline, so I decided to go for an "Ethnic Bird" look in keeping with the theme that has already been set. I'm not sure I entirely suceeded in what I was attempting to do -- her eyes ended up a little too close together -- but I don't think I need to be ashamed of my contribution.

To tell the truth, I kind of wish I could keep her. I have a zillion ideas as to how she should be finished. I look forward to seeing a photo of her when she has made the rounds of all the artists who are to contribute to her creation and see how she turns out.

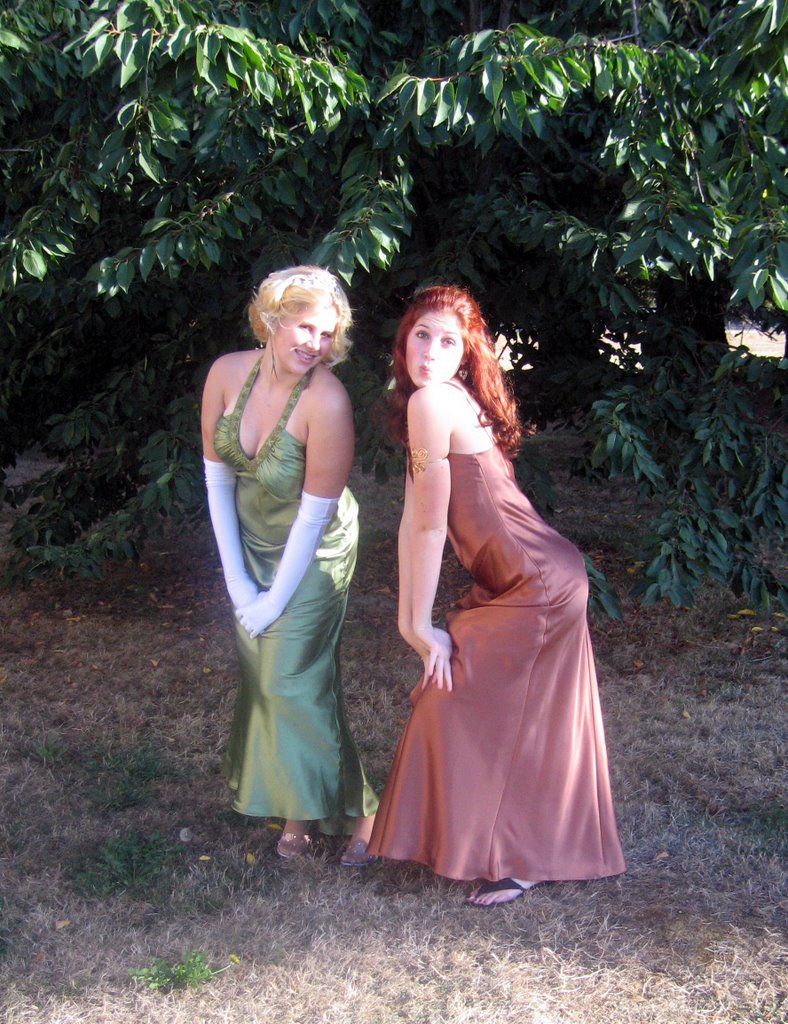
And finally, I want to share my wonderful "Living Dolls". Last night was the big Homecoming Dance at the High School, so of course I had to get pictures of the girls in their gowns. I did get some nice ordinary "stand still and smile" photos, but this one is by far and away my favorite picture as it captures their personalities so well. Alice is SUCH a diva, and Lydia was elected to be a Senior Class representative on the Court this year -- oh my, and isn't she proud of her tiara!

I'M proud of THEM!

Wednesday, October 04, 2006

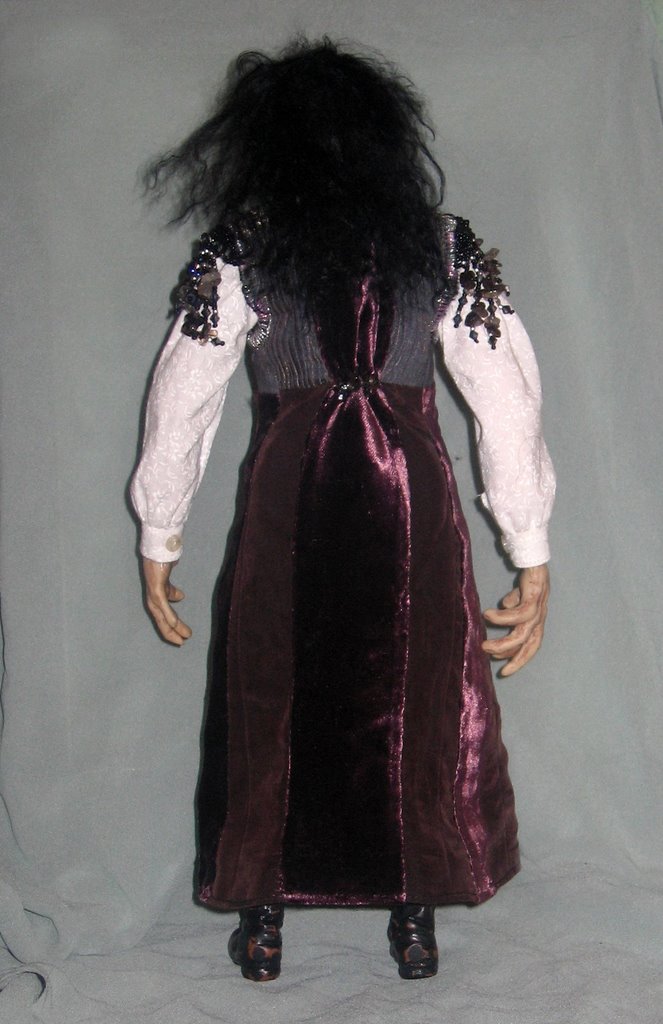
Just a quick update today -- I think I have finished his over tunic. Once I get started beading, I can't seem to find a good place to stop. I love this tunic, especially the color. Everyone else in the challenge is seems to be working in black. I think the brown/plum, especially combined with the smoky quartz stones in the beading, give a good "dark" effect that is something different.

Trust me to be the one wanting to do something different...

I need to go through my idea files yet and find a good look to do for a hat. I am NOT good at applying hair -- there has to be a better way! -- so his head must be covered. I think a good hat will also help to balance out the fact that his skull isn't *quite* full enough on top. Learning, learning...

Here he is from behind. I was going for a kind of cape-like effect with the beads and stones draping off the top of the arm holes. I used matching beads to make a closure for the front, as well as a cover for the gathering I did at the back waist to give the tunic a little more shape.

It's a pity I didn't take a photo of his body without clothes AFTER I did the sculpting stitches. He has quite a realistic figure and a great butt. Especially once I remembered that he is, in fact, male, and that males do not usually have waists and hips. Ooops... Can you tell I usually do females, LOL??

Tuesday, October 03, 2006

SO NOT a Father Christmas!

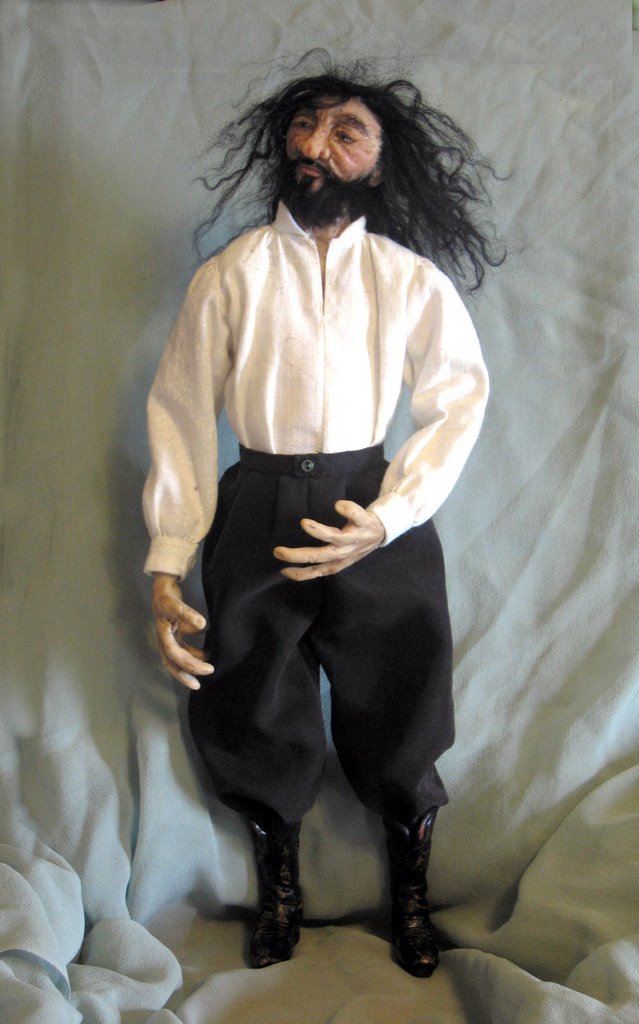
Jake *told* me his face was all wrong for a Father Christmas character -- I should have listened. I dug out every last reasonable shade of hair I own, as well as one not so reasonable, and he wasn't happy with anything but the black. Honestly, this guy is turning out to be as autocratic as his face. So I guess Jake will get gloating rights for being right THIS time. Instead of Father Christmas, he is going to be entered in Doll Street's "Dungeon Master" challenge. He tells me he will be a great "Keeper of the Keys".

(People who don't play with dolls will probably think I have lost my marbles, but trust me -- they do TOO talk!)

I am pretty happy with his clothing so far. Everything fits! He will also be wearing a hat of some sort and a long over tunic. I am hand sewing the tunic right now. The main fabric is a velvet which is too wriggly to sew accurately by machine, and then there are a few coordinating fabrics that set it off just right.

I wanted the tunic to be in black and silver, but I found an old brownish plum velvet formal at the thrift store that was such a delicious color I knew I would have to use it.

His accessories will include a belt with a key chatelaine, and perhaps a staff or a whip of some kind. Hmmm... his hands aren't really posed to hold either of those things though... I'll have to think about it some more.


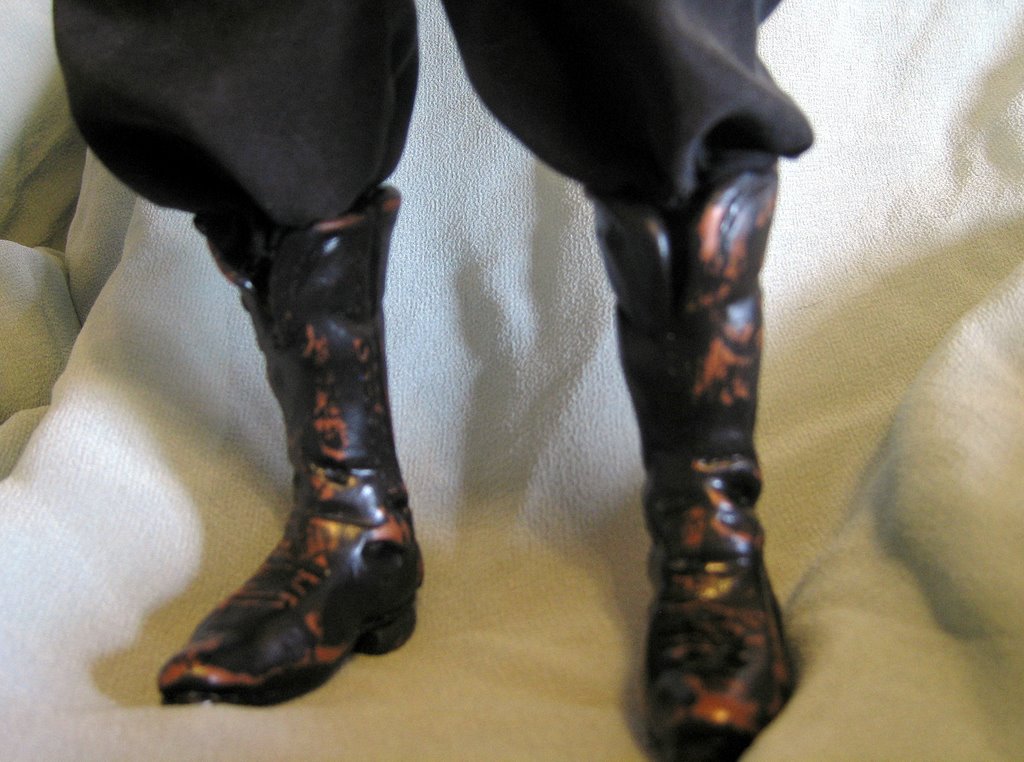
Just for fun I have included this close-up of his boots. They are modeled after a photo I found on the 'net of a pair of boots worn by a woman surgeon from the Civil War. They turned out well, but next time I will know to leave more of a "slot" around the top edge in which to tuck pants. These have barely enough of a ridge to conceal the raw edges of the pants fabric.

I keep learning!

Wednesday, September 27, 2006

So far, so good...

This is where I am so far in my attempt to create a finished figure from one of my head sculpts. I'm practicing on this guy because he is good enough to finish, but not my best piece so I won't be too discouraged if he isn't totally remarkable. I aim high. (grin)

I'm not at all happy with his hands. I forsee more sculpting practice in my future. Not a problem -- I adore getting my hands into the clay!

I am VERY happy though with his boots. They almost look real up close. I sculpted them in brown, painted them black, then sanded them lightly to make them look like worn leather boots.

The next step will be some needle sculpting on the body to give him a little more shape, and then I can begin his costume. Right now I am thinking I want him to be a Father Christmas type figure. I already have some lovely brown-ish velvet that will be perfect for a robe or cloak.

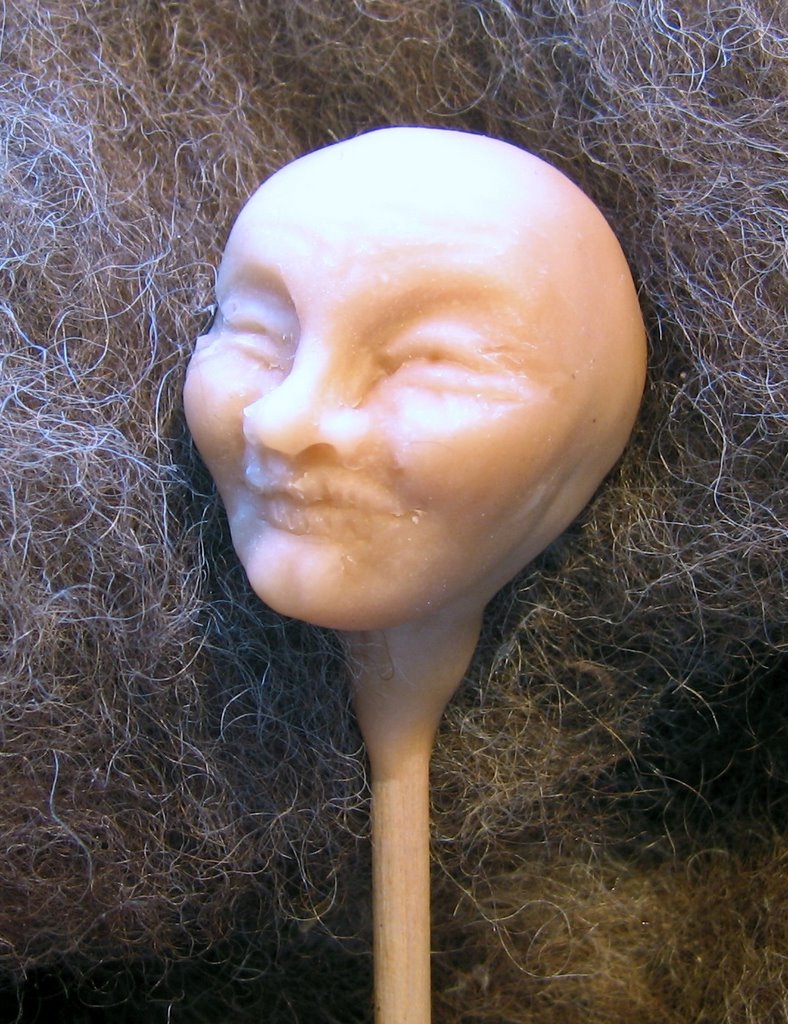
Just for fun I'm putting up this photo I snapped of the very first head I ever sculpted. Isn't it so awful it's funny?! I know most faces are slightly asymmetrical, but I don't think there is a single feature that even begins to resemble its counterpart...

At least I learned that I hate paperclay, and have never forced myself to endure touching it again.

The last shot for today is the necklace I promised in the last post. This is Eni Oken's "Chaos" pattern, done with blue and pink peruvian opals and sterling silver. The charm on the center stone is the chinese character for "Happiness". I have some small drops I am considering attaching as dangles as well, but I haven't decided yet. As much as I adore fringy stuff, I am liking this one just as it is too.

Monday, September 25, 2006

September...

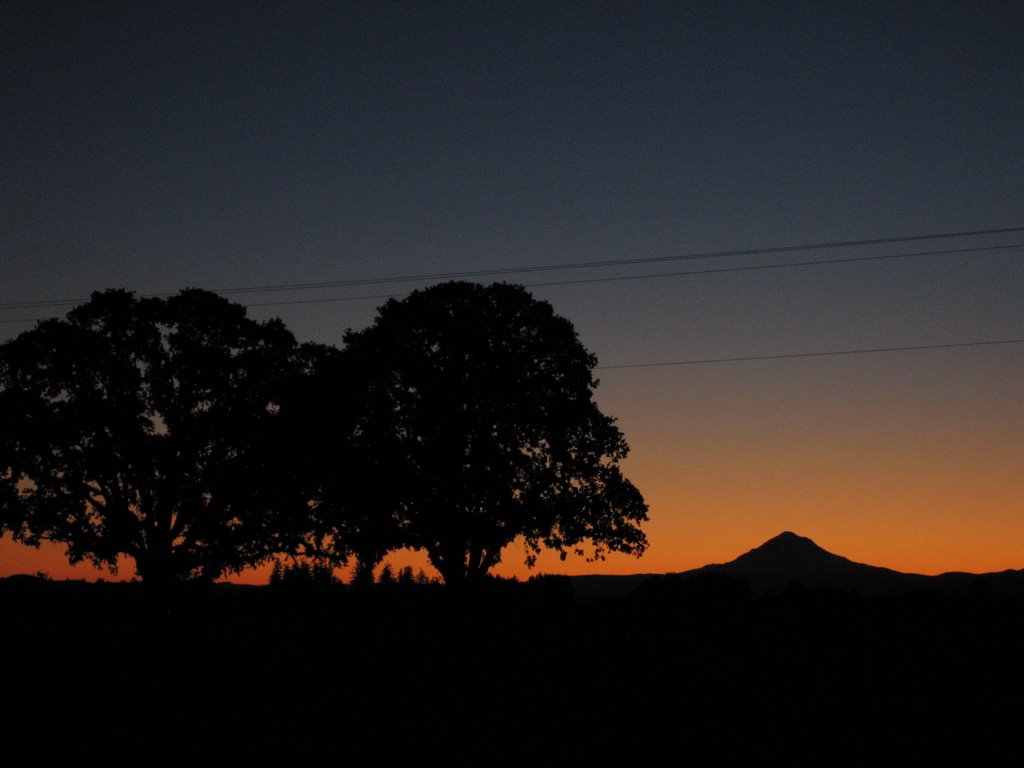
There is *nothing* like September in Oregon. The days are so painfully beautiful, and even more beautiful because you just KNOW that they are numbered. The rains are coming. They are going to stay for a very long time, and the sun may not be seen again until next February when the late winter high pressure systems come.


This was the view from my front yard at about 6:15 a.m Sunday morning. My heart ached with the beauty of it.


I injured my back last week, which is why I haven't been posting. Nothing terribly awful, just enough to make sitting at the computer a little painful. It's all right today. I've even been able to resume my workouts.

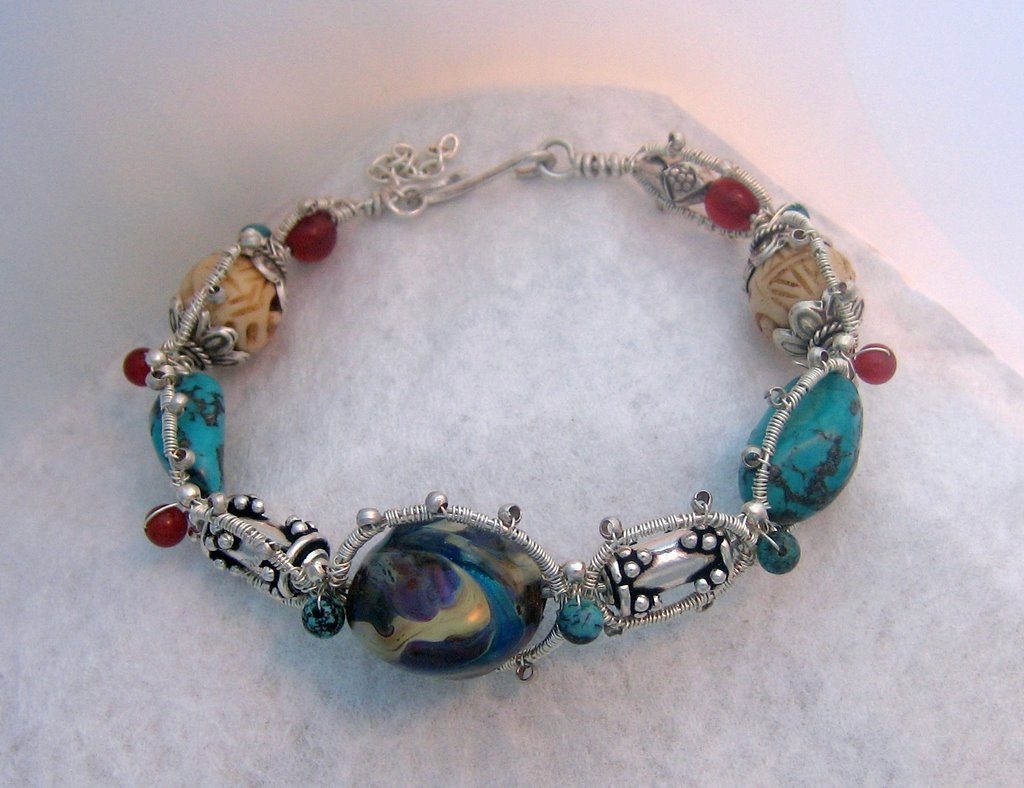
Anyway, this was a good opportunity to lounge in front of a few good movies and finish some of the wire work I began last week. This is the bangle I made using the pattern from Eni Oken's site. The main "stone" is lampwork glass. It is set with sterling silver, turquoise, bone, and carnelian. I am extremely pleased with how it turned out, right down to the hand shaped hook and clasp. The little length of chain with the clasp is so that it can be extended in case the buyer has a larger wrist than mine.

I'm also working on Eni's "Chaos" necklace. The beading and wrapping is finished. It just needs the chains and a clasp yet. I can't wait to finish it -- unfortunately I won't have any more time to play until perhaps Wednesday. This wire stuff is as satisfying as sculpting. I just can't get enough of manipulating things with my hands.

Saturday, September 16, 2006

More faces

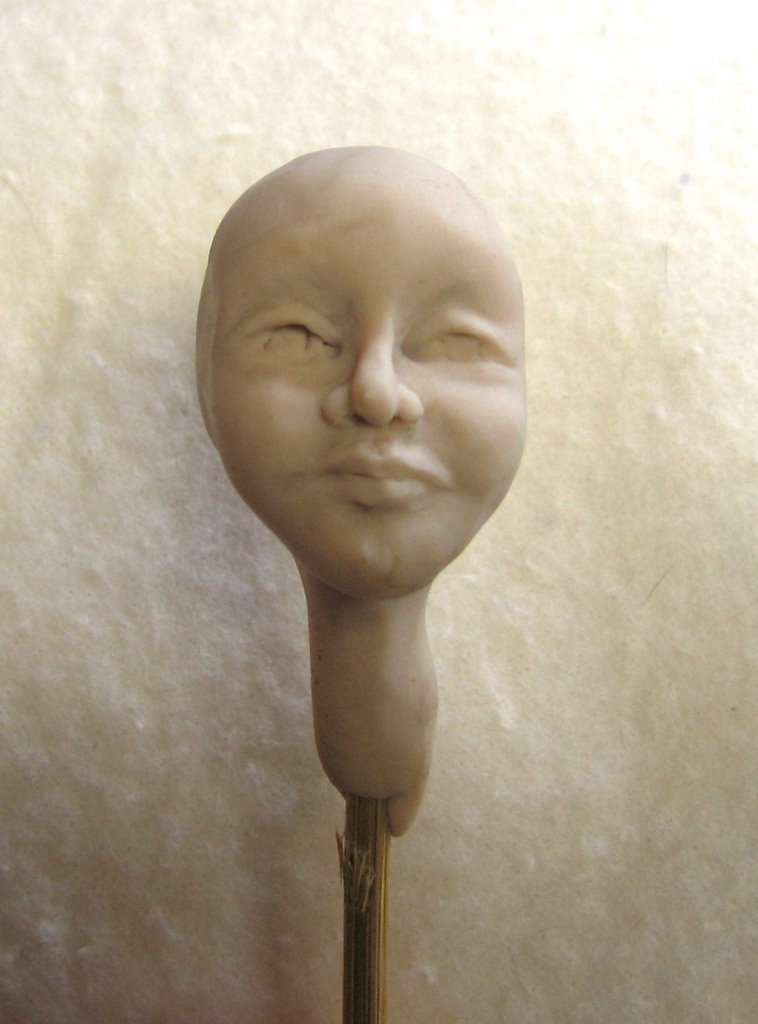
In between the tomatoes and other things, I've been able to sculpt 3 more heads -- these things are addicting! I still have issues with final smoothing, I really feel I am getting the hang of moving the clay around *just* the way I want it to.

I've started adding some Cernit to the ProSculpt -- smoothing is easier, but it's also easier to mash a feature totally out of place. The trade off is worth it though and I will just have to learn to be more careful.

This lady face was done while watching a Patricia Rose video. It's so much easier to remember how to do each step when you work along with an expert. I love the production quality of her videos too -- the camera maintains a nice tight focus on her hands, which is just what I want to be looking at.

This grinning guy was sculpted while Jake was watching football last week. He is modeled after a drawing by Brian Froud from his book "Fairies". The original character from the book is a bit more menacing in appearance, but I think once I get some ears, hair, and a cap on him, he is going to look very close to the way I intended. That doesn't happen to me very often!


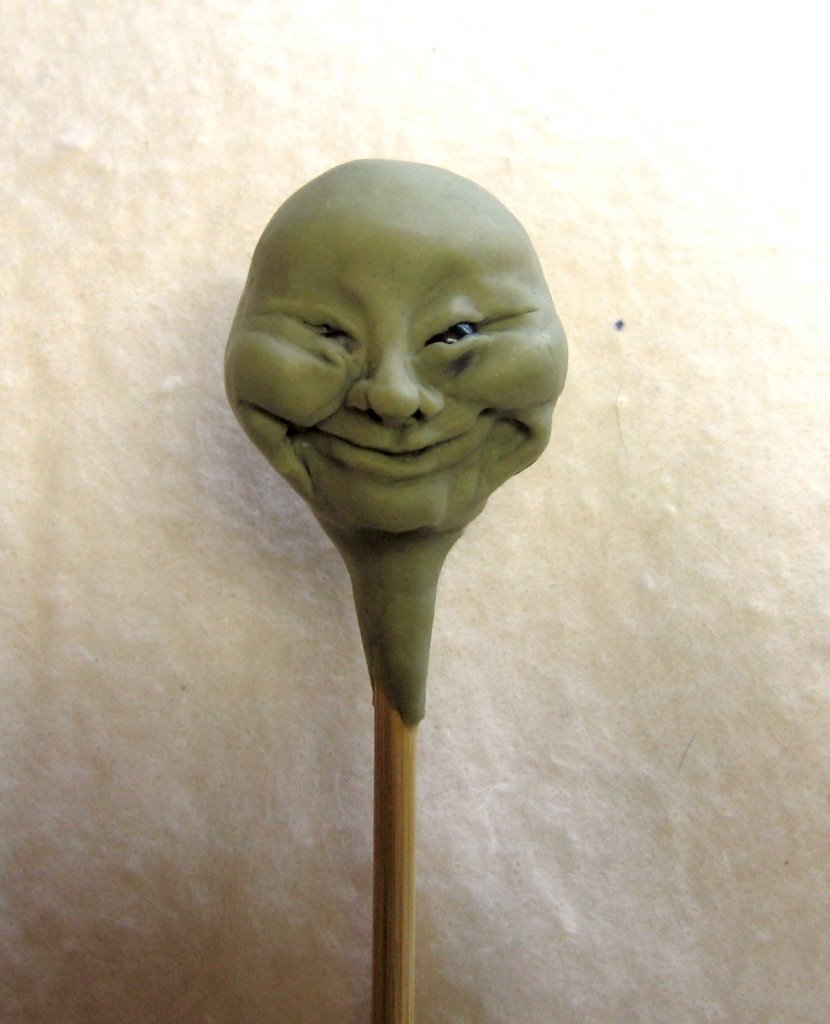
This little creature was also modeled after a Froud drawing. I added a little bit of Premo! green and metallic gold to my ProSculpt/Cernit blend and got such a wonderful alien skin tone, not as dark or as green as this photo shows.

He is also good enough that I think I want to go ahead and turn him into a finished figure. For one thing, I have finally managed to use inset eyes successfully. He also survived the final smoothing with almost all facial features completely intact! The left side of his grin sagged a little during baking, but nothing fatal.

I am going to make a mold of this face for my Sculpt-Along list. I can't wait to get some ears on him!

Thursday, September 14, 2006

A different kind of Creating

Today is the 4th day of the corn harvest, and so far everything is going well, praise God. No breakdowns, accidents or injuries, and the corn itself looks like a quality crop. I am managing to keep my cool and stay loose and go with the flow and all that... but I will still be thankful when it is all over for another season and everything is safely stored for the winter.

With Jake on a tractor all day, working like a machine and almost no time to eat, I have been indulging myself in a massive cooking and baking effort. He SAYS he doesn't have a sweet tooth, but in 4 days he has demolished a batch of oatmeal raisin cookies and a loaf of banana bread almost by himself. I haven't baked since I started my diet last January, so the girls were not happy with him when they got home yesterday and all the goodies were gone already!

I'm doing monkey bread today. There should be enough to keep him going and provide an after-school treat for the girls too. There should be enough...

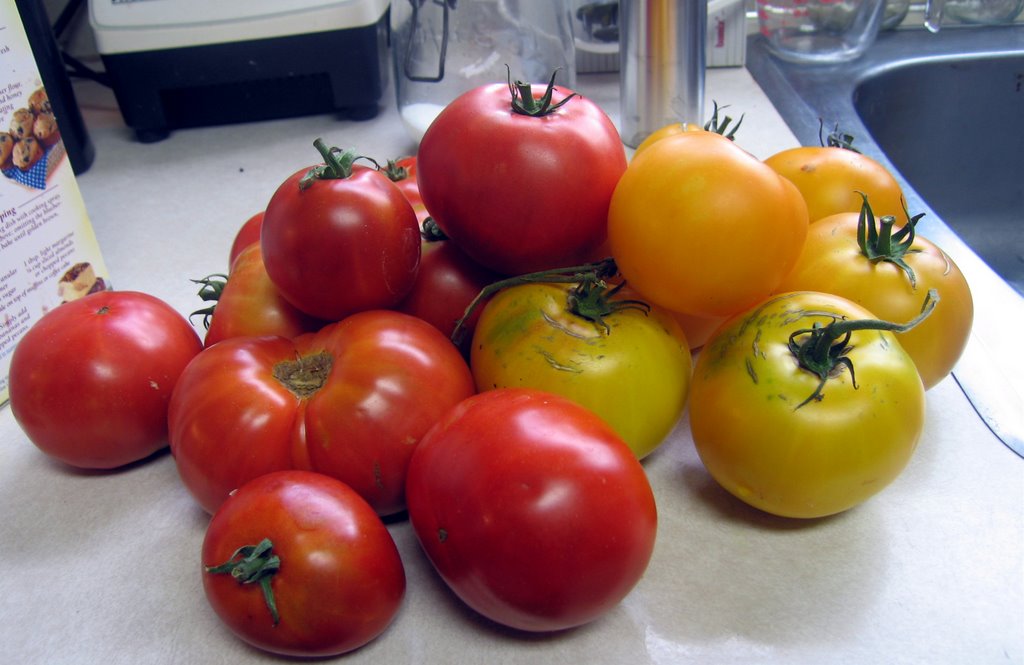
I don't know if you can tell from this photo, but there are 4 different varieties here of tomatoes here, all from my garden. The bushes are going crazy right now and it is all I can do to keep up with the harvest. This family LOVES tomatoes. No tomato, whether red, yellow, or purple, raw or cooked, whole, sliced, or chopped that is safe from any of us. However, even our greedy appetities can't keep up with this year's bountiful harvest, so I am making soup base this week.

A pot like this will make enough base for 2 or 3 meals next winter, all tasting just like the jewels of summer these beauties are. Can you see how good they smell?? A steaming bowl of tomato soup with a warm slice of garlic bread on a cold evening... Yum!

In the meantime, I am slicing and dicing as fast as I can. Thank goodness the weather is cooling and I'm not pouring hot steam into an already hot kitchen!

Monday, September 11, 2006

It has begun...

The corn trucks started rolling in bright and early this morning. That means that controlled chaos will reign at Cascade View Dairy for the next week or so. Sigh... This is my 23rd corn silage season. You'd think I'd be better able to cope with it by now!


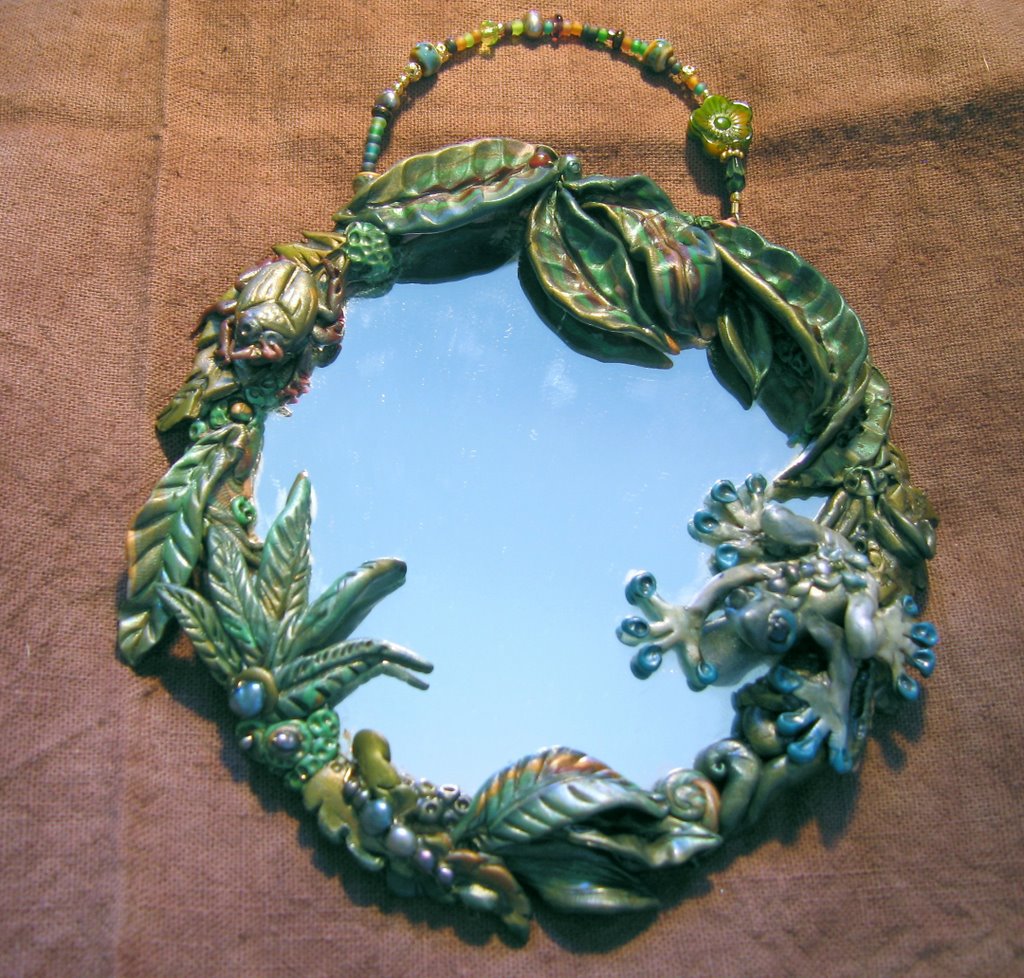
Here you see the results of my playday last week. I took all the "CF style" leaves I had made and positioned them around the edge of a little craft mirror. It still needed something though, so I went ahead and made the little frog to sit on a boring stretch of clay.

The detail in the photo isn't as clear as I'd like -- it is very difficult to photograph a mirror! -- but if you look close you can see him looking up at you with the most quizzical expression on his face.

Ribbit!

Saturday, September 09, 2006

Clay lessons

I had a nice long afternoon to play yesterday. I made up a few armatures, conditioned some clay, and decided to let my fingers come up with whatever they wanted.

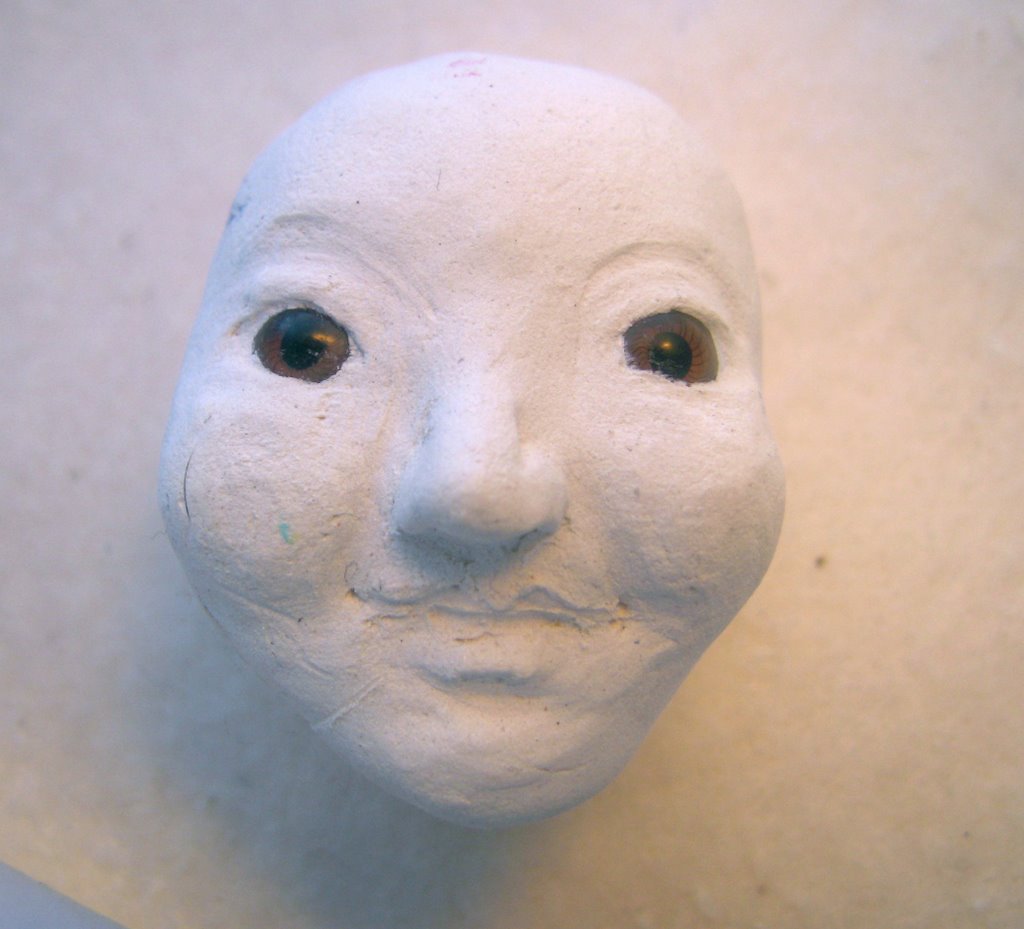
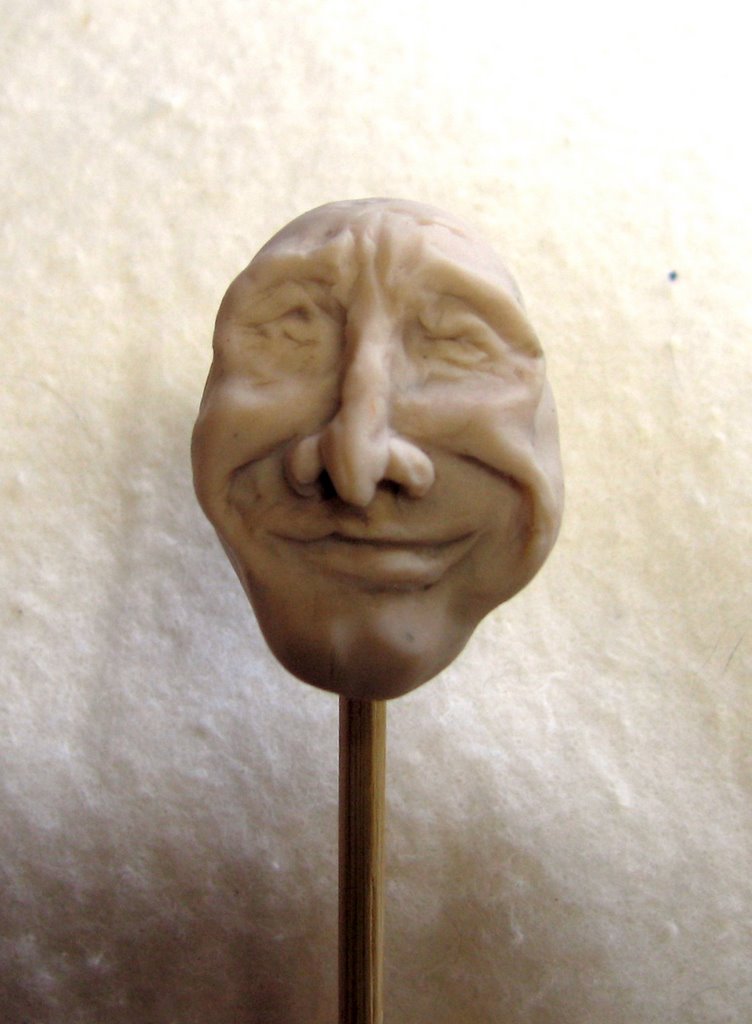
This is the first head I made. Just look at those moonies! I intend to make a mold from this one, so the moonies don't matter so much in this particular piece, but I can tell you I won't make faces from anything other than ProSculpt ever again. This head was made from a flesh/translucent blend of Premo Sculpey. I've never had this problem with sculpey before, so I'm not sure what happened.


This photo was taken in the light of a north window. There are more wrinkles in her than show up in the photo. You can still see the rough spots where she wasn't smoothed properly before baking however. Go figure!


I really like this guy, even though his eyes aren't set evenly into his head. (If you look carefully, you can see that the eye in the right of the photo is set noticeably deeper into the skull.) I think I feel a Santa figure coming on, even if he does look more like Jack Elam than a jolly old elf. Maybe if I give him an eye patch... Just dig that nose though!

I now know that there is more to making a wrinkle though than just carving a line in the clay. If I could only just figure out what it is!

Anyone got any hints??

Thursday, September 07, 2006

I have been home alone pretty much all day today. It's a lovely September day, and I feel great, so I put on some music and went upstairs to play with some clay... and stopped cold at the door to the room. Couldn't even get IN to the room.

Sigh...

It took quite a while, but the light in that room is fantastic, and I was enjoying the music too, so it felt good to clean and it REALLY feels good to be able to move and find things in there again!

I decided to save the face sculpt I had intended to work on for tomorrow, and instead sat down to practice some techniques I have been learning by reading Christi Friesen's books. I admire her style so much!

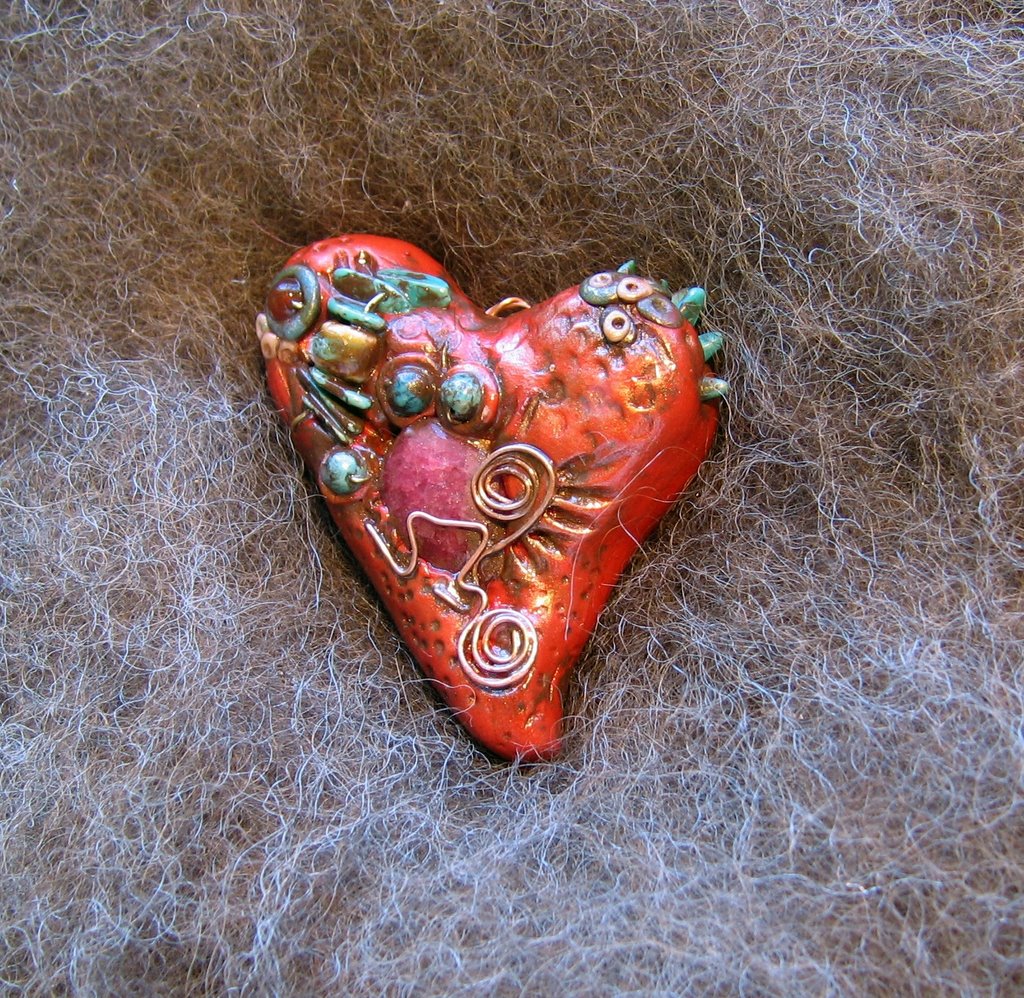
This red heart just sort of formed under my fingers. It's pretty big -- about 2" square, and has a chunkiness and carved-from-rock feel to it that made me reach for copper wire for the embellishments instead of the gold I usually use.

The small stones are turquoise and carnelian. The central faceted stone is a ruby briolette that I broke yesterday trying to thread it onto a too-large piece of wire. (Stupid! Stupid! Stupid!!!) I had no way of wiring it into the clay, so I made a "cage" for it out of more copper wire. One beautiful ruby saved!

(Whew!)

It must have been one of those things that was Meant To Be, as I very rarely work with red.

Monday, September 04, 2006

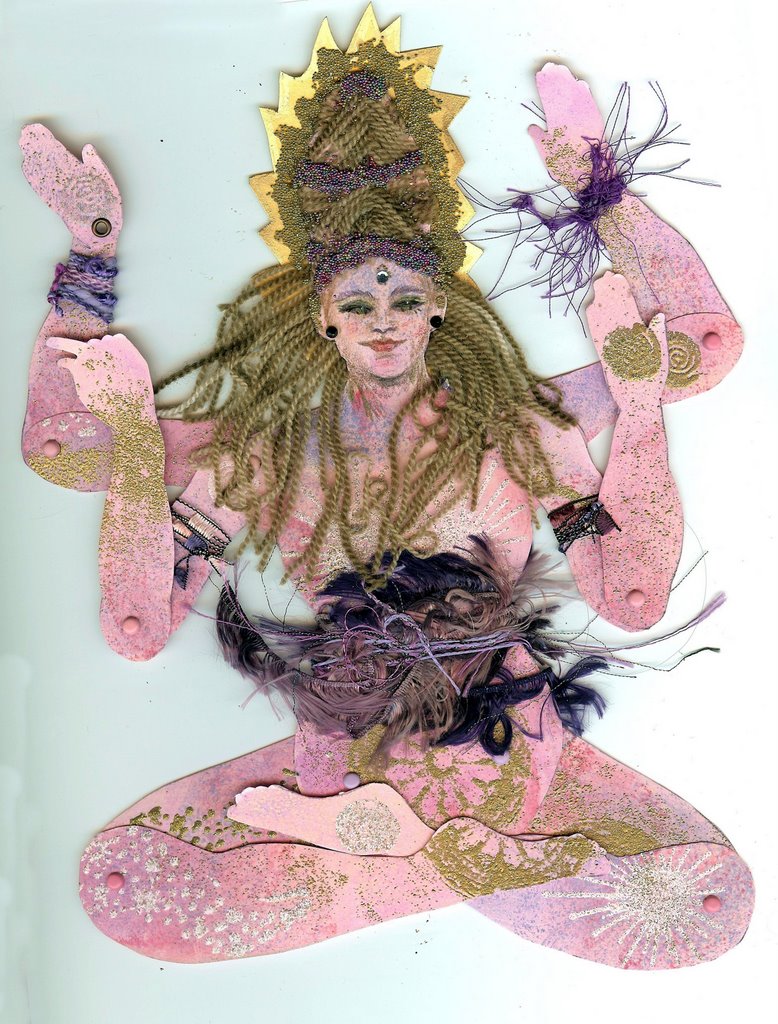
It is a relief to the mind to actually be *finishing* a few of the things I have bought supplies for and put so much time in to. The paper dolls ARE finished for the Doll Street swap -- I never want to touch them again, even though I can think of a few touches I'd like to make... No No NONONONONONONOOOOOO! No more!


I've been on another bead kick lately too. This time it's stones and silver. Yum!!

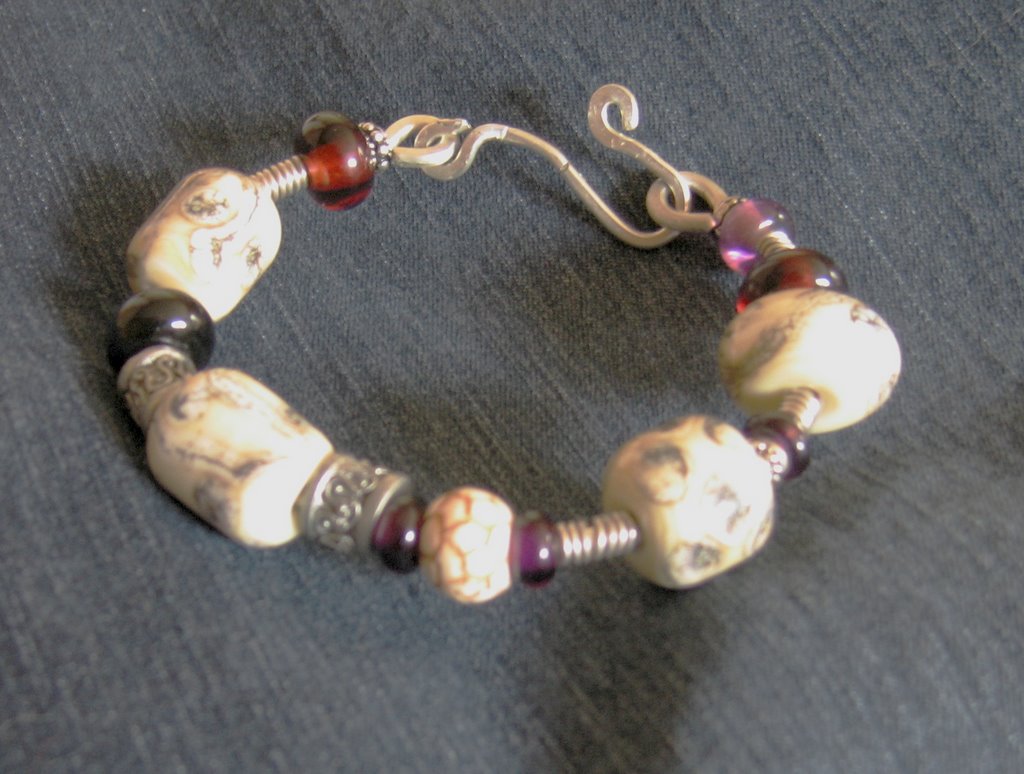
This bangle is the first wire piece I made. As you can see it is VERY simple. I learned that I prefer more ornate styles, and I DON'T like working with 12 gauge wire. Never again!

I have some of those white marbled lampwork beads left over. I am going to try again -- I can do better.

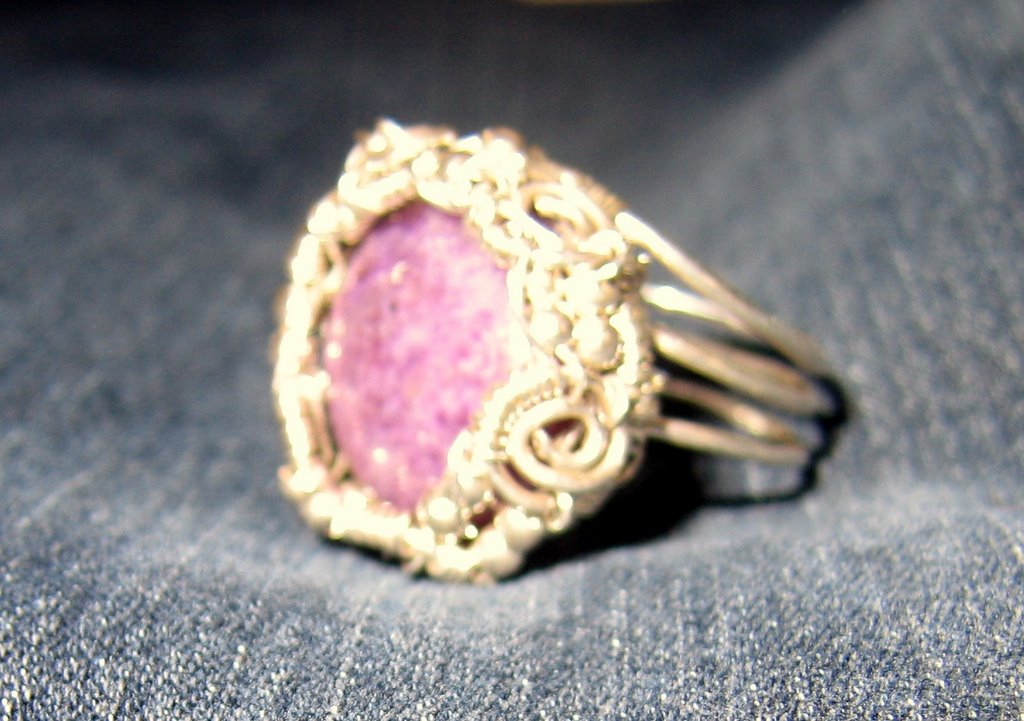
This ring is made using the instructions from a tutorial on Eni Oken's site. Such eye candy!
I think I want to blacken the silver, but I don't have the chemical to do that yet. I've also heard that it smells dreadful, so maybe I will just let it tarnish the old fashioned way. Heaven knows, the climate here is damp enough!

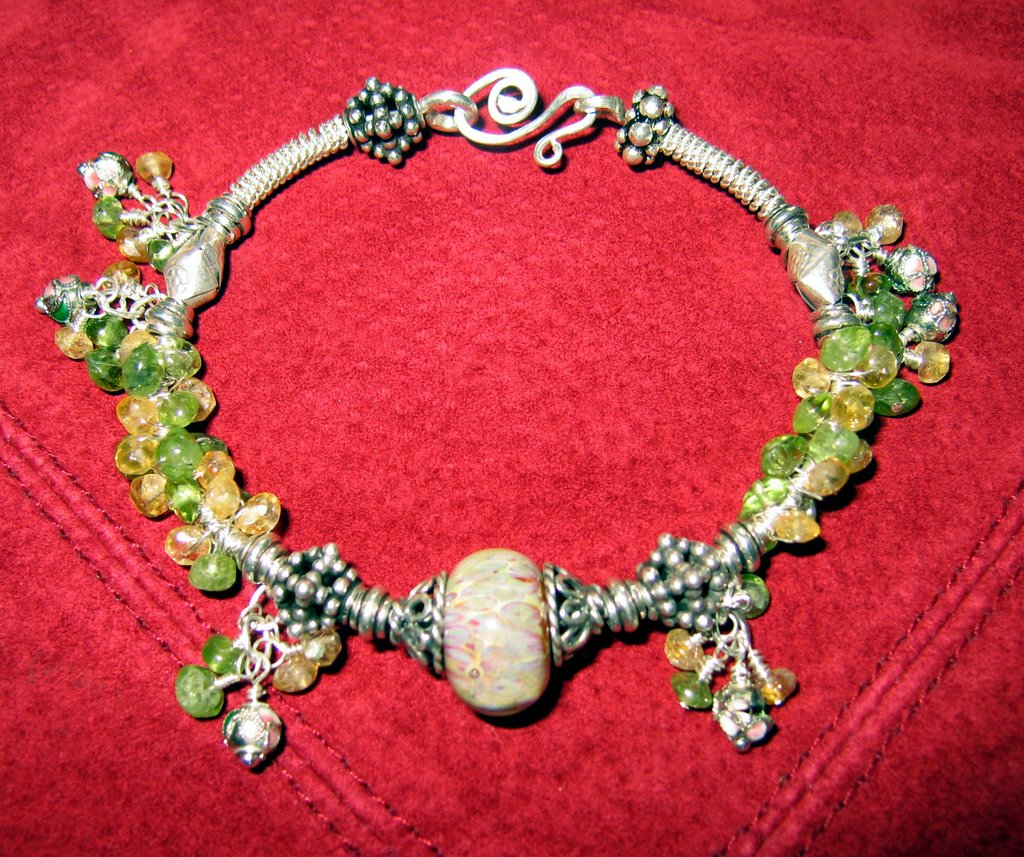
I just finished this bangle this morning. It is made of sterling and Balinese silver on 14 gauge wire (MUCH better!) featuring a lampwork bead, and set with citrine and peridot faceted rondelles.

The lampwork is a little washed out in the flash. In normal light it picks up and tosses back the colors of the stones beautifully. I almost hope this one doesn't sell!

Friday, September 01, 2006

Life is Good!

It has become a tradition in this family to spend the last few days of summer break before Labor Day at the beach in Lincoln City. There is an outlet mall there, so we also do some back-to-school shopping, but the main purpose is to goof off before the mad rush of September begins.

We all agree that it's a Very Good Idea.

Although the girls did drag us through 5 consecutive hours of "Project Runway" one night, we spent most of our time on the beach. The water was way too cold for swimming, but the tide pools are always fun to explore. We never disturb anything beyond teasing the sea anemones a little bit, although Lydia has been known to try to feed things to the crabs.

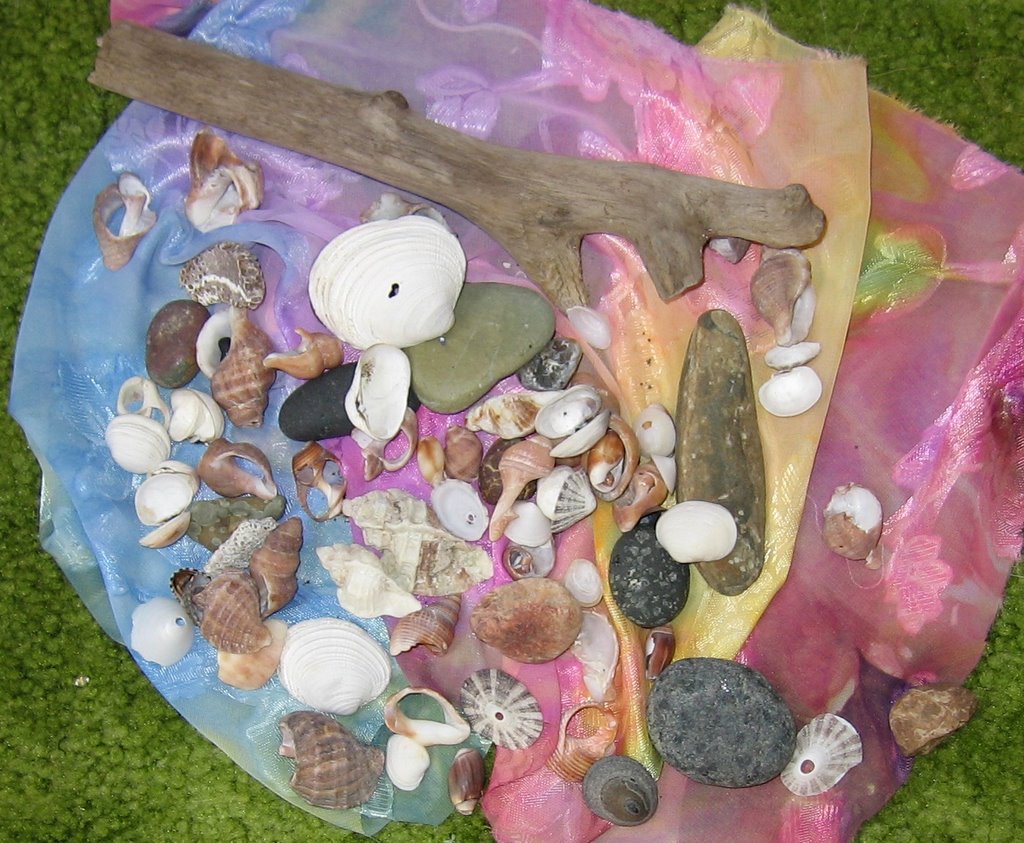
I had my best trip ever for beach combing. I have loved sea shells since I was very little, and this year I found a bunch of intact shells of species I have never collected before, which was pretty exciting. I kept a bunch of broken ones too -- they "broke pretty" into lovely spiral designs. Very idea stimulating!


The sun decided to show off in a major way on Wednesday evening. We took advantage of the incredible light conditions to play with some portrait photography. Lydia snapped this shot of Jake and I after I decided it had gotten too dark for photography. What do I know???


Time to get back to Real Life now!

Friday, August 25, 2006

I have set the white/white doll aside in disgust... I began the work on her so long ago and my tastes have changed SO much (not to mention my skills!) that I don't even like it anymore. Maybe once I finish her and achieve some distance I might learn to like her again, but for now... ick!

So, what to do???

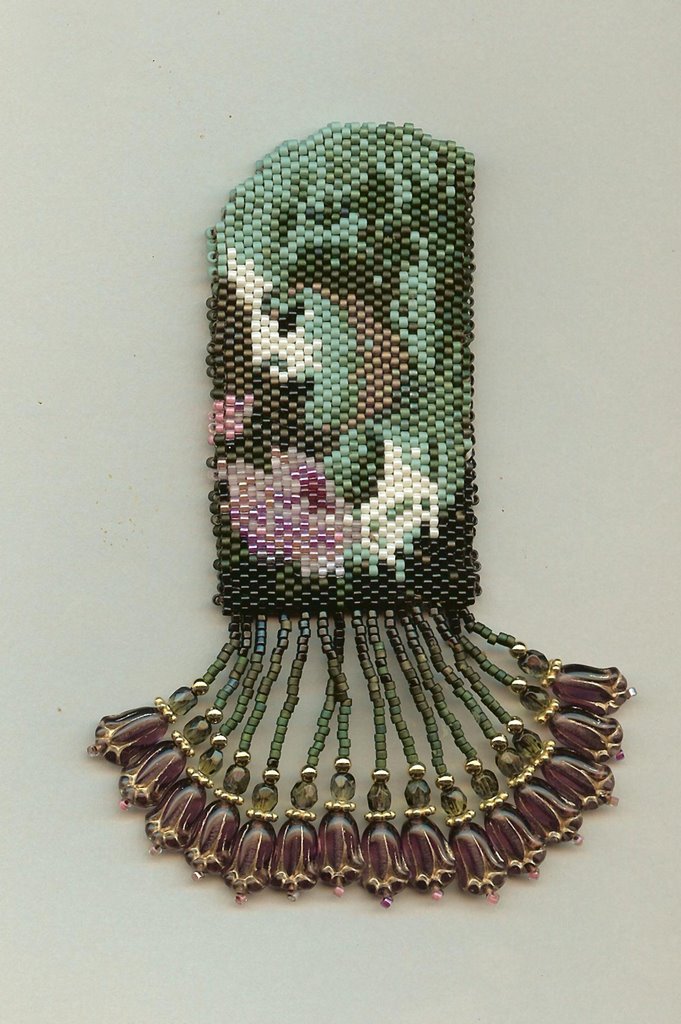
This little amulet bag is a project I started very enthusiastically ages ago when I was heavily into beading. It is a free pattern available on the 'net by Cheryl Assemi .

So, I ran out of the black Delicas for the background. I went to town and bought some more black "Japanese seed beads", but didn't notice until I got them home that they were 15's rather than 11's -- waaaayyyyy too small. Arghhhhh! That pretty much took the oomph out of my motivation to work on it for... um... several years at least.

"She Who Has the Attention Span of a Grasshopper" is my real name I think...

Anyway, in the fit of disgust the followed the last work session on the white/white doll, I decided to tidy up my bead table to prepare for work on the domino necklaces and I found her again. (I have long since aquired the necessary black beads for other projects...) It only took 2 days of beading to finish her, including the fringe. I was SO CLOSE -- WHY do I do this to myself???

I am happy to have redeemed all those hours and hours of work and taken the project this far. I wish I had the eyesight to keep up with the beadwork, but alas, even with my bifocals, it just isn't happening anymore. Sigh... it's a good thing I have so many hobbies!

Anyway, all she needs now is her strap and she's ready to wear. She is so NOT for sale!

Monday, August 21, 2006

Back to Doll Making

Jake is at a meeting in Corvallis all day today, so after getting a little housework done, I took the opportunity to gorge my brain on a bunch of "Lord of the Rings" extras and get some work done on some real dolls. I especially wanted to complete the work on a round robin piece that will need to hit the mail soon. I won't post photos of her because I don't want her "Mom" to see her.

I was on a roll (and only about half way through the DVD I was watching,) so I grabbed my white-on-white doll and attacked her clothes. I have found over and over again when working with other designers' patterns that the doll I make doesn't fit the clothes patterns. This was the case with this doll as well. All her lovely dresses looked like ill-fitting pajamas on her. I used some rather expensive fabric on them though, so no way was I going to start over!
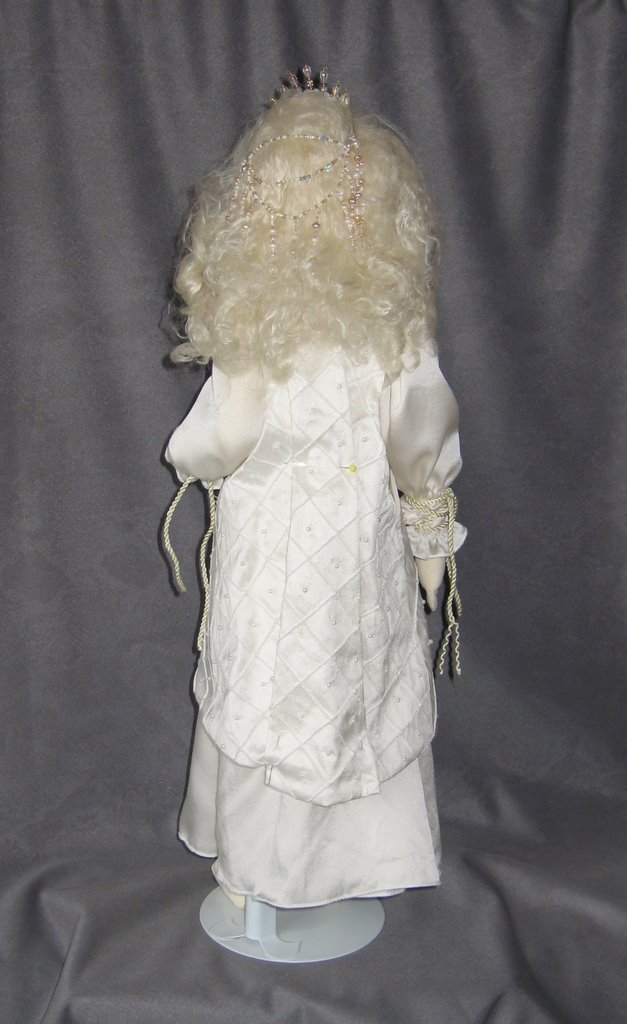
Here she is so far. First I gave her a petticoat to hold out the silk of her undergown, which is very fluid but hung like a limp rag from her body -- not attractive. Then I took in the undergown by wrapping a shape into the bodice with some satin cord. She has such a beautiful figure and it was nearly completely hidden under those shapeless clothes.

I added some of the same cord to the sleeves to add a little more color and texture. I am discovering that adding some darker shades of white really wakes up the monochromatic color scheme. I haven't trimmed the ends yet because I haven't decided exactly what to do with them. Now that I see the photos, I think I will cut them off. They just look messy to me now.
From the back she is looking pretty good! I have pinned in a HUGE pleat at the waist of the overgown -- now I just need to make up some kind of accent to hold it in place. Probably beads to match her head piece.


I have no idea whatsoever why Blogger decided to rotate this photo... Anyway, this is a closeup of her headpiece. It looks beautiful in her hair. If I had somewhere appropriate to go I would wear it myself!
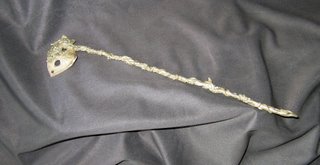

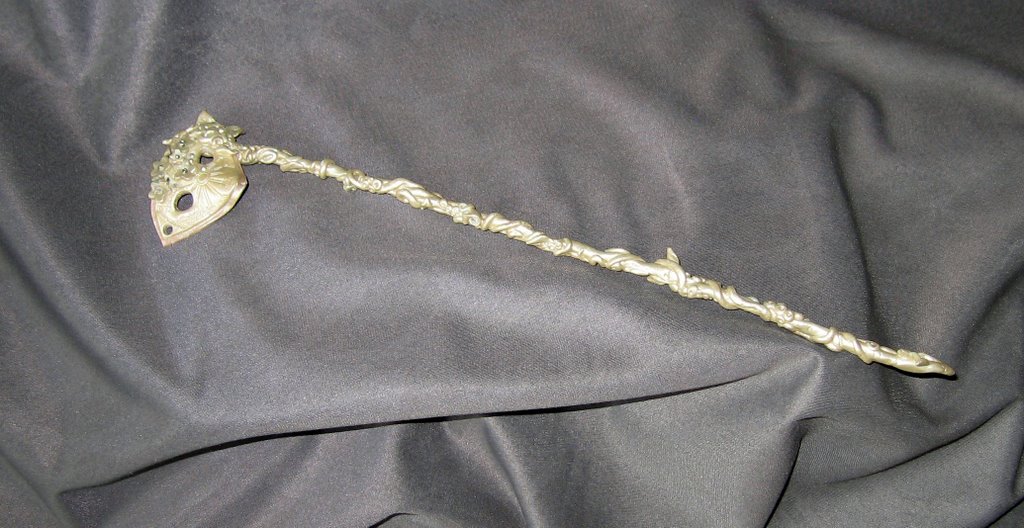
By adding a handle to the mask instead of attaching it to her face, I have convinced her that yes, it does too look good with her outfit. Unfortunately, she is one of the few dolls I have ever made without wired fingers, so I will have to work out a way to make it stay in her hands.

This pattern is the most bizarre blend of engineering technicalities and utterly simple "rag doll" parts. Odd...

The handle of the mask is just wire with Apoxie Sculpt wrapped around it, then painted Champagne metallic. I want to try a little watered down burnt umber on a small corner to see if it brings out the details or just ruins it, but I am done for today.
Wednesday, August 16, 2006

I had an idea...

I have been wondering just how I was going to set all the dominoes I have been stamping. Necklaces? Key rings? Parachute clips? Just as a pendant that customers could hang themselves? I may do a few of each yet, BUT ...

... while looking for something else, I found Chinese Knots for Beaded Jewellery, (sic) a book I had nearly forgotten I owned. It contains instructions for a bunch of decorative knots. The diagrams are extremely easy to read, and once my fingers got the hang of what they were doing, I found even the more complicated knots are easier than they look, as long as I pay attention.


The red knot was the most fun to tie. The little blue one... well, it looks like the picture in the book, but I am still not quite sure how exactly that one works! The 2 colored one on the right was only a little more difficult because it involved working with more ends. It's my favorite so far.

I practiced using some of my not-so-favorite dominoes. Now I wish I had been brave enough to use my favorites. I really like this look. If I can find a source of nice rattail cord that doesn't cost an arm and a leg, I am going to play around with this some more.

Once I get dinner started, I will be eager to try a few more new knots!