Saturday, October 09, 2010

The Green Woman makes her Debut

It took all week and 2 minor heart attacks, but my tree lady is painted. As you can see, she has changed a lot! She went off in a completely different direction as I painted her, morphing from a tree spirit into a Green Woman. 

I hadn't intended for her to be as dark as this, but as I kept adding wash upon wash of color (I just counted... there are 18 colors of paint on her) the darker she got, the more I liked it.  Oh well, when the must speaks, it is best to just go with it.

I can only stare at her in wonder -- WHERE did she come from? I don't know...


I argued with myself quite a bit before deciding to add the micromarble embellishments - sometimes more is just too much - but I couldn't resist. I'm glad I didn't. :-)


She is 19" tall from root to tallest branch, and quite heavy.  It will be fun deciding on just the right spot to display her.


I have an idea now for another tree woman in an entirely different style. I even have another head in my stash ready to go.

Sunday, October 03, 2010

Tree WIP - Ready to Paint?

I spent a good part of yesterday finishing the sculpting portion of my Tree Lady and adding some texture elements to give her skin more of a bark-like texture.  Tonight I plan on adding tiny touches of apoxie here and there to flesh out her hands and cover up some flaws in her branches, but other than that, I think he is ready for her first coat of paint!


I am just really REALLY relieved that I don't have to twist up any more leaf clusters.  I estimate that I used about 10 strands of chips, both gem and glass, as well as 2 spools of 26 gauge wire.  If I had known what I was letting myself in for when I started, I probably wouldn't have given her leaves, LOL.


This girl is BIG, about 19" from bottom to the tip of the tallest branch.


I think I am going to add a few more leaf cascades around her face, but I want to see what she looks like painted first. 

I love the way her root system turned out, especially once I added the banana silk fibers to tone down the "sculpted" look of the clay.  The effect is subtle, but it really made her come alive.


A few years ago I would have been too paralyzed by the fear of ruining her to touch her with a paintbrush, but I have learned that layers are the way to go, and if all else fails, there is always starting over, LOL.


Wish me luck!

Tuesday, September 28, 2010

Photo Transparency over Collage: A Quickie Tutorial

  Photo-Transparency over Collage
(words only)


Materials:

• Photo, either digital, or scanned to digital format
• Ready-to-paint canvas, 8”x10” (Note: it is possible to tile more than one sheet of Lazertran to make a larger collage, but for the sake of simplicity and brevity, I will use 8”x10” for these instructions.)
• Lazertran Inkjet (If your canvas is larger than 8”x10”, you will need more than one sheet.)
• Collage papers – I like old book and magazine pages, light-weight scrapbooking papers, vintage sheet music, etc. It is important to limit your paper choices to pale colors and non-busy patterns. Avoid solids, shiny surfaces, and anything with a raised texture.
• Collage medium – I like Golden’s Soft Gel Matte, but Mod Podge Matte is acceptable.
• Colored pencils – NOT watercolor pencils! These are optional, but nice for adding color to a specific area of
• Paint Brush – I like a 1” soft bristle flat brush. This should not be one of your good brushes!
• Paper scissors
• Solvent-based polyurethane, either spray or brush-on. (Look for mineral spirits on the ingredient list)
• Embellishments to coordinate with your photo


Step One: Edit and Print your photo


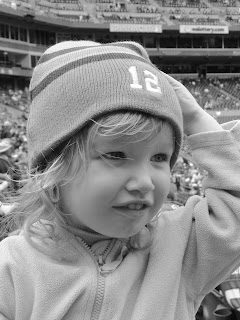
I will demonstrate my editing steps on this photo of my granddaughter; I use Photoshop Elements 6. Open your photo in the editing software of your choice. Make a duplicate of the image (File,  Duplicate), then close the original.

 
Optional Step: Straighten the image. Most people hold their cameras at a slight tilt when they snap a photo, so I always level the horizon line. In Elements, the button for this tool is the one that looks like 2 overlapping rectangles about half way down the tool menu. This photo is pretty straight already, so I will leave it alone.

Crop the photo to fit your canvas. The click on the crop button, which looks like 2 overlapping L-squares with a diagonal line through them, a little less than half way down the tool menu bar. In the width box type 8, in the height box, type 10.


Convert your photo to black and white. (Alt+Ctrl+B, or Enhance, Convert to Black and White, Portrait; Enter.)


Adjust the levels of your image. I like to really tighten up the value range, so I use a somewhat extreme approach with the levels command. Open the Levels Command dialog box. (Ctrl +L, or Enhance, Adjust Lighting, Levels). The box with the mountain shapes at the bottom is called a histogram, and under it you will see 3 triangles, a black one on the left, a grey one in the center, and a white one on the right. Click and hold on the black triangle and drag it toward the center of the histogram – see how the blacks get blacker? Drag the white triangle toward the center from the other side and see the image brighten back up again. Now play with the grey triangle, dragging it one way then the other, until you reclaim the details in the middle value ranges of the image and you like the way your photo looks. If you *don’t* like the way your photo looks, click on “reset” and start over.


See the difference? These darker darks and lighter lights will show up well when applied over your collage.
Make a test print. I find that what I see on my monitor is almost never what comes out of my printer, so I print my photo out on plain paper to see if it is really what I want, then make adjustments until I like what comes out of my printer. Then and ONLY then do I print my image onto a sheet of Lazertran Inkjet.

It can be difficult to determine with is the correct side to print on the Lazertran. Hold the paper up to natural daylight – the printable side is a creamy eggshell color, while the wrong side has a slightly blue-ish tint.

Print your photo onto the Lazertran and set aside at least overnight. The manufacturer says half an hour is enough, but I experienced significant ink bleeding if I tried to apply the transfer too soon.

Step 2: Plan and Create the Collage

Trim your printed Lazertran to fit your canvas, (I have tried letting the edges fold over the canvas, but to me it looked very sloppy that way) then lay the photo over the canvas. Notice where your center of interest (usually your subject’s face) is located, then lift up a corner of the photo and lightly indicate with a pencil where that focal point falls on the canvas. This is where you want to use your lightest most subtly designed papers so as not to detract from your image.

(Of course you may choose to obliterate your subject’s face for artistic reasons, in which case you can use any paper you want to create your effect.)

Cut your chosen papers to fit your canvas. For an 8”x10” canvas, I suggest using 8-12 pieces cut to fit. You may also choose to tear and layers your papers, but be aware that overlapping the papers will leave a visible ridge in the finished project and will also make it harder to avoid air bubbles when applying the Lazertran.

Apply your collage medium to your canvas AND to the back of your papers. (If you are using vintage papers, use a generous amount of medium and allow it to absorb for a moment. Sometimes those old papers are so dried out that they literally drink in the medium.) Apply the paper to the canvas, smooth it down thoroughly with something like a brayer or a bone folder, and then add another coat of medium over the top of the paper. Repeat this process with all the papers you cut. Make sure the canvas is entirely covered, as any bare spots will show.


Step 3: Add color. Or not.
If you choose to add some color with colored pencils to emphasize details in your photo, now is the time to do so. Use a light touch, as it is easy to damage the print.

Step 4: Apply the Lazertran Transfer to the Canvas
Fill a container large enough to fit the Lazertran with water about 1” or so deep. Immerse the Lazertran in the water. It will curl up almost immediately, but this is OK. Leave the transfer paper in the water for about 2 minutes to activate the adhesive.
While the Lazertran is soaking, apply an even coating of collage medium to the whole surface of the collage, taking care not to leave any dry spots.

Keep in mind that once the Lazertran is wet, the printed surface is fragile, so be gentle when perform the next few steps! Lift the transfer paper out of the water by the corners, letting the excess water run back into the container for a few seconds. (The transfer should slide easily on its backing paper – if it feels like it is still stuck to the backing, put it back in the water for a little bit longer.) Slip the top edge of the transfer up and off the backing paper by about ½”, and then lay that exposed edge down along the top of the canvas. Carefully slide the backing paper out from under the transfer, watching for air bubbles. If you see an air bubble form, gently lift the transfer back up and release it.

Once the backing paper is out from under the transfer, gently smooth the entire transfer with a brayer or a soft squeegee or sponge, working from the center out to eliminate any air bubbles that may have formed. Be sure to use a VERY light touch while you do this, as it is easy to damage to wet transfer at this point. It is important to clean your smoothing tool after each stroke. A mixture of water and collage medium will likely ooze out from under the edge – do not let this water get back on to the surface of the transfer or it will interfere with the finishing process.

Let the whole thing dry completely. Overnight is best.

Step 5: Creating the Transparency Effect
I prefer to use brush-on polyurethane in a satin finish for this step. It gives a great transparent effect every time. If you choose to use a spray, make sure it has mineral spirits in the ingredients list. Others don’t perform as well. Any oil based varnish will also work. Also, I prefer not to use a glossy finish as I feel this detracts from the work.

Step 6: Embellish as Desired
The sky is the limit here. Charms, ribbon, alcohol inks, beads, glitter… anything goes! Have fun, and I hope you enjoy the process as much as I do.


Thursday, September 23, 2010

A Quick Update on my Tree Spirit

Now that I have finished my Retreat piece, I am motivated to get back to work on my Tree sculpt. I set up a little work space in the living room so I can work in the evenings with Jake as company. It's just a little tray table ("As Seen on TV!", LOL) but it is working out very well.


Anyway, I added her head and filled out her branches. She is a little foreshortened in this photo - her "canopy" is actually quite round and full.


I have spent the last several evenings making up leaf clusters out of gemstone chips and wire and applying them to her branches. As usual, this is taking much longer than anticipated, as what I thought was "enough" only covered about a third of her branches. Oh well, wire is cheap and I have lots of chips left.


I hope these are enough now. I want to get back to sculpting!

Monday, September 20, 2010

Reno/Iowa Retreat Project - Finished!

The annual Retreat hosted and taught by Jean Bernard and Sherry Goshon was once again a fantastic creative experience. I returned home both exhausted and exhilerated, with a mixed-media treasure that I still can't quite believe came from my own hands.
I began with this drawing by my daughter...


After 3 days of intense activity and a little more work at home, I ended up with this beautiful mixed-media sculpture.  (As always, if you wish to see mor detail, click on the photo to enlarge to full size.)


Her base is wire lace built on a frame fashioned from a tomato cage, believe it or not. Her torso is a combination of soft sculpture and paperclay.


Her face is drawn and shaded with watercolor pencils, and sealed with a coat of beeswax. Now that was fun!


The rest of her consists of whatever struck my fancy at the moment. Chains, feathers, tulle, glitter, micromarbles, metal filagree... it's all on there.

If anyone is interested, there are still a few slots left open for next year's retreats.  You will never be sorry!  http://renoiowaretreat.com/

Saturday, September 04, 2010

Tree WIP - making progress

This was supposed to be a quick and fun 2-day project. You would think I would know myself better than that my now. Sheesh...


I keep adding to her and bit by bit she is coming along. I have found that by working up from the bottom it is easier to integrate the details into the clay so that's why her upper half is so plain compared to the bottom. Apoxie can be unforgiving, so I am trying to control my impatience to get to the branches, no matter how annoying those wires get.


And a back view. The turntable has been a huge help in keeping her looking balanced and in proportion from all sides.


I probably won't finish her before I leave for Iowa, but I won't complain. Having something absorbing to work on is helping me stay focused on life here, which is good because I don't leave for another 4 days. Only 4 more days - woo hoo!

Friday, August 27, 2010

What do you do when you don't feel like doing anything??

I read.  A lot.  I suppose I probably should be exercising, or at least tidying up my studio, but nope... when it's this hot and I am this unmotivated, I read.  Don't laugh, but lately I have been rereading the "Harry Potter" series - it has been a little bit like visiting old friends.


Jake and I went to the Coast last weekend, just to get away for a few days.  I didn't expect to do much of anything, but I brought along some apoxie clay to play with anyway and for a change I actually got it out and got to work on a sculpt.  I have felt my muse coming back to life recently - I don't think she likes this heat much either, LOL.  If that's true, she must really love the ocean, because I had to force myself to stop work a few times to let the clay set up.  I'm pretty happy with what I have so far.


Because it is apoxie I am working in layers, so she is a little thin yet. I actually ran out and had to order more, but it is here now so I can get back to work on her again. There is a football game on tonight, so I think I will grab my tools and play a bit while Jake watches the game. We keep each other pretty good company.  :-)

Saturday, August 14, 2010

Life is changing

Jake and I have been "Empty Nesters" for 2 weeks now - the girls have moved into an apartment together in the town where they go to college.  Lydia has a job already, and Alice is still looking, but they have a sweet little set-up for themselves and seem so happy and excited to be out on their own.  It is quiet around here, but we still text and play Facebook games, so I don't miss them *too* much.


It has been fun getting reacquainted with my husband!  AND I have been busy reclaiming newly released space in the house.  I guess you could say my creative energies are being spent on my home rather than in my studio, but it feels GREAT to have so much room to rattle around in.  I don't think I will ever amass a huge stash ever again.


In celebration (and also because it has become too hot to wear my hair down over my neck) I got a new haircut.  It was a stretch for me to dare to go this short with this much texture, but my stylist is a doll and gave me exactly what I wanted.  I LOVE it!


Considering that I haven't had long hair since I broke my arm a few years ago, I think it is probably about time that I update my profile pic, LOL.

Monday, July 26, 2010

September Iowa Retreat - Mini-class Samples

I will be teaching a mini-class at the Iowa Retreat in September -- these are photos of the class samples I have made using the transparent-image-over-collaged-background technique I worked out last spring. I hope everyone in class has as much fun with this technique as I have had!

This first one used a studio portrait from around 1912 or so of my grandmother and a neighbor boy as very young children. 


This next canvas used the exact same technique, but I created an entirely different effect by using  a different style of photo, different image editing techniques, and different collage papers.  Anything goes, really!


I am putting up this last one only to serve as a horrible example and a warning: don't let your background collage become too important!  I spent HOURS creating this background, including fussy-cutting the floral bouquet in the lower left from a vintage magazine advertisement.  Such a waste... 

Myy grandmother was such a beautiful bride, but you would never know it from this mess.

Tuesday, July 20, 2010

Photo of the Week - "Favorite Things"

I haven't fallen off the face of the Earth, but, now that summer is finally here, we have been scrambling to get caught up on the field work that didn't get done because it was too wet, and also enjoying the pleasant weather to the utmost. In another post, I will show you my new toy and what it can do...


In the meantime, it is time to catch up with the weekly photo challenge. This is Sprite's month to choose the themes, and this week she has asked us to share a "Favorite Thing", with a focus on a piece of work we haven't dared to share before.


OK... here goes!


I did this little sketch in July of 2000 while in church. I was bored and the little sheet of paper provided for taking notes was a convenient blank canvas. I have kept it all these years because I am fond of it, as drawing is not one of my best skills.

Bad Judi, LOL.

Monday, June 21, 2010

Photo of the Week - "Father"

The same uncle who took the photograph I posted in honor of Mother's Day of my mother and I also took this photograph of my father and I. In honor of Father's Day, I post it here today. I am pretty sure, judging by the little dress I am wearing, that this was taken on the day I was baptized; I was 6 weeks old, and he was 22 and a few months. I always thought that my Dad is one of the handsomest men in the world.


He is 71 now, but he still runs miles and miles with his dog every day. I don't know if he intends to run any marathons this year, but he ran 2 last year. If you were to see him today, you would be able to recognize him from this photograph. (Me... not so much!)


I still think he is one of the handsomest men in the world.

Wednesday, June 16, 2010

Photo of the Week - "Black and White"

It is my month to choose our themes - for this week I chose "Black and White". I have lately become fascinated by the artistic potential of black and white images - who knew there was so much you could do beyond removing the color?


My roses are in full bloom right now (or they would be, if it would ever stop raining long enough to quit damaging the buds. Sigh...)  I photographed this bud this morning and then started playing around with the image in Photoshop Elements.   I love how taking color out of the mix really plays up the lines and movement of the petals.


I snapped this photo of my daughter last week while playing with the super zoom on my new pocket camera, and just for fun I started playing with it in black and white mode. There is so much you can do in Elements with black and white!


I never even noticed the lens flare in the lower left of the photo until I rendered it in black and white.  Too fun, and so much left yet to learn!

Thursday, June 10, 2010

Photo of the Week - "Heirloom"

There are very few people in this world whom I love as much as I loved my Grandma Ruby. She lived in a wonderful little house under a huge maple tree, with a very explorable creek nearby.  No corner of Grandma's house was off limits to us kids. She was a pack rat of the first order and I absolutely loved digging through her piles of boxes. And boy, could she ever play! As far as her grandchildren were concerned, she was a one-woman personal entertainment system, and we couldn't get enough of her company.


She had absolutely no patience whatsoever with the domestic arts. I can only imagine that she picked up a needle at all as an attempt to fit in with other ladies in their social gatherings, which is why I think I treasure this little square of muslin so much. If the date is accurate, she was 20 when she made it.


Um... I did better embroidery when I first learned how when I was 9.  (But then, I like stitching. Motivation is everything sometimes!)


It isn't even hemmed, just basted.


Everything about this little hanky reminds me so much of her though, that it makes me feel that she is still with me. Grandma Ruby died while I was pregnant with my oldest daughter who is named after her. I am only sorry that she never knew her namesake, who is so much like her in personality that I wonder sometimes... Do names have more influence than we give them credit for?

Sunday, June 06, 2010

So happy!

The gourd is finished, the glue is dry, and I still can't quite believe I did it. No glue holds the pieces together right now, but I think the weight of MerMomma's body is putting some stress on her anchoring arm - I don't want it to crack again, so perhaps I will end up gluing her permanently to the gourd after all.


I am rapidly using up my stash of Yadeno mohair. Does anybody know where I would be able to get some more??

Friday, June 04, 2010

Painted, Embellished, Ready for Hair

I wish I knew some magic to make glue dry faster, LOL!


Again, sorry for the awkward pose. This girl is quite uncooperative when it comes to being photographed. She fits beautifully around her gourd though, and that's what matters.

Oh, I think I will just go and prepare some locks of hair or something. I am dying to keep working though - I want to finish!

Tuesday, June 01, 2010

Photo of the Week - "Things with Wings"

Lots of winged things around here! Unfortunately, there has also been an awful lot of rain - not the kind of weather to make me take my camera outside for a look around. However, on Monday evening we were visiting my in-laws and the skies cleared up enough to spend some time on their deck. My mother-in-law has several bird feeders and houses around, so it wasn't long before the winged things began to appear.


They weren't too pleased to see us however, especially this daddy sparrow. The bug in his mouth is intended for his chicks that were chirping their little heads off inside the birdhouse, but he wouldn't go in as long as we were sitting there.   We could see momma sparrow hovering nearby with a bug in her mouth as well, but she didn't dare to come even this close.


There is usually a little flock of nearly a dozen finches at the seed feeder, but this little one was the only one bold enough to approach. He didn't look too happy to see us and didn't stick around either.  Sigh...


Fortunately for the birds, it soon got too cool for us to remain outside, so we retired indoors and they were able to go about their business in peace once more.

In other news, I have replaced baby mer's hair with a different color and sculpted momma mer's arms.  Unfortunately the clay cracked at the shoulder joint so I will have to repair that.  I am sculpting her tail fin tonight - it will all be over soon!

Saturday, May 29, 2010

Merbaby has a Bed

I have worked every spare minute on this project this week - it feels so good to be on a creative roll again!   Here is my little Merbaby, wigged and painted, in her finished gourd bower.

The gourd was embellished with apoxie sculpt, then painted. The interior is lined with a velvet cushion, silk and velvet pillows, and micromarble embellishment. I love the way the colors turned out.


Here is a close up of little Merbaby. I see now that her wig is a little messy, but the glue isn't quite dry so I won't try for a tidier style until all is stable.

Now I am wondering if she needs a little blanket. Does she look cold to you?


I took me 3 days to sculpt MerMama's hands and they still aren't quite what they ought to be, but I want to finish this project some time in THIS decade, so I have declared them "good enough" and attached them to her arm wires. I still need to sculpt her arms and tailfin and give her a wig and headdress, but I am on track to get that done soon too. Woo hoo -- getting closer!

Tuesday, May 25, 2010

Coming Together

I snapped a few photos when I finished working last night in order to show the progress I made this weekend on my Mermaid gourd. Baby Mer got her tailfin and is now ready for painting.


Mama Mer got a tail. Last night I roughed in her hands - I taped her to the gourd in order to put the final pose on the hands before I add the details and bake them. Once I add her pillow to raise her up a bit into the gourd, Baby Mer will fit perfectly in her little nest!


I had intended to have that pillow made already, but now I'm glad I haven't gotten to it yet -- I discovered that I am going to need to add some weight to the bottom front of the gourd to counterbalance Mama. It's all coming together nicely.

Saturday, May 22, 2010

An Ambitious Project

I started this project about 2 weeks ago in answer to a challenge to do "something" with a gourd. I have had this gourd in my house for years... so long in fact, that I don't even remember why I bought it. Sigh...


I began by cutting the off the top to form a vessel shape, then lined the inside with apoxie clay and painted it with a coat soft black acrylic. I followed that up with 2 light washes of Lumiere's Pearl White, then dabbed in some Pearl-Ex in blues, greens, rose, and interference violet to make this mother-of-pearl look. For once, a paint job turned out EXACTLY the way I wanted it!


The bottom of the gourd will be lined with cushions made of charmeuse and silk velvet in pale blues and greens to become a cradle for this little sleeping merbaby. I've never sculpted a baby before, and I figured that such a simple pose would cause me the least stress. Plus, it's cute.


Even working from a reference photo, it took me a couple of tries to get the face right - those little features are tiny!   The tail was easier, and I am just about ready to do her tail fin and paint in the color details. She will get her hair last. What do you think... blonde?


And finally, wrapped around the back of the gourd and peering in at the sleeping baby will be an adult mermaid. This is what I have of her so far -- sorry for the awkward pose in the photo, but she doesn't sit or lie well naturally in her present state. I plan on sculpting her tail tonight and putting her in her final pose to make sure she fits around the gourd.


I've always wanted to do a tableau, but I never had enough confidence in my skills (OR my attention span) to try it. This challenge gave me the prompt I needed to at least begin. So far, so good.

Tuesday, May 18, 2010

Photo of the Week - "My Workspace"

I am blessed to have several work spaces in this old farmhouse, but this one is my favorite. The north facing window lets in beautiful light on all but the stormiest days, and right now I can look down on a pasture full of
pregnant cows grazing peacefully in the morning sunlight. If that sight doesn't bring down your blood pressure, nothing will. :-)


I love working in this room even though it is tiny, and a little messy at the moment as I am in the middle of a major purge. I have already gotten rid of several boxes of stuff that I have been giving storage room for far too long. It is already so much more pleasant to work in there - it is going to be wonderful when I finally get it ship-shape.

Sunday, May 16, 2010

Sculpting Again

It has been an incredibly beautiful week here - there is just *something* about a run of gorgeous spring days that makes me feel as if I am waking up after a long winter of dreaming. I love the creative energy that comes with days like these!

Even though I have had to hustle to get my garden planted (only 3 weeks late this year... sigh...), I made time to work on some projects, this time in polymer clay. I added the last face to my Sea Spirits piece - unfortunately I caused some damage to some of the other faces, so now I have to see what I can do about repairs. Oh well, at least the sculpting if finished! I'm pretty happy with the way it turned out.


This next little guy has been in the works for quite some time, but I have had to keep quiet about him as he was my entry into an anonomous challenge. His paint job isn't really as gleam-y as it looks in this photo. I am going to try again to get a better photograph, maybe next time in natural light, bur for today this one will have to do.  (One of these days I WILL solve the mystery of how to photograph a piece that has Pearl-Ex in the finish, LOL.)


He won the challenge by the way. Woo hoo! My first win!


If you want to learn how to make a baby dragon of your very own, go to the page of online classes on Jean Bernard's website.  There you will find more information about a splendid class taught by Sprite Hanson - Sprite herself is a wonderful sculptor, and in the lessons she shares all kinds of great techniques, including how to make that awesome skin texture.  This project is suitable for all skill levels and the instructions are clearly written, well illustrated, easy to follow and fun.