Monday, July 31, 2006

And, Lastly...

I had fully intended to do a lot more embellishment. I even made wings and some beaded strands, but everything I added took away from what was already there. So...

...she is finished. Her colors aren't anything like the "Peace" rose I began with as inspiration, but I LOVE them.

Now if only I could figure out what is causing that annoying little shadow on her upper lip. It is simply NOT THERE in real life.

I don't remember the last time I have been so completely caught up on a project. OR had one with so few snags! I need to get back to my dressing project now. Good! I am actually looking forward to have a project that is something more "cut and dried"!

Sunday, July 30, 2006

Toning it down

Yes, now we're getting somewhere! Remember I said not to worry if you don't like something because you can just add more layers. Let's see... today she got a layer of champagne metallic acrylic paint, some pearl metallic paint, and then Pearl-Ex/Varnish mix in layers of Interference Gold, Antique Gold, and Interference Blue. I think I want to add another layer yet of the mix in a rose color, but maybe not. I need to sleep on that one.

Now, if I can just remember what I did so I can make wings that look as if they belong with her. What color???

THEN I get to start with the embellishments. Can't wait to get out the beads!

Saturday, July 29, 2006

More layers

She just keeps going and going...

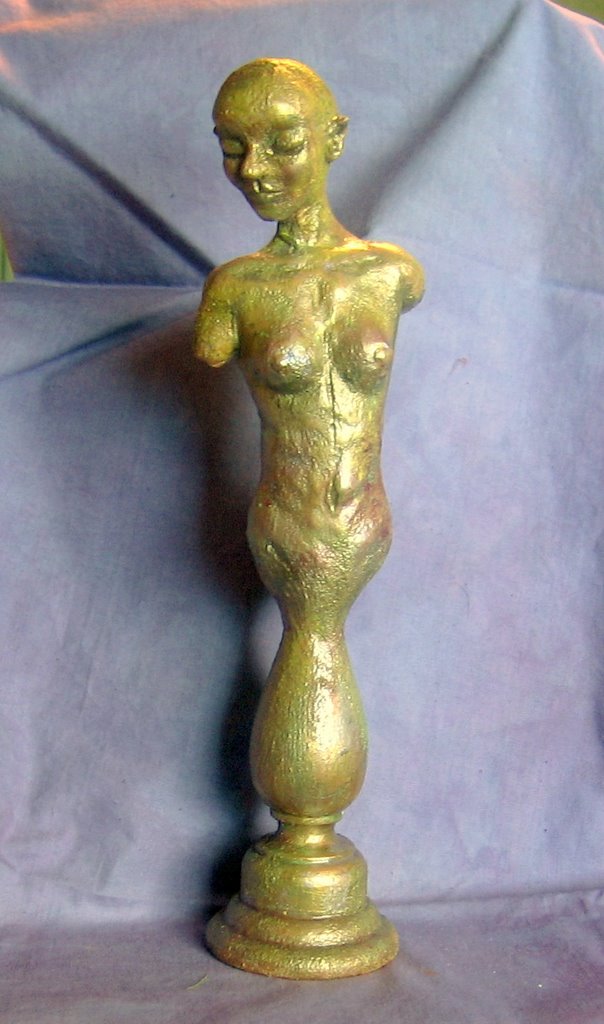
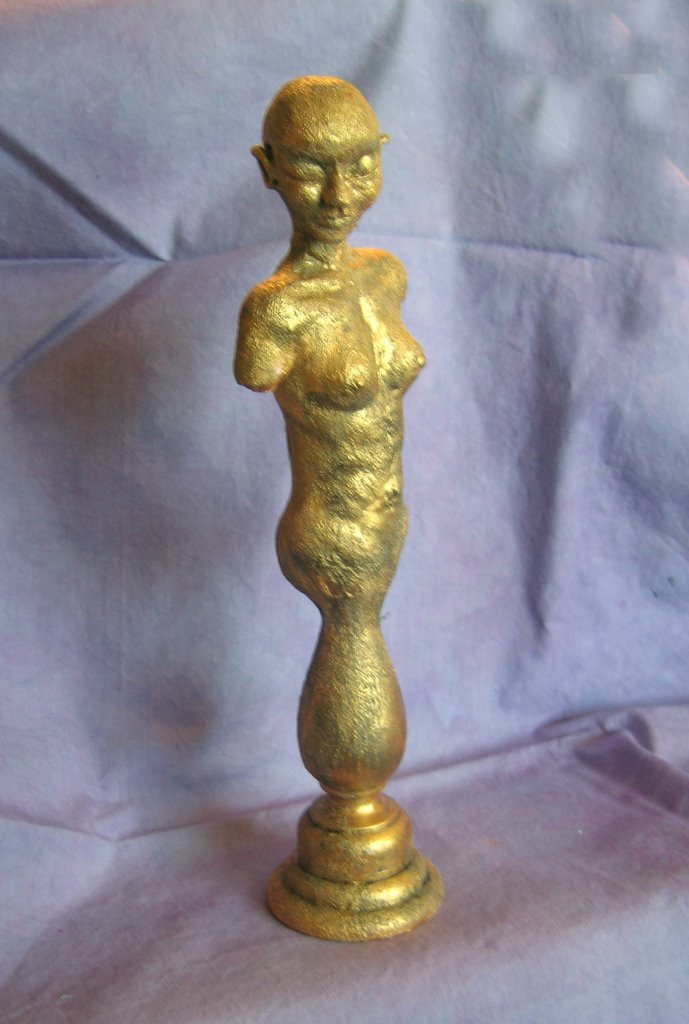
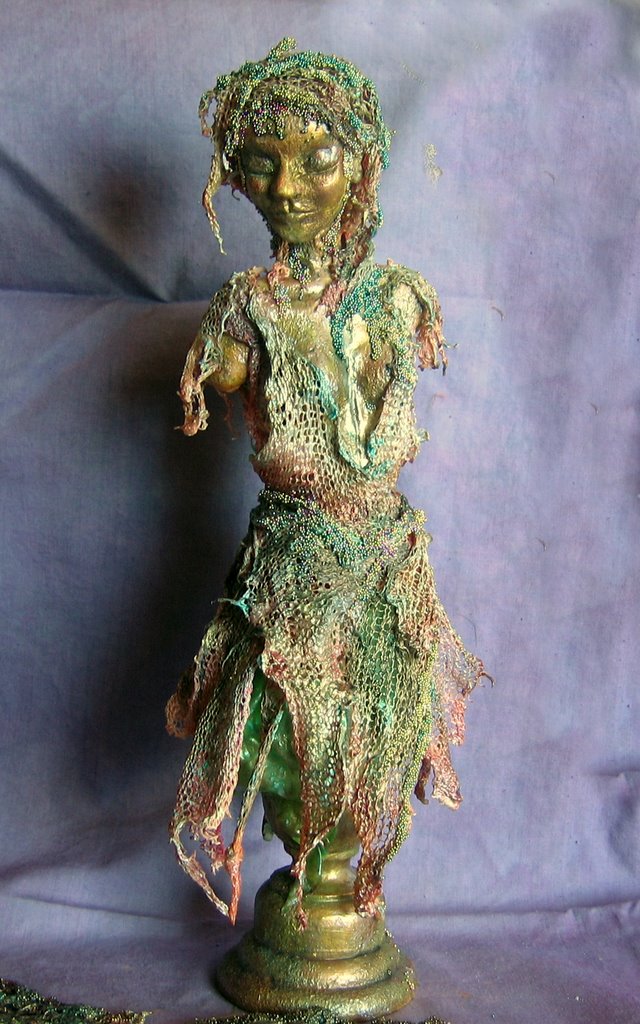
The photo at left shows her with yet another coat of paint (4 colors for highlighting) and varnish mixed with several different colors of Pearl-Ex powder. There is no way to pick up the glow the powders give her with my camera. A very subtle and beautiful effect.

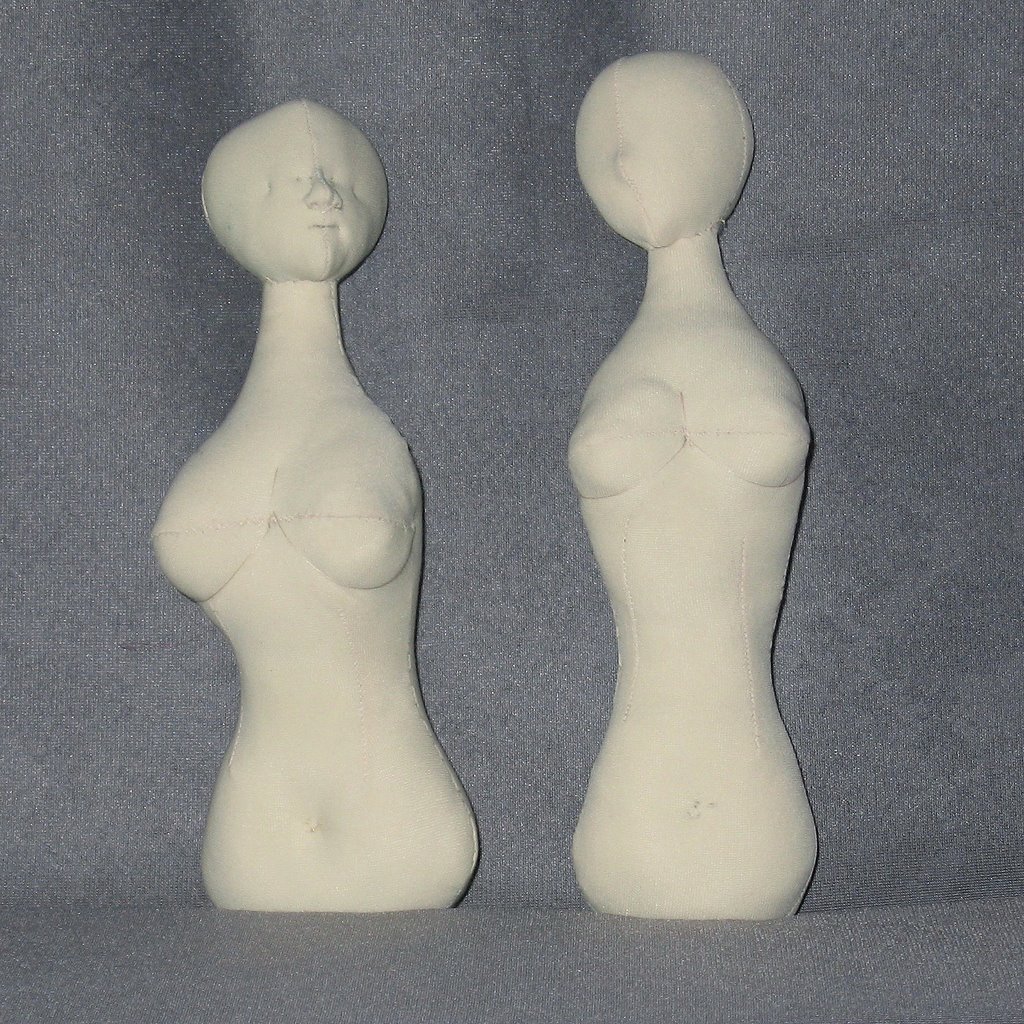
Had to wait for the paint to dry.

Then had to wait for the varnish to dry.


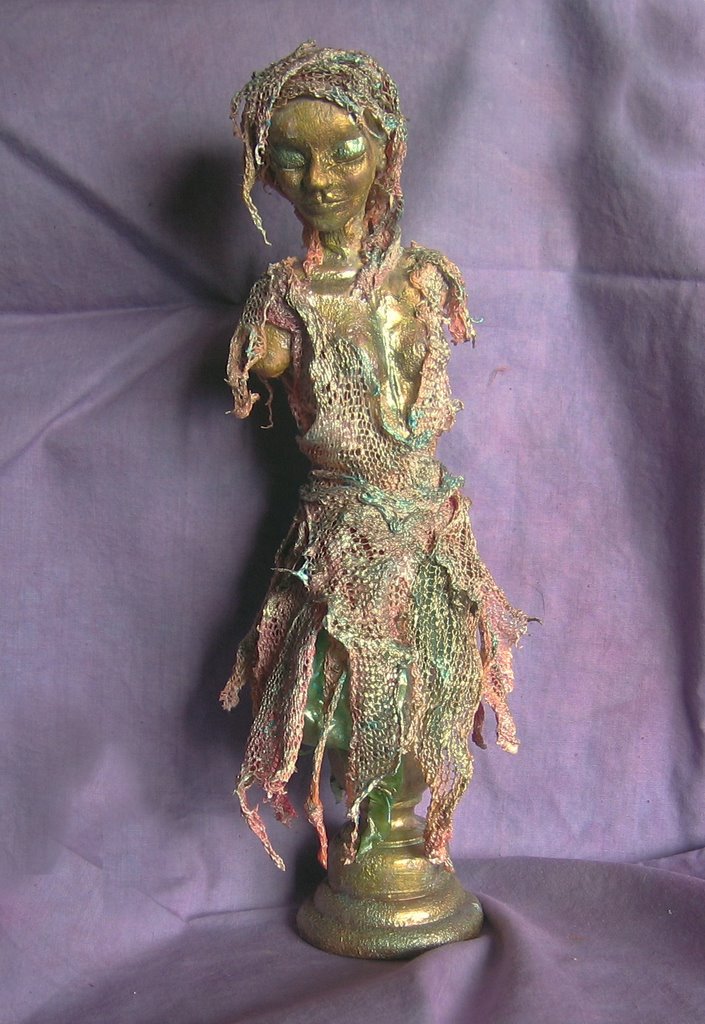
Then it was time to begin layering on some clothing. The lowest layer of her skirt is made of petal shapes of green silk dipped in Paverpol and attached at the hip line. The headpiece and the colored layers of the skirt are made of a piece of knit cotton stockinette. Oooooh, this stuff almost made me say some bad words. Very difficult to control.

Ok... you know what comes next don't you? Wait for the Paverpol to dry. This is getting annoying!


A third layers of stockinette soaked in Paverpol and she is beginning to look properly clothed for a fairy.

I had intended to dress her in colors to make her resemble the colors of a "Peace" rose. Too much fuschia, too much green, not enough yellow, and EVERYTHING is just too vivid. (The whitish color on the skirt is the wet Paverpol. Have to let that dry now. Sigh...)

Will I EVER be able to make something turn out the way I plan in the beginning?? Nevertheless, I am still pleased with the way she is progressing. She still needs wings, another coat of Paverpol, and some embellishments. If I have learned anything at all beyond how to play with some new techniques, it is that I mustn't worry so much if something isn't looking as good as I'd like. I can just keep adding more and more layers of "stuff" and it will look totally different in the end anyway!

Ohhhhhhh, I really REALLY want to add her wings, but no -- they aren't dry yet either!
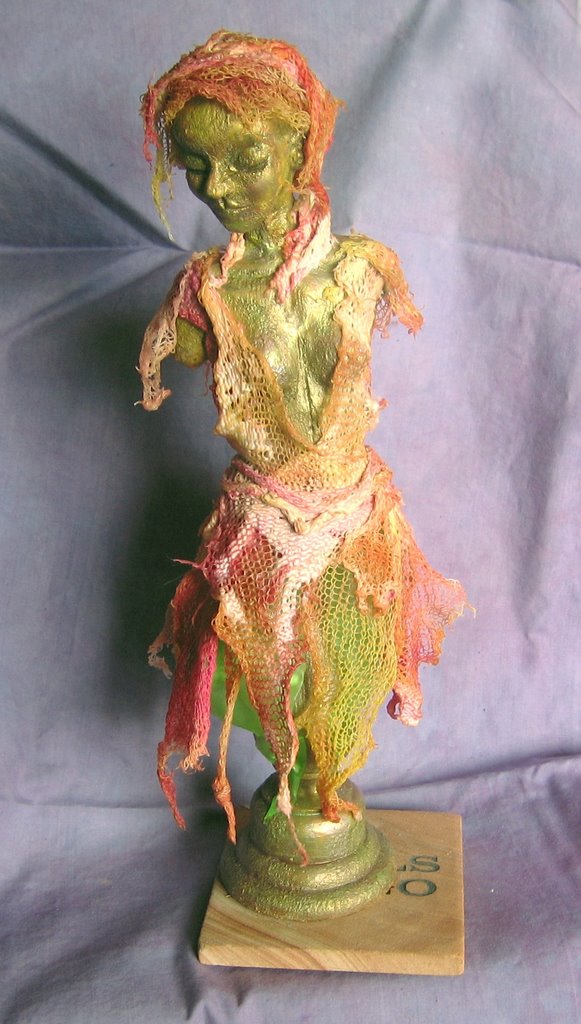
Friday, July 28, 2006

More Progress

If only paint dried instantly...! I could have gotten so much more done on her today if I hadn't had to wait for paint to dry. As it is, she is now ready for embellishment.

After 2 coats of gold paint she looked like this.

Then I added a layer of texturizing medium. Cool stuff! I will have to play with that some more.

Another layer of gold paint to blend it all together...

...followed by a wash of watered down black paint. I am REALLY likeing how she looks right now. The next step in the class calls for working her over with some sand paper, but I'm not sure I want to do that. I'll just let the idea percolate a bit. The teacher's sample looked great after the sanding, but I don't want to ruin what I have started!.

Uhuh... I confess. I'm a chicken.


Thursday, July 27, 2006

Gessoed and ready for texture

Doesn't she look better all one color? What a relief!

It's a good thing she's going to be coated with texture medium. I had no idea she was so rough.

I am continually amazed by how much detail these photos pick up that I just *don't see* when the piece is right there in front of me.


Her "inny" belly button turned into an "outy" due to an air bubble that didn't show itself to me until she was baked. Grrrrr.....


And, I still love her little bottom. This photo also clearly shows the break where the torso joins the candlestick. Can you see the line at the base of the ribs?

Whew! It's a GOOD thing she will be clothed!

A Magical Sculpt

Yes, Magical I say. This body practically sculpted itself.

This photo was taken outside in later afternoon sunshine. I thought I would get truer color this way, but it didn't work out that way. The clay did darken a bit in baking, but not nearly this much!

I had a little trouble with the candlestick base. It was too wide for the torso so I had to sand it down with the Dremel. You can still see a hint of an outline of the top of the candlestick under the clay, but it's all going to be covered with other things so I won't worry about it too much. I would have peeled off the clay and resculpted if I had intended to leave her nude.

I really need to get a photo reference of anatomy. There is still something not quite exactly right with her neck tendons.

This is the back view. She actually has a much cuter little bottom than this photo shows. It will be a little bit of a shame to cover it up.

True confessions time... I find I enjoy sculpting little butts.

I have to gather my courage and get working on a full body sculpt soon.

Anyway, she's cool enough now for a layer of gesso. Off to find the paintbrush!

Wednesday, July 26, 2006

Stealing Time

I should be at the gym -- pilates class is half over as I type. But today I rebel as I simply *must* make something with my hands besides dinner.

This little head is the beginning of a bust sculpture I am making in Jean Bernard's class at Class Heaven.

I tried very hard not to take this class, but I caved in when I saw what Judi W was doing with her class piece on her Art Doll blog . She is also the one who has been enticing me into the world of paper art. If you check out her blog, you will see why. She is a very talented lady whom I would LOVE to know personally.


Anyway, I managed to get this little head sculpted. The class calls for a press mold for the face, but I don't have one the proper size, and I'd rather make my own anyway. I learned that, even though the color of the clay won't show in the finished piece, it is not a good idea to scuplt a single piece in multiple colors. I should have started over when I began having difficulties seeing details, but I was was too stubborn. Leave it to me t do things the hard way... ;-)


Here is the same head with 2 coats of gesso. As soon as the gesso is dry I can begin to put it together with its pedestal. I am so excited! I love to sculpt! This is my first "eyes closed" head. I'm not crazy about the look -- I like to see a soul behind the eyes -- but I finally managed to sculpt a pretty mouth. It will be interesting to see this character evolve.


Tuesday, July 25, 2006

Off playing instead of creating

We finally got a chance this past weekend to visit my son and his wife in their new home in Bremerton, WA. Oh my, was it every hot there, but we had a nice visit -- I am so happy to see *them* so happy in a house of their own.

On Friday evening they took us on a picnic at a little cove park near their home. I love picnics! Alice took this photo of Jake and I together. It's one of the few I have of the 2 of us in the same picture, so I will treasure it. I think I will have the girls take more of the photos on our trips... it's nice to be actually IN the photos instead of the one who takes them all the time.

Well, it looks as if I had better count my blessings and be glad that I got this one photo to load. Blogger is being tempermental this morning and won't let me put up anything else.

sigh...

I am creating still, but nothing is really worth photographing at the moment. It has been SO hot that I can't work upstairs this week. I will get back to my painting when it cools off. I am still working on "Eustacia" but the clothing patterns didn't fit the body I created, so it's back to the drawing board for some redrafting. Ugh. But, unless I want yet another naked doll on the unfinished pile under my work table, it has to be done. I hope to have at least her gown finished this afternoon...

Wednesday, July 12, 2006

Flat Stanley on the move

This little guy is Shashi's Flat Stanley doll from our round robin. He is even more adorable in real life than he is in these scans, and the little charmer knows it, too!

My contribution to him is the crocheted muscle shirt. He says now he wants to be a body builder like Jake when he grows up. (I *told* you he was a charmer. )


Here's another scan of him, this time from the back. I am crazy about the embroidery on his
shirt! I would never have thought of that.

I have finished his journal too and will pop him into the mail to Linda in Canada tomorrow.

I will miss the little guy. I couldn't help but smile every time I saw him sitting there on my work table. I hope Shashi loves him as much as I do when he finally gets home!

Monday, July 10, 2006

I've been busy these days, too busy to post. That, and I have to fight the girls for my share of time at the computer!! I am still creating though, in the minutes I have between other things. I'd go crazy if I couldn't...

These are bodies made from the same piece of doe suede using exactly the same pattern pieces ("Eustacia" by Mary Tressler). The only difference is that the pieces for the doll on the left were cut with the stretch going around her body. The doll on the right has the stretch running lengthwise. I am amazed by the differences in their shaping!

My family agrees that the doll on the left has a more attractive and realistic shape. She was also much easier to stuff, by the way. Her head looks deformed at the crown where the seams join, but that will be covered eventually so I won't worry too much about it. This doll will be travelling next week -- she is my beginning contribution to a round robin exchange. I am so excited to be a part of this RR. I can't wait to see what everyone else does!

I prefer the head on the tall doll. I will be giving her limbs and a costume this week. It will be so interesting to compare these 2 when the Traveller returns home...

I started a painting this week too. This is the underlayer of what will be a collage of rice papers and watercolor paints. I learned this technique from a video I bought off eBay -- I am just waiting for the rice papers I ordered to be delivered.

I am kind of glad for this break in the action though, because I notice in the photo that the waterfall isn't falling straight (oh my!) Not a big problem, as it will be covered and repainted in the collage process. It will be interesting to see how much if any of this first layer of color will be visible in the final painting.

The photo has been *heavily* edited to crop out the rest of my painting room -- gads, what a mess! I didn't notice that until I looked at the photo either (oops!) Time to get in there and put some stuff away!