Saturday, December 16, 2006

A finished Doll

Yeah! I can call myself a doll maker again. It has been so long since I actually finished a doll that I was starting to feel guilty for hanging out on the Dollmakers lists...

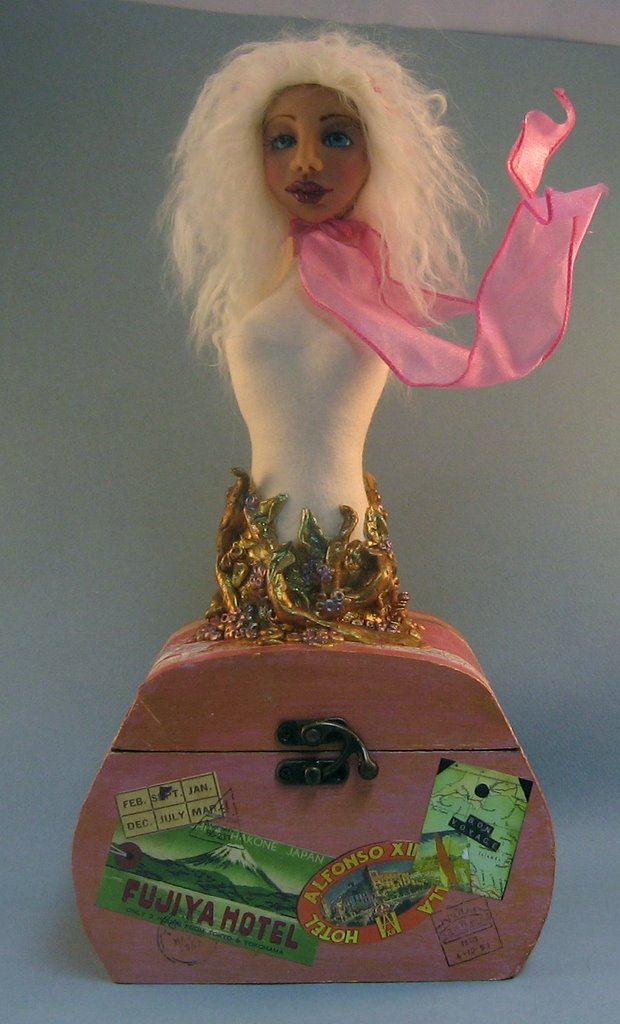
I began this topsy-turvy doll ages ago... I made myself finish her this week, in order to get her in the mail to my sister on time for a Christmas gift. DS and her husband adopted 2 children from Russia and brought them home last spring. I thought this doll illustrating the Russian folk tale of Baba Yaga and Vasalisa would be an appropriate gift to welcome my new neice and nephew into the family. I hope they like it.

These photos are absolutely dreadful, I know, but they are the best I could get under the circumstances. I need a bigger light tent for dolls of this size!


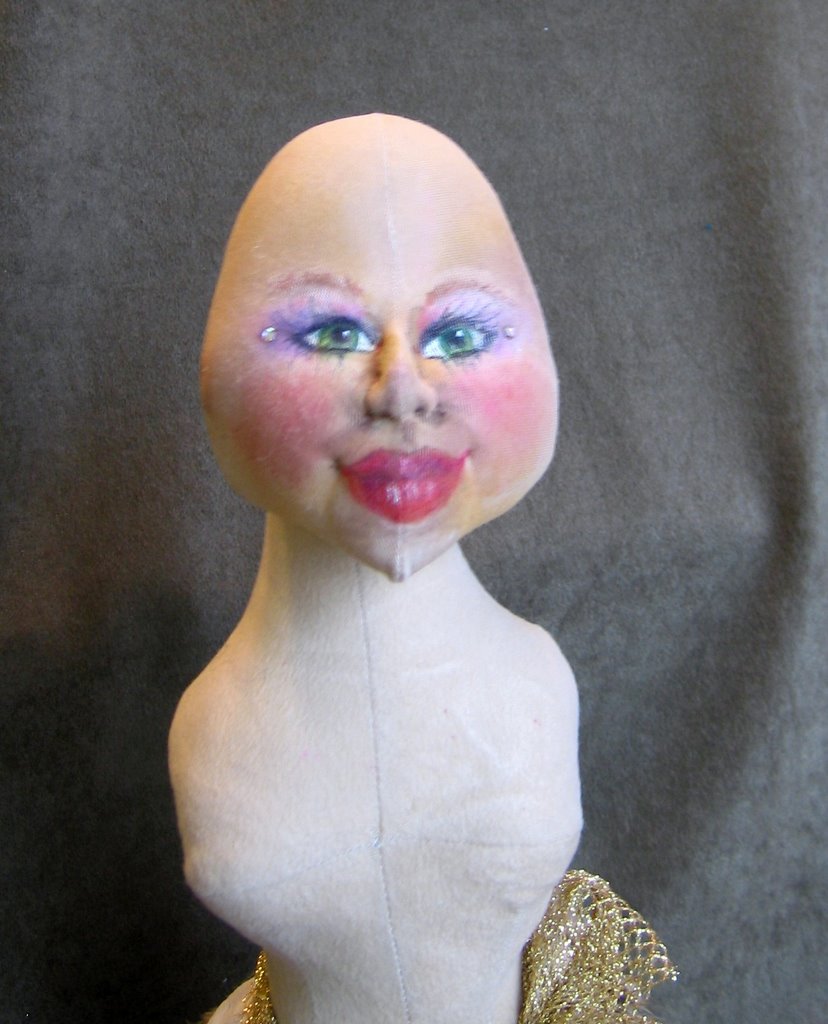
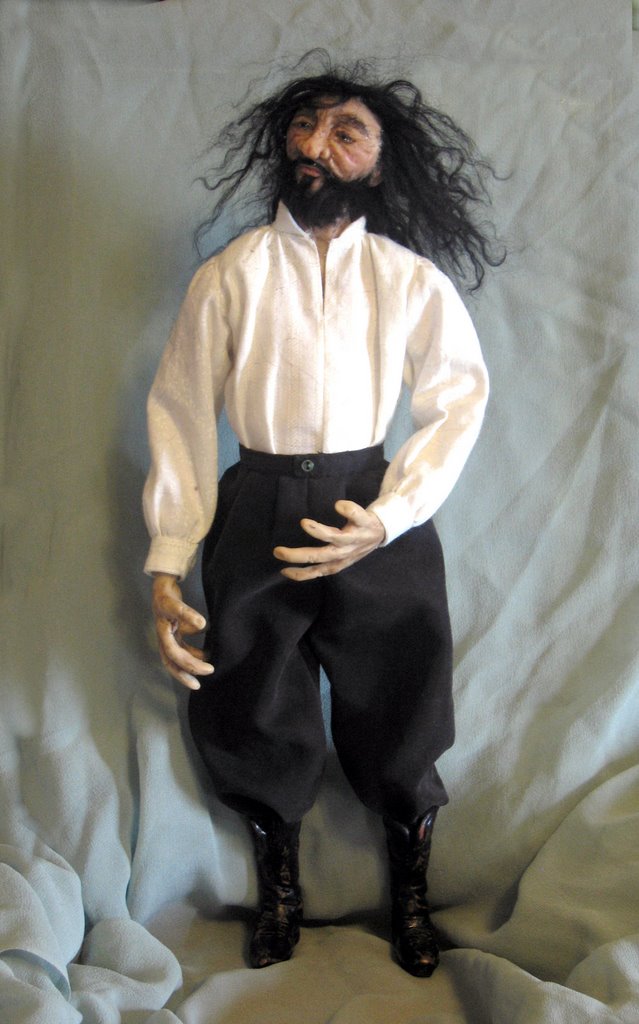
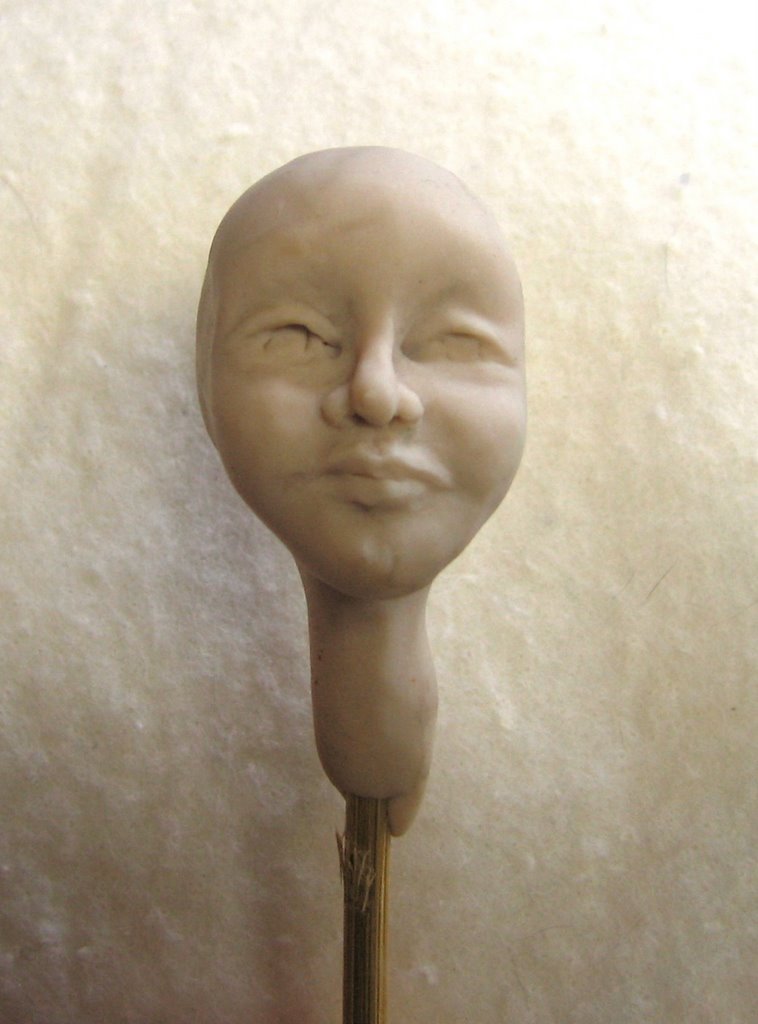
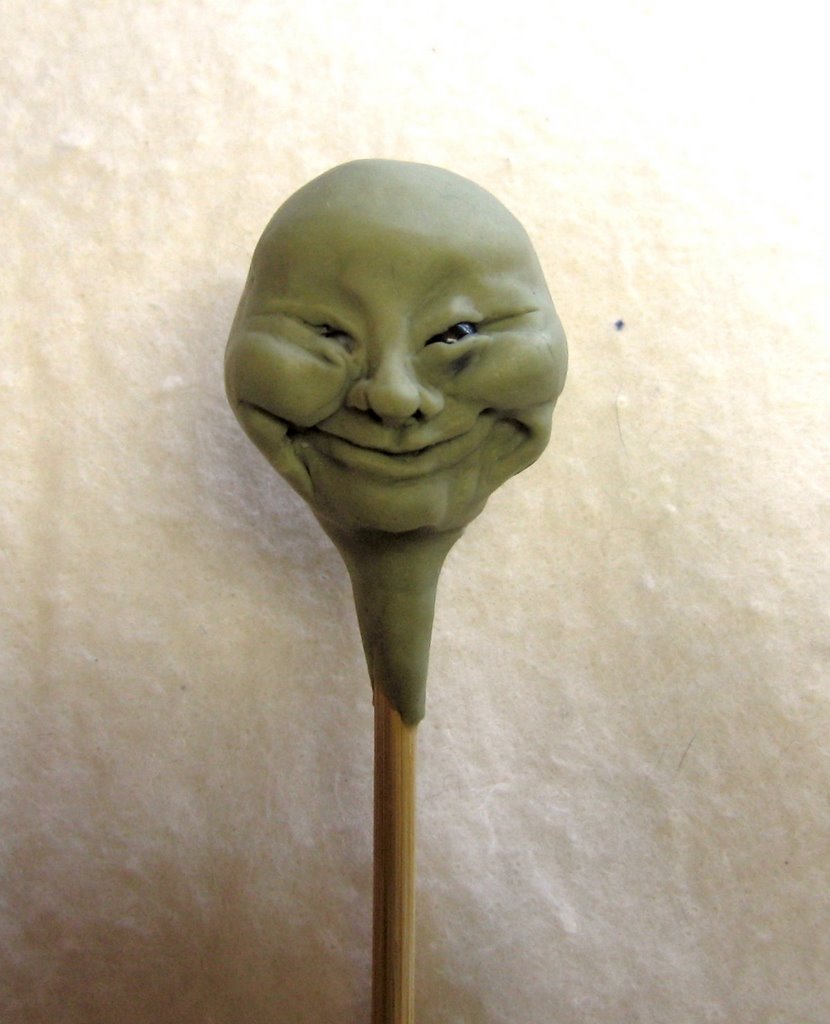
Anyway, this is Vasalisa carrying her torch as she goes about her adventures fulfilling tasks set by Baba Yaga. I love her costume, but I wish her face had turned out a little more realistic... my tastes have passed beyond this type of character face, I guess.


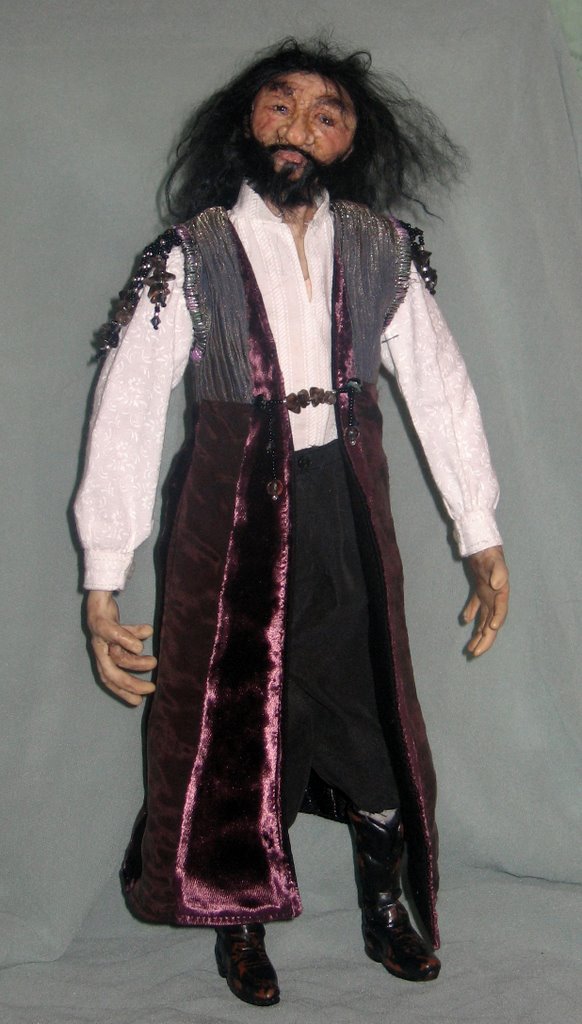
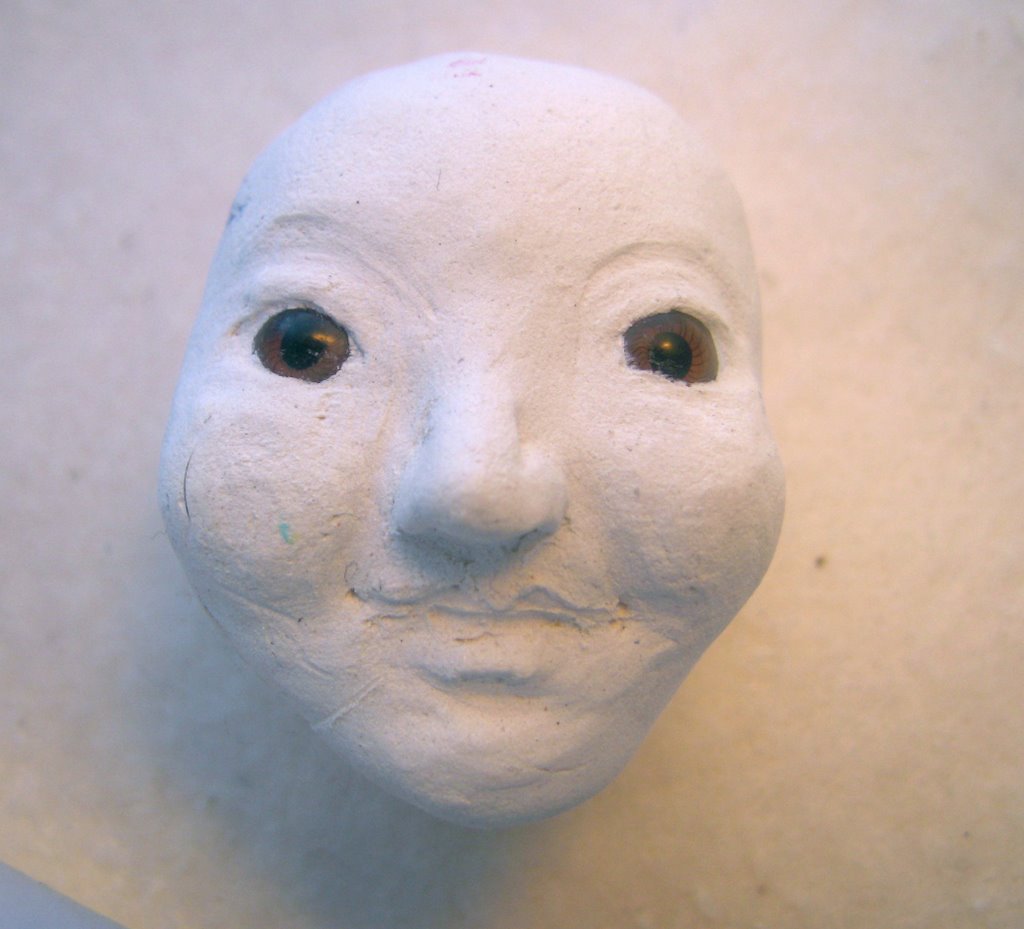
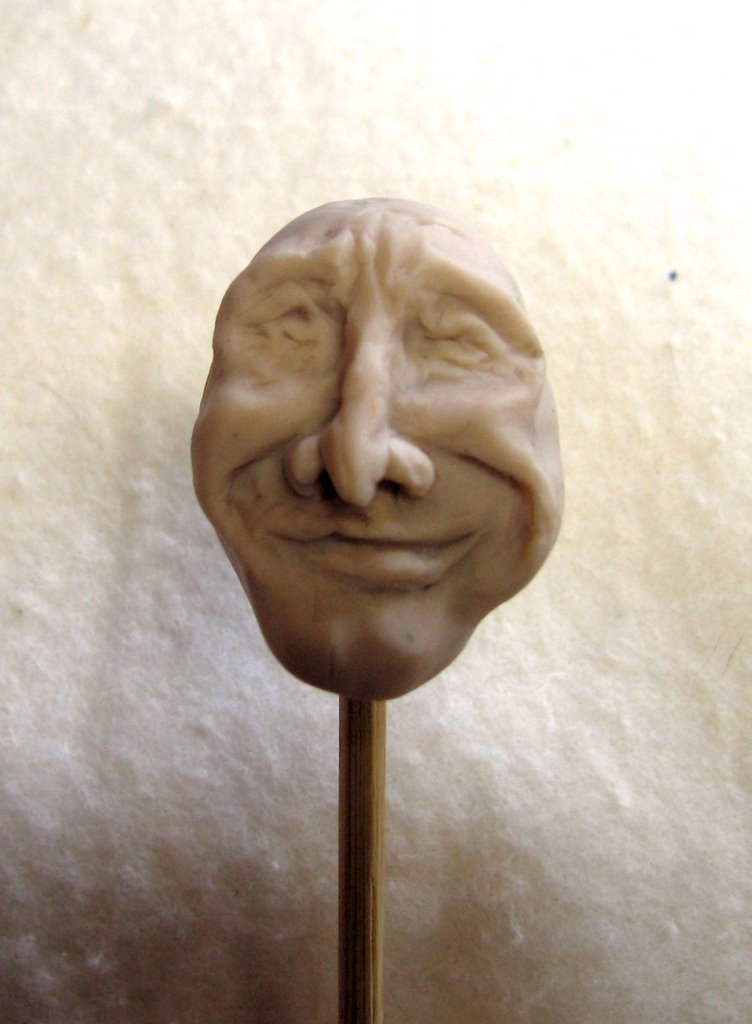
The Baba Yaga half of the doll was just a blast to make! HER face pleases me in every way, though I wish I could get sharper details around her eyes. I used colored pencils and perhaps acrylic paints would have been a better choice there...


This is such an unfortunate angle from which to view her face as you can only see the tip of her nose. It would be better to get her in profile where you would be able to tell that her nose extends 3 inches from her face!

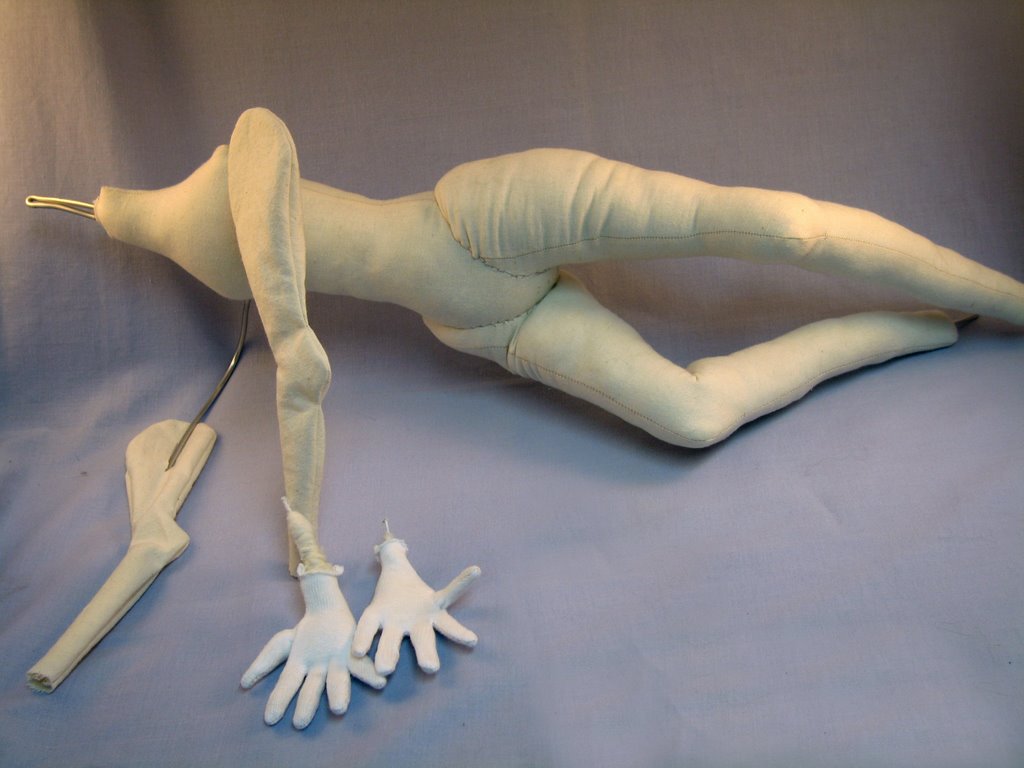
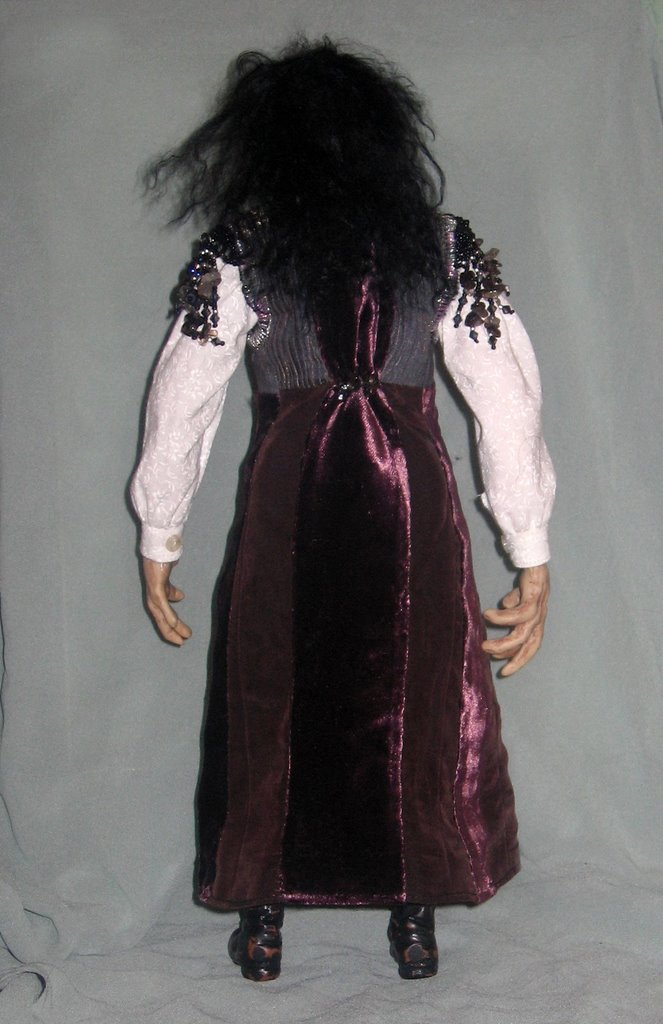
This photo gives you a better view of how this doll is put together. (Boy, I really do need a bigger light tent, don't I...)

The pattern is by Melinda Small Patterson of Smallworks. She also has several dragon patterns available, as well as a really cool hand pattern available free at her site. While her patterns are very detailed and time-consuming, they are also extremely well designed, and the instructions are well written and detailed. Anyone who is willing to devote the time and effort to creating one of her designs will be able to make a project to be proud of.

Monday, December 11, 2006

The end of a very long journey

The Doll Street round robin swap based on the character of Flat Stanley is almost over. Unless she got mailed out of order, my "Spirit of the Dance" should be coming home soon! This has been a loooooooooong process -- over a year and a half. I am looking forward to having her home and reading the journal of her adventures.

"Flat Fiona" is a lovely mermaid by Linda Danielson of Sooke, British Columbia. My original plan was to give her a complexion -- she is still wearing only her original coat of gesso -- but I couldn't paint over her tattoos because the tattoo ink isn't waterproof. You can see where I smeared the ink on her wrist just a little... oops!

I could have sealed her and tried again, but by the time of thought of it, I had already had another idea... this travelling mermaid is going to go home with her own portable body of water in which to swim, complete with swimming buddies.

The plaque is made in the style of Christi Freisen, from her new book, Under the Sea. I used 2 layers of polymer clay sandwiched around a sheet of wire mesh for strength. The "stones" on the sandy floor are lampwork beads along with some shells I picked up on the Oregon coast of the Pacific Ocean this summer. The waves are accented with pearls and beads as well.

I may have gone a little overboard, but it was so much fun that I couldn't stop once I got started...

I am already planning another one, this time a little larger and for ME.

Friday, December 08, 2006

Working through Trials

I haven't had much time to create lately. My grandmother suffered a stroke recently, and my sister's husband was diagnosed with a stage 4 cancer in his brain. Needless to say, it has been a worrisome time. DBIL came through surgery for the removal of the tumor successfully, and is now working with therapists to retrain his brain to control the left side of his body. I don't quite understand all the ins and outs of what he's going through, but my sister and my mom are keeping me posted and we are just praying as hard as we can for grace and strength to face all that is yet to come.


Thank you to ALL who have been aware of this for your continued prayers for his complete recovery.

In my usual way, I turned to my handwork to keep myself busy and my mind occupied with something other than worry...

I had planned to weave a blanket months ago and have had the warp measured, cut, and waiting to be put on the loom for ages. I hit a snag when I simply couldn't decide what yarn to use as weft, and then it got too hot to be working with wool, and the whole project got set aside. I decided last week to weave it up into a prayer blanket for my DBIL and started hunting through my stash to find a suitable color for a more masculine blanket.

In an effort to reduce my stash, I have been spinning up odd lots of old fibers and I just happened to be spinning the last bumps of this blend from Spinderellas . Hmmmm... I noticed how nicely it went with the warp. I threw in a few lines of the singles just to see what the effect would be, and WOW! BRAINSTORM! I could weave with these singles straight from the wheel! Talk about fast!

It is working up into a really cool sort of faux plaid design. If I can spin fast enough to keep up with the weaving, I hope to have it finished by next week and get it in the mail before Christmas. I have some reservations about sending an object that will require special care to my sister and her family, but Jake says it is too beautiful not to send and they will love it later. I hope so. I don't want to be the cause of more stress, when my only intention is to send a tangible piece of care and hugs, with prayers woven into every thread...

And lastly, I have to share my Christmas Moth. Because I am an idiot who loves to overextend herself, I signed up for a Christmas ornament swap on my sculpting list. I received the idea for this piece in a dream and HAD to make it. As usual, I overdid the whole thing. But I guess I can get away with it at Christmas where glitter AND pearl AND metallic all in one piece just sort of goes with the season, LOL.

The body is made of 2 layers of polymer clay with a piece of wire mesh sandwiched in between for strength. The embellishments are balls of clay accented with stones, pearls and crystals applied in the style of Christi Freisen. Let's see... this guy has carnelian, 3 different kinds of pearls, jade, gold beads, and Swarovski crystals. Oh yeah, and 3 colors of Pearl-Ex AND glitter!

I'd like to keep him, but then I'd have to start all over again for the swap!

Friday, November 24, 2006

A Good Day

We had a lovely holiday... a good day with MUCH to be thankful for. I set out the food and let everybody have at it. With plates in hand, they settled down to watch football. Jake doesn't often get an entire afternoon to just sit down and indulge himself like that, so it was my pleasure to make everything as laid back and relaxing for him as possible.

Now, I like football as much as anyone, but my hands *need* to be busy, so I picked up some clay and began to play.

This lovely thing is the round robin doll that is staying with me this month. Doesn't she have a gorgeous face? She is a world traveller, touring the world with her treasure box. I have been agonizing over what to do to her for a few weeks now, so I was quite relieved to finally have An Idea! Yesterday was the perfect opportunity to just sit and play and keep everybody company as well.

I was inspired by the work of Jean Bernard to give her some roots to keep her centered while she wanders...

I began with the top of the box. She had been simply glued to her base, and while the connection seemed pretty secure, it utilitarian rather than attractive. I thought I could do something about that.

Here is a closeup of the front of the box. I forgot to take a photo of the back, but it's pretty much more of the same, so you get the idea...

I would have liked to spread the sculpt out a little farther along the top of the box, but I didn't want to obscure what previous artists had done. The "Emperor's Gold" paint that I used stood out against the pink a little too strong; this morning I added a light wash of Lumiere's "Halo Pink/Gold", which connects the elements nicely.

I continued the "Roots" theme down into the inside cover of the box. I really got to go to town here. I just kept going and going until I finally ran out of what apoxie clay I had mixed up... it took me two whole football games to complete, but it was so much fun that it seemed to take no time at all.

For once in my life, I have a travelling project complete BEFORE the 11th hour before it is due to be mailed!

Wednesday, November 22, 2006

I have absolutely no business blogging today. I should be cleaning. My son and his wife are coming for a visit for Thanksgiving and their room isn't ready yet and the bathroom is not fit to be shown to outsiders. We haven't seen them since July, so I want everything to be nice.

On the other hand, I have been working all morning, and these hats are going in the mail today so I NEEDED to get a photo of them. LOL!

These are for a "parts swap" on Fabric Doll Art. The finished dolls will be in the form of Holiday tea pots! I especially like the green and pink one with the angel button. I wish I could find another one of those buttons...

It is good to be in the sewing room after so much time spent painting.

The painting bug has bit me hard however, and I have begun another canvas. I won't work on it until after our company leaves, as not everybody is as crazy about the smell of oil paint as I am.

This is the reference for my next portrait attempt. It is a snapshot of my mother taken when she was a young girl. I have *always* loved this photo. Wasn't she the cutest thing??

I have a couple other old snaps of family members... I think I will begin a series.

This is what I have so far. I think I caught the likeness pretty well, but I need to keep working on the placement of her hands. The details in the photo just aren't as clear as I'd like. Hmmm... this might be a good spot to experiment with "lost edges"!

Anybody have any ideas as to what color her shirt might be??

OK, back to cleaning. It really will be nice to have the house completely clean again. It makes it so much more comfortable to be creative.

I hope that everyone who reads this has the most Blessed Thanksgiving. May you have as much to be thankful for as I do!

Sincerely,

Judi

Saturday, November 18, 2006

For Judi W...

Because she asked, I am posting this photo of my domino magnets for Judi W. (Hi Judi!) I sold about 2/3 of what I had, and thank goodness I had them! Between these and what I called "Hanglie-Danglies" (little bead combinations hanging from a small parachute clip) I made a LOT of kids happy... which lured in their parents, who bought other stuff. (happy grins!) Even 2 of my canvasses!

Lots of "ooh"s and "ahhh"s and some good sales too. I actually sold more than I anticipated, which is good, but oh! I am tired tonight.

The reactions to my canvasses was both amazing and disappointing, though now that I think about it... not surprising. A few people simply walked right past my table as if they didn't even see it, which is a *little* weird as I was spilling out into the path way with my easles... MANY people were interested in them, and even very complimentary, remarking how unique they were. The ones who seemed most fascinated by them -- and some seemed to be completely mesmerized! -- wanted to know all about how I made them... now that I think about it, I wonder if they weren't hunting for ideas...

(Not to worry -- I gave Sherry Goshon FULL credit and gave away NO secrets!)

I have nothing but the deepest respect for those brave and HARDY souls who do this for a living. How do they DO it??? I would SO much rather make stuff than sell it!

Did I mention I was tired...??

Thursday, November 16, 2006

Ready or Not...

It's just a little church craft bazaar. No big deal... right? Sigh...

As much as I love sharing my work, I still dread the "I can find it cheaper at Wal-Mart" comments that I KNOW will be forthcoming. I KNOW in my head that not everyone will like everything I do, but I don't have to like knowing that! I especially don't like it when they tell me so to my face...

OK, I'm taking a breath and getting over it!

TA DA! This is my little corner of the world where I will be spending the next 3 days. Most of it is my jewelry, but I dyed some silk and silk velvet scarves too -- they look SO pretty all lined up on that old drying rack. I also threw in my canvasses from my online class, just to see if there is a market here for my very different art. No fruit still lifes here!

If they DO sell, I can afford to buy some more canvasses and make some more, LOL!

I finished 2 more canvasses. I'm not that crazy about the dancer one, but I really really like the Angels canvas. I think it's my favorite. I seriously think they are too weird to sell, but we shall see. I am often wrong. I hope this is one of those times!


Now that I know the basic process, I look forward to refining the technique and making it my own. I like the way the whole process flows, with each step taking its cue from what has gone before. It is an intuitive way of working that I find very comfortable and energizing.

Sunday, November 12, 2006

A Frenzy of Art

Maybe instead of Leaping Calf, My studio name should be ADD Art. I've been jumping from one project like a manic grasshopper all this week, LOL.

This is the first piece I have completed from Sherry Goshon's "Inner Child Wall Art" class at Joggles.com. I am reasonably pleased with it, though I learned a lot about what I DON'T need to be doing for this kind of art. For example, I wish I had sealed with paper with the words on it on the back as well as the front. The paint under the paper seeped through and the words aren't as clear and easy to read as I would have liked. On the other hand, they blend well with the rest of the piece and don't stand out too much. Oh well.... it's done now.

It has been a wildly entertaining class with lots of give and take between the students and the teacher. Those are my favorite kind. It has also been a s-t-r-e--t---c----h for me to branch out into this kind of art. Flat AND 3D just felt sort of "wrong" at first... I think I got the hang of it though.


This one is the second of the 2 canvasses I have completed so far. This one is just for me and will be my signature piece. Again, I wish I had protected the paper...

I have 6 more in progess, but only one more is as large as these. 3 of them are pretty little...


This last one is from Jean Bernard's "OOAK Journal" class at Class Heaven.com. Another fun class with some interesting and innovative journals coming out of it. The face is from one of my own sculpts, but other than that, I pretty much followed the teacher's instructions. I have some good ideas for another one that will be a little more my own design.

AFTER the bazaar next week! Until then, I am in a frantic finishing mode. Time to be creative later, LOL.

Wednesday, November 08, 2006

A Finished Object, at last!

I finished Lydia's portrait yesterday in painting class. I am so pleased with it -- I honestly had no idea that I could paint like this. It is SO satisfying to complete a project of this magnitude, especially one with so many potentials for disaster, not the least of which is my beloved daughter never speaking to me again!

I have already begun the undersketch for another portrait. This one will be taken from a very old black and white photo of my mother taken when she was a very young girl. I am looking forward to the increased freedom of *not* having to follow an already-decided-upon color scheme, as well as not having the model looking over my shoulder every week...

Here is where I am on the first of my mixed media collages...

I think it actually looks pretty cool as is. The teacher called for spray paint as the "cover everything" medium, but I am too cheap and also too in love with my new-found ability to throw paint at canvas. Lots of paint! Lots of color!!

This is the only one of its size I have to this point, but I have 2 more big canvasses, 3 medium size canvasses and 4 little bitty ones at various stages of completion. I just wish I knew what was coming next. I am dying to take the next step!

And finally, as if I had all the time in the world to get stuff ready for next week's bazaar, I went and began a new Eni Oken style piece. She posted a similar piece to her blog a week or so ago, and I just *had* to start one similar to it. Strike while the iron is hot and all that...

This is a dreadful picture, but I was too lazy to set up the light tent. These colors aren't quite true, but you get the idea. Beginning at the center, the stones are ametrine, aquamarine, amethyse, rose quartz, another aquamarine, and another amythest. Can you see the tiny green stones that cover the space between the stones? Those are the last of my peridots. I'm so glad that I found such an exciting piece to spend them on.

The wrapping is going much easier this time -- I must be getting the hang of it. There will be another wrapped ametrine and maybe a few other little things dangling from the central silver piece, but I can't start that part until I finish the wrapping, which gives me some time to ponder ideas for the dangle too... I can't wait to finish it. After all... I still have 9 days before everything ELSE has to be finished for the bazaar...

All the time in the world, right?

Friday, November 03, 2006

I am in 2 minds about sharing these photos of my works in progress -- I am so pleased with what I have accomplished so far, but I just can't give a viewer an idea of how much is left to do to these pieces. There is still a long way to go.

For one thing, the whole surface will be getting several more coats of paint and then more embellishments, but these photos will give you an idea of where I am going. I have already adjusted the folds of the stockinette draping based on what I see here in 2D, so taking them wasn't a total waste of time.

The piece to the left "Freedom - Leaping Calf." It is going to be my signature piece. It will hang in my studio, and accompany me when I do anything like a craft show or demonstration. Unfortunately, everything is still wet and shiny, so you can't really get a good idea of the wealth of texture on the surface of this canvas. Ignore what is left of the black writing as well as the colors of the draping -- it will all be painted over in the end. (I find that my calligraphy skills aren't up to the challenge of the design of this piece, so I cheated and used a fancy font on the computer. Sigh...)

Look hard -- you can see the capital "B" which begins the quote. I cut it out of cardboard and coated it with modeling paste, so it is quite dimensional. There is also a stylized sun in a celtic knot design stenciled in modeling paste in the upper right.

The second piece is more experimental in nature. I am using it to practice on. The "hills" are finger painted in using a modeling paste that has had little glass beads mixed in. It is softer and a little less dimensional than the other paste, so I may add another layer to make those hills stand out from the surface a bit more. This particular angel is my favorite body shape. I couldn't use one of my own original sculpts for the face though, because they are all too big. I had to resort to one of my Sculpey mold faces. I wish it had a little more "life" in its expression, but oh well. I can see I am going to have to sculpt some smaller faces if I want these pieces to remain entirely original.

I am dying to get started on my "Inner Gypsy" themed piece, but I already have requests for works revolving around other people's signature verses, so that one may have to sit on the back burner for a bit. Who knows... I may get some commissions out of this. That would be nice...

Tuesday, October 31, 2006

Just checking

Painting day! I started getting some details in place on Lydia's portrait today. I thought I'd snap a quick photo to check my work -- I am always amazed how reducing a piece to 2 dimensions gives me such a MUCH clearer picture of flaws. And there usually are flaws... sigh...

On the whole though, I am not unhappy with where I am so far! I need to add the shadows that will define the ball of her nose and add quite a bit of color to her lips. The background above her head needs to be toned down too. Her right pupil got away from me and is too big, but I won't touch it until the paint dries a bit. I have learned that it is almost as easy to make mud with oil paints as it is with watercolors!

The likeness is good though. Her hair is about perfect and I can't believe how easy it was to put in her necklace. I had been worrying about that little detail -- it's one of her signature pieces -- but I think I got it right in about 5 minutes.

I have to start thinking about another picture to paint next.

Monday, October 30, 2006

I seem to be even worse than usual lately about taking off in 47 different directions at once. This time though, I can't help it -- I'm taking a live class and 2 online classes all at the same time. Trying to keep up with the homework in each is preventing me from actually *finishing* anything. Just wait... in a little while I'll be posting lots of FO's.

Yes, I will!

No progress to report on the portraits. We had a guest demonstrator in class last week. It was absolutely amazing to watch him go from a blank canvas to a portrait over the course of 3 hours. I learned a lot, but didn't get any painting done. I'm not sure what to do next, so I'll get started again after tomorrow's class.

I did make some progress on my Pam Grose doll. I had to order a different "skin" fabric for her as the stuff I had on hand just wasn't right. The new stuff came this weekend, so I'll try to get her skinned and photographed today or tomorrow. This pattern is becoming quite a challenge.

I am taking an online class called "Inner Child" by Sherry Goshon at Joggles. It's a multi-media assemblage using all kinds of materials selected around a theme. I had so much fun painting the background canvasses that I couldn't stop at 1. I have 5 begun at the moment... The larger ones are 11x14 and 16x20 inches. The 2 smaller ones are each 8 inches square. I really like that size.

I also have some tiny canvasses to play with, but I haven't painted them yet. I think I have enough going at the moment!

The faces are lifted from molds I took of my own sculpts. Hmmm... I see now that the face on the purple canvas is too big for its shape. I'll have to play with that one a bit more. The shapes are cut from cardboard and covered with acrylic texture medium.

I want to wait now before I do any more to them until the last class is posted. I need to be able to *see* where all this is going before I make any more choices. I DON'T want to screw these up!

These are two of the sculpts I made to take molds of. The third one is misplaced this morning. I'll have to hunt her down as she's my favorite and I want to make a complete figure out of her later. Not all of the faces are from my original sculpts. I have a few commercial molds as well, but I don't know if I will be using them. Maybe some of the tiny ones on the smaller canvasses...

The faces are all pressed out of either paper clay or La Doll. Can't stand working with either one but they make nice castings so as long as I have it I might as well use it up.

Now the hunt is on for related objects to add in. The last lesson will be posted on Thursday. I am DYING to see how we are going to be wrapping this up!

Monday, October 23, 2006

Second layer of color added


I got quite a good long time to myself yesterday afternoon by electing NOT to go to the gym with Jake so I could paint instead. I added the next layer of color to Lydia's portrait.

I see that I need to correct the line of the shoulder on the left, and add the highlight that will give her the hint of a smile on the left side of her mouth. There is something not quite right about the line of her chin on the right side too -- she does NOT have that stubborn of a set to her mouth, though she can be quite stubborn at times...

The undercolor of her hair is just right, as is the beginning of the background. I love the way the denim of her jacket turned out. Now I need to add in her necklace.

I hope I haven't lost too much of the first drawing for when it comes time to add in the details of the face.

Yay! It's class again tomorrow -- I can't wait!

Saturday, October 21, 2006

I certainly have had ample opportunity for making messes this week. These are sample images from the three large sheets of silk paper I made from some roving I have never gotten around to spinning. Oh yum! I can using see these in scrapbooking, paper art, and maybe even in the mixed media collage class I am taking online.

HUGE mess though. Very wet!

I also started an oil portrait of my oldest daughter. My painting instructor set us the tast this week of starting a second portrait to work on at home, while we kept our class project for class. So...

I applied what I have learned so far to a copy of one of Lydia's senior portrait shots.


This is the undersketch, complete with grid. The diagonal lines make getting a faithful copy particularly easy.


This is where I am stopping until the next lesson. I laid down an underpainting in very thin burnt umber, let that dry, then added a layer of local color. I really REALLY wanted to keep going, but I was beginning to make mud in my attempts to blend colors, so I will try to contain myself until this layer dries.

It's so cool to see the canvas in a photo like this. I like the modeling I have achieved on the left side of her face, but I need to correct the shape of her mouth on the right. The lines of her clothing look good too, but the shadow under her left lapel needs to be darker

It amazes me how fast time goes when I have a brush in my hand...

Tuesday, October 17, 2006

I have gotten a lot done this week, even though there isn't much in the way of tangible objects to show for it. My main accomplishment was actually getting a small light tent set up for object photography. I still have some fine tuning to do -- I need better background material and a bigger sheet for the tent -- but the hard part is finished. Now I need to practice!

Just to test it out, I threw in these parts of a doll I am working on. This is Pam Grose's "Female" -- easily the most complicated doll I have ever attempted. By the way, her leg isn't really that wrinkley. I tried to bend the leg to fit it into the tent and it didn't work very well.

I haven't even started the head yet...

I have also begun working toward a long-held dream: I want to learn to paint. The Silverton Art Association is offering a Beginning Portrait Painting Class for 5 weeks this fall, so I decided to take it. Last week we learned how to lay down a grid to transfer our portrait to the canvas. I am attempting to copy Vermeer's "Girl with a Pearl Earring." I've done this sort of drawing before, so this week's homework was a piece of cake. Fun!

This morning we finally got to start painting. Here's what I have so far. When class ended, I couldn't believe that 3 hours had passed so quickly.

I think I am in love with the smell of oil paint!

Sunday, October 08, 2006

A Quiet Sunday

We stayed home and slept in this morning -- the whole family has been so on-the-go this week that it has been the height of luxury to simply do nothing. I could get used to this...!

I did get bored after a while though, so I decided to do the last finishing touches on my Dungeon Master. Here he is. I gave him a very ornate key chain, a bejeweled turban, and his very own dungeon steps to pose on. I am so happy with the bent leg pose -- it gives him better balance and a more active look.

Who would have thought that the funny little head with the mismatched eyes I posted a few weeks ago could become such a figure?! I am aware of his flaws -- oh, those hands! -- but I am still happy with the outcome.

This little lady is "Spring Chicken", a round robin doll it was my turn to work on. I thought I would be brave and give her a face. (Someone has to!) The head itself had rather full lips sewn in to the outline, so I decided to go for an "Ethnic Bird" look in keeping with the theme that has already been set. I'm not sure I entirely suceeded in what I was attempting to do -- her eyes ended up a little too close together -- but I don't think I need to be ashamed of my contribution.

To tell the truth, I kind of wish I could keep her. I have a zillion ideas as to how she should be finished. I look forward to seeing a photo of her when she has made the rounds of all the artists who are to contribute to her creation and see how she turns out.

And finally, I want to share my wonderful "Living Dolls". Last night was the big Homecoming Dance at the High School, so of course I had to get pictures of the girls in their gowns. I did get some nice ordinary "stand still and smile" photos, but this one is by far and away my favorite picture as it captures their personalities so well. Alice is SUCH a diva, and Lydia was elected to be a Senior Class representative on the Court this year -- oh my, and isn't she proud of her tiara!

I'M proud of THEM!

Wednesday, October 04, 2006

Just a quick update today -- I think I have finished his over tunic. Once I get started beading, I can't seem to find a good place to stop. I love this tunic, especially the color. Everyone else in the challenge is seems to be working in black. I think the brown/plum, especially combined with the smoky quartz stones in the beading, give a good "dark" effect that is something different.

Trust me to be the one wanting to do something different...

I need to go through my idea files yet and find a good look to do for a hat. I am NOT good at applying hair -- there has to be a better way! -- so his head must be covered. I think a good hat will also help to balance out the fact that his skull isn't *quite* full enough on top. Learning, learning...

Here he is from behind. I was going for a kind of cape-like effect with the beads and stones draping off the top of the arm holes. I used matching beads to make a closure for the front, as well as a cover for the gathering I did at the back waist to give the tunic a little more shape.

It's a pity I didn't take a photo of his body without clothes AFTER I did the sculpting stitches. He has quite a realistic figure and a great butt. Especially once I remembered that he is, in fact, male, and that males do not usually have waists and hips. Ooops... Can you tell I usually do females, LOL??

Tuesday, October 03, 2006

SO NOT a Father Christmas!

Jake *told* me his face was all wrong for a Father Christmas character -- I should have listened. I dug out every last reasonable shade of hair I own, as well as one not so reasonable, and he wasn't happy with anything but the black. Honestly, this guy is turning out to be as autocratic as his face. So I guess Jake will get gloating rights for being right THIS time. Instead of Father Christmas, he is going to be entered in Doll Street's "Dungeon Master" challenge. He tells me he will be a great "Keeper of the Keys".

(People who don't play with dolls will probably think I have lost my marbles, but trust me -- they do TOO talk!)

I am pretty happy with his clothing so far. Everything fits! He will also be wearing a hat of some sort and a long over tunic. I am hand sewing the tunic right now. The main fabric is a velvet which is too wriggly to sew accurately by machine, and then there are a few coordinating fabrics that set it off just right.

I wanted the tunic to be in black and silver, but I found an old brownish plum velvet formal at the thrift store that was such a delicious color I knew I would have to use it.

His accessories will include a belt with a key chatelaine, and perhaps a staff or a whip of some kind. Hmmm... his hands aren't really posed to hold either of those things though... I'll have to think about it some more.


Just for fun I have included this close-up of his boots. They are modeled after a photo I found on the 'net of a pair of boots worn by a woman surgeon from the Civil War. They turned out well, but next time I will know to leave more of a "slot" around the top edge in which to tuck pants. These have barely enough of a ridge to conceal the raw edges of the pants fabric.

I keep learning!

Wednesday, September 27, 2006

So far, so good...

This is where I am so far in my attempt to create a finished figure from one of my head sculpts. I'm practicing on this guy because he is good enough to finish, but not my best piece so I won't be too discouraged if he isn't totally remarkable. I aim high. (grin)

I'm not at all happy with his hands. I forsee more sculpting practice in my future. Not a problem -- I adore getting my hands into the clay!

I am VERY happy though with his boots. They almost look real up close. I sculpted them in brown, painted them black, then sanded them lightly to make them look like worn leather boots.

The next step will be some needle sculpting on the body to give him a little more shape, and then I can begin his costume. Right now I am thinking I want him to be a Father Christmas type figure. I already have some lovely brown-ish velvet that will be perfect for a robe or cloak.

Just for fun I'm putting up this photo I snapped of the very first head I ever sculpted. Isn't it so awful it's funny?! I know most faces are slightly asymmetrical, but I don't think there is a single feature that even begins to resemble its counterpart...

At least I learned that I hate paperclay, and have never forced myself to endure touching it again.

The last shot for today is the necklace I promised in the last post. This is Eni Oken's "Chaos" pattern, done with blue and pink peruvian opals and sterling silver. The charm on the center stone is the chinese character for "Happiness". I have some small drops I am considering attaching as dangles as well, but I haven't decided yet. As much as I adore fringy stuff, I am liking this one just as it is too.

Monday, September 25, 2006

September...

There is *nothing* like September in Oregon. The days are so painfully beautiful, and even more beautiful because you just KNOW that they are numbered. The rains are coming. They are going to stay for a very long time, and the sun may not be seen again until next February when the late winter high pressure systems come.


This was the view from my front yard at about 6:15 a.m Sunday morning. My heart ached with the beauty of it.


I injured my back last week, which is why I haven't been posting. Nothing terribly awful, just enough to make sitting at the computer a little painful. It's all right today. I've even been able to resume my workouts.

Anyway, this was a good opportunity to lounge in front of a few good movies and finish some of the wire work I began last week. This is the bangle I made using the pattern from Eni Oken's site. The main "stone" is lampwork glass. It is set with sterling silver, turquoise, bone, and carnelian. I am extremely pleased with how it turned out, right down to the hand shaped hook and clasp. The little length of chain with the clasp is so that it can be extended in case the buyer has a larger wrist than mine.

I'm also working on Eni's "Chaos" necklace. The beading and wrapping is finished. It just needs the chains and a clasp yet. I can't wait to finish it -- unfortunately I won't have any more time to play until perhaps Wednesday. This wire stuff is as satisfying as sculpting. I just can't get enough of manipulating things with my hands.

Saturday, September 16, 2006

More faces

In between the tomatoes and other things, I've been able to sculpt 3 more heads -- these things are addicting! I still have issues with final smoothing, I really feel I am getting the hang of moving the clay around *just* the way I want it to.

I've started adding some Cernit to the ProSculpt -- smoothing is easier, but it's also easier to mash a feature totally out of place. The trade off is worth it though and I will just have to learn to be more careful.

This lady face was done while watching a Patricia Rose video. It's so much easier to remember how to do each step when you work along with an expert. I love the production quality of her videos too -- the camera maintains a nice tight focus on her hands, which is just what I want to be looking at.

This grinning guy was sculpted while Jake was watching football last week. He is modeled after a drawing by Brian Froud from his book "Fairies". The original character from the book is a bit more menacing in appearance, but I think once I get some ears, hair, and a cap on him, he is going to look very close to the way I intended. That doesn't happen to me very often!


This little creature was also modeled after a Froud drawing. I added a little bit of Premo! green and metallic gold to my ProSculpt/Cernit blend and got such a wonderful alien skin tone, not as dark or as green as this photo shows.

He is also good enough that I think I want to go ahead and turn him into a finished figure. For one thing, I have finally managed to use inset eyes successfully. He also survived the final smoothing with almost all facial features completely intact! The left side of his grin sagged a little during baking, but nothing fatal.

I am going to make a mold of this face for my Sculpt-Along list. I can't wait to get some ears on him!