Wednesday, September 27, 2006

So far, so good...

This is where I am so far in my attempt to create a finished figure from one of my head sculpts. I'm practicing on this guy because he is good enough to finish, but not my best piece so I won't be too discouraged if he isn't totally remarkable. I aim high. (grin)

I'm not at all happy with his hands. I forsee more sculpting practice in my future. Not a problem -- I adore getting my hands into the clay!

I am VERY happy though with his boots. They almost look real up close. I sculpted them in brown, painted them black, then sanded them lightly to make them look like worn leather boots.

The next step will be some needle sculpting on the body to give him a little more shape, and then I can begin his costume. Right now I am thinking I want him to be a Father Christmas type figure. I already have some lovely brown-ish velvet that will be perfect for a robe or cloak.
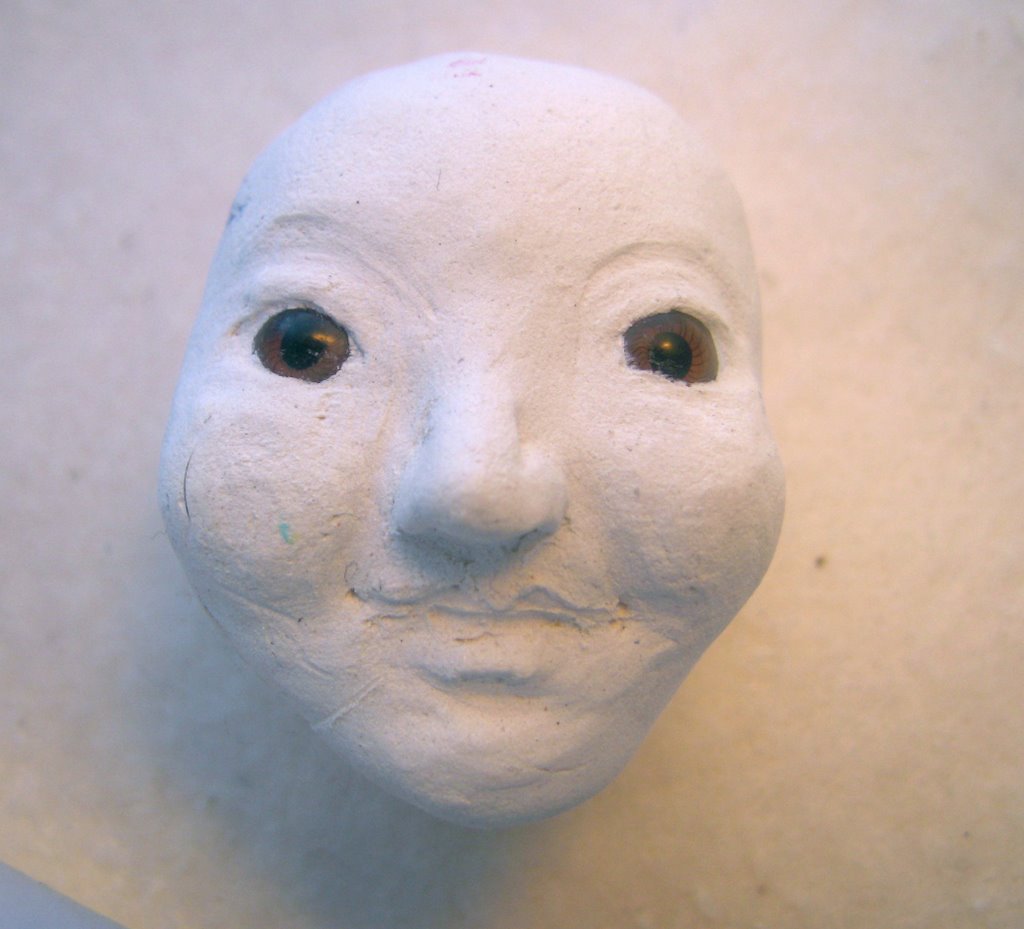
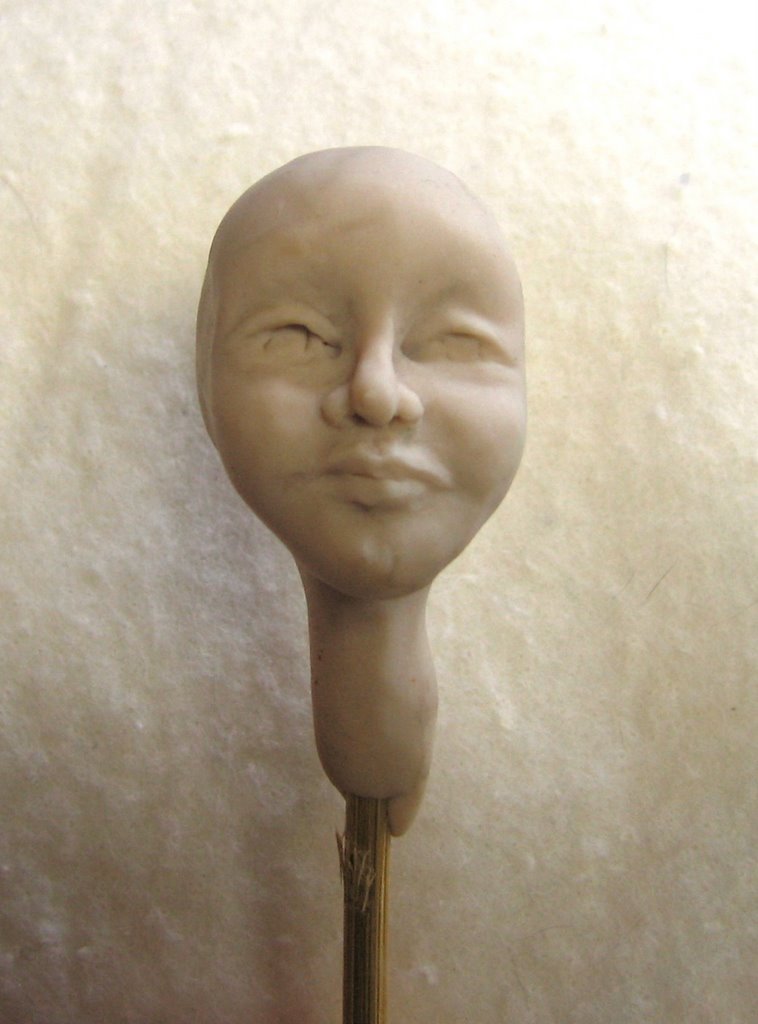
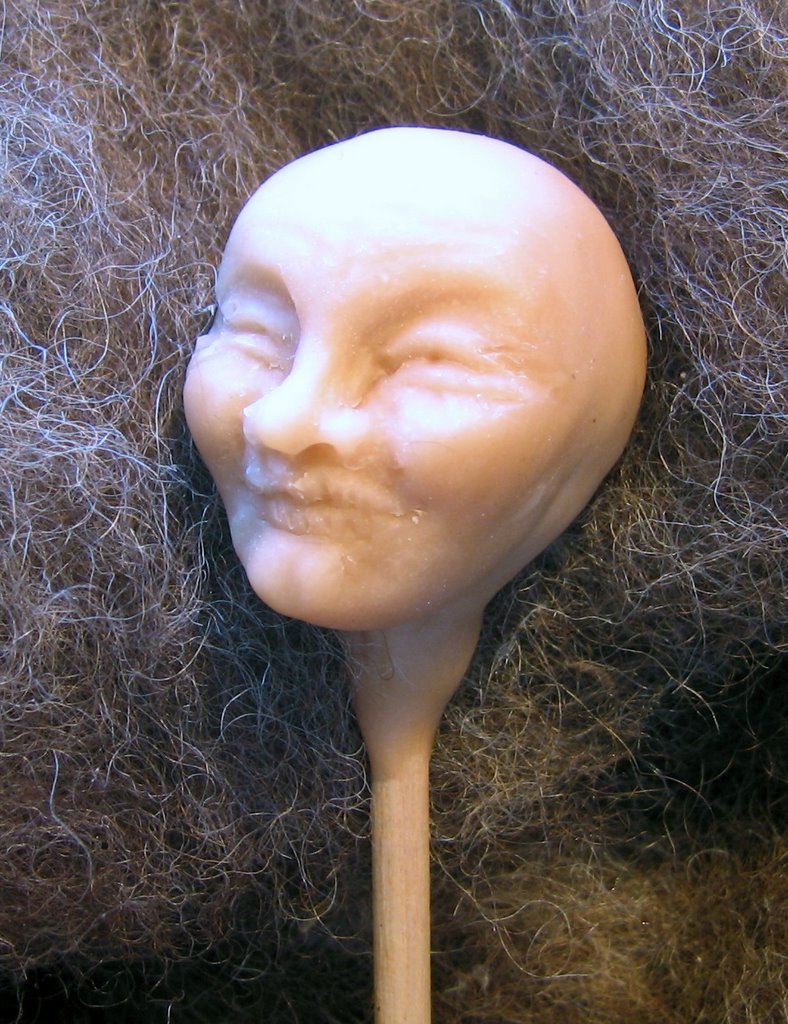
Just for fun I'm putting up this photo I snapped of the very first head I ever sculpted. Isn't it so awful it's funny?! I know most faces are slightly asymmetrical, but I don't think there is a single feature that even begins to resemble its counterpart...

At least I learned that I hate paperclay, and have never forced myself to endure touching it again.

The last shot for today is the necklace I promised in the last post. This is Eni Oken's "Chaos" pattern, done with blue and pink peruvian opals and sterling silver. The charm on the center stone is the chinese character for "Happiness". I have some small drops I am considering attaching as dangles as well, but I haven't decided yet. As much as I adore fringy stuff, I am liking this one just as it is too.

Monday, September 25, 2006

September...

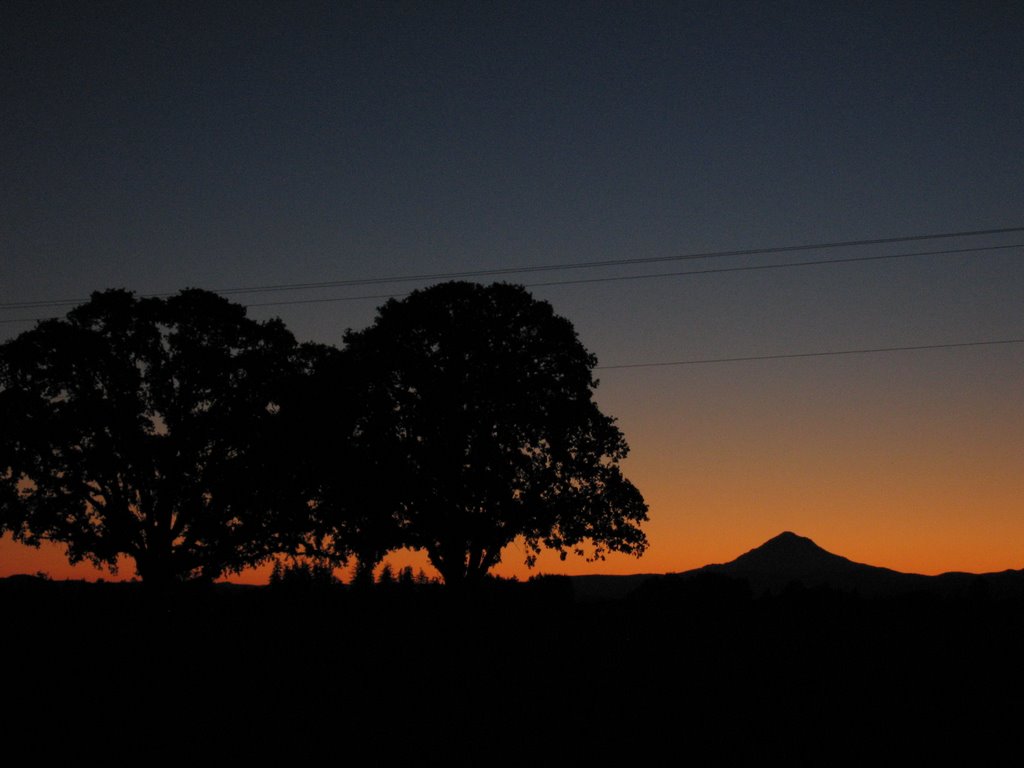
There is *nothing* like September in Oregon. The days are so painfully beautiful, and even more beautiful because you just KNOW that they are numbered. The rains are coming. They are going to stay for a very long time, and the sun may not be seen again until next February when the late winter high pressure systems come.


This was the view from my front yard at about 6:15 a.m Sunday morning. My heart ached with the beauty of it.


I injured my back last week, which is why I haven't been posting. Nothing terribly awful, just enough to make sitting at the computer a little painful. It's all right today. I've even been able to resume my workouts.

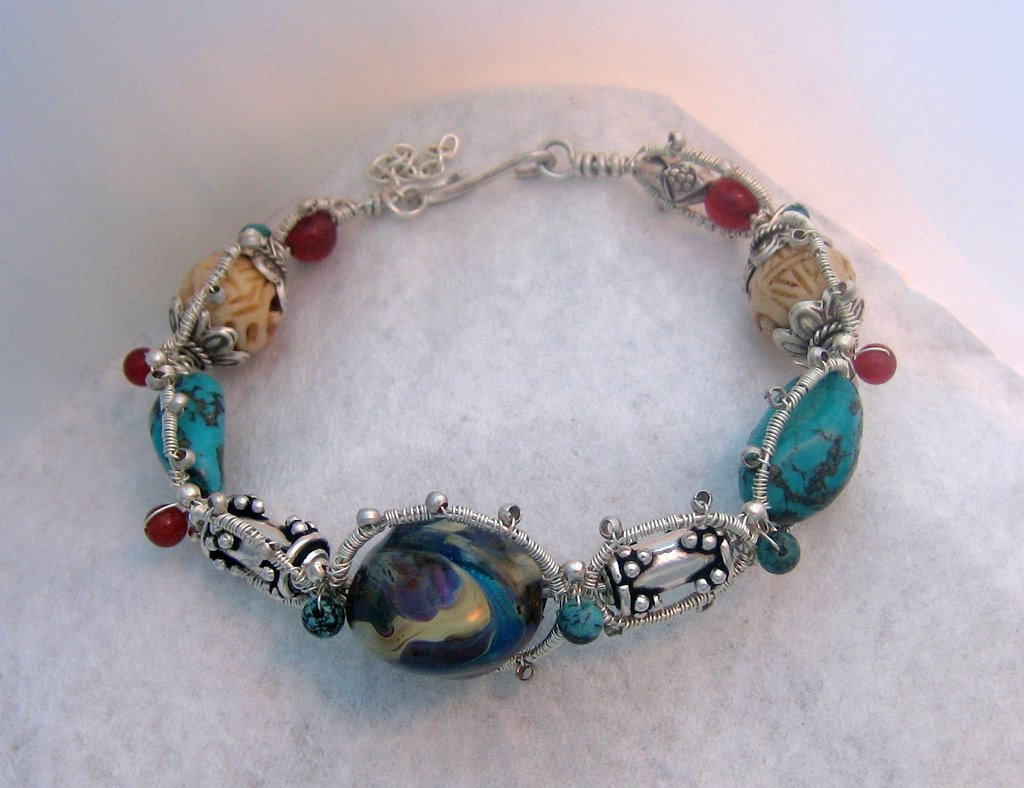
Anyway, this was a good opportunity to lounge in front of a few good movies and finish some of the wire work I began last week. This is the bangle I made using the pattern from Eni Oken's site. The main "stone" is lampwork glass. It is set with sterling silver, turquoise, bone, and carnelian. I am extremely pleased with how it turned out, right down to the hand shaped hook and clasp. The little length of chain with the clasp is so that it can be extended in case the buyer has a larger wrist than mine.

I'm also working on Eni's "Chaos" necklace. The beading and wrapping is finished. It just needs the chains and a clasp yet. I can't wait to finish it -- unfortunately I won't have any more time to play until perhaps Wednesday. This wire stuff is as satisfying as sculpting. I just can't get enough of manipulating things with my hands.

Saturday, September 16, 2006

More faces

In between the tomatoes and other things, I've been able to sculpt 3 more heads -- these things are addicting! I still have issues with final smoothing, I really feel I am getting the hang of moving the clay around *just* the way I want it to.

I've started adding some Cernit to the ProSculpt -- smoothing is easier, but it's also easier to mash a feature totally out of place. The trade off is worth it though and I will just have to learn to be more careful.

This lady face was done while watching a Patricia Rose video. It's so much easier to remember how to do each step when you work along with an expert. I love the production quality of her videos too -- the camera maintains a nice tight focus on her hands, which is just what I want to be looking at.

This grinning guy was sculpted while Jake was watching football last week. He is modeled after a drawing by Brian Froud from his book "Fairies". The original character from the book is a bit more menacing in appearance, but I think once I get some ears, hair, and a cap on him, he is going to look very close to the way I intended. That doesn't happen to me very often!


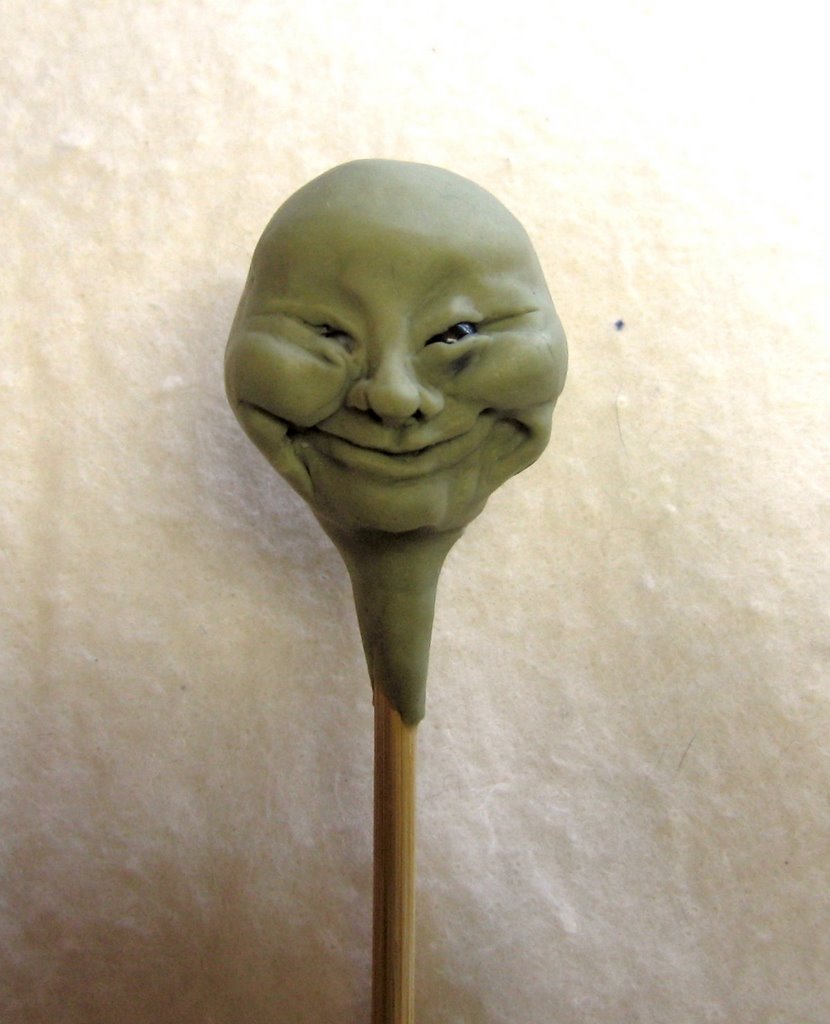
This little creature was also modeled after a Froud drawing. I added a little bit of Premo! green and metallic gold to my ProSculpt/Cernit blend and got such a wonderful alien skin tone, not as dark or as green as this photo shows.

He is also good enough that I think I want to go ahead and turn him into a finished figure. For one thing, I have finally managed to use inset eyes successfully. He also survived the final smoothing with almost all facial features completely intact! The left side of his grin sagged a little during baking, but nothing fatal.

I am going to make a mold of this face for my Sculpt-Along list. I can't wait to get some ears on him!

Thursday, September 14, 2006

A different kind of Creating

Today is the 4th day of the corn harvest, and so far everything is going well, praise God. No breakdowns, accidents or injuries, and the corn itself looks like a quality crop. I am managing to keep my cool and stay loose and go with the flow and all that... but I will still be thankful when it is all over for another season and everything is safely stored for the winter.

With Jake on a tractor all day, working like a machine and almost no time to eat, I have been indulging myself in a massive cooking and baking effort. He SAYS he doesn't have a sweet tooth, but in 4 days he has demolished a batch of oatmeal raisin cookies and a loaf of banana bread almost by himself. I haven't baked since I started my diet last January, so the girls were not happy with him when they got home yesterday and all the goodies were gone already!

I'm doing monkey bread today. There should be enough to keep him going and provide an after-school treat for the girls too. There should be enough...

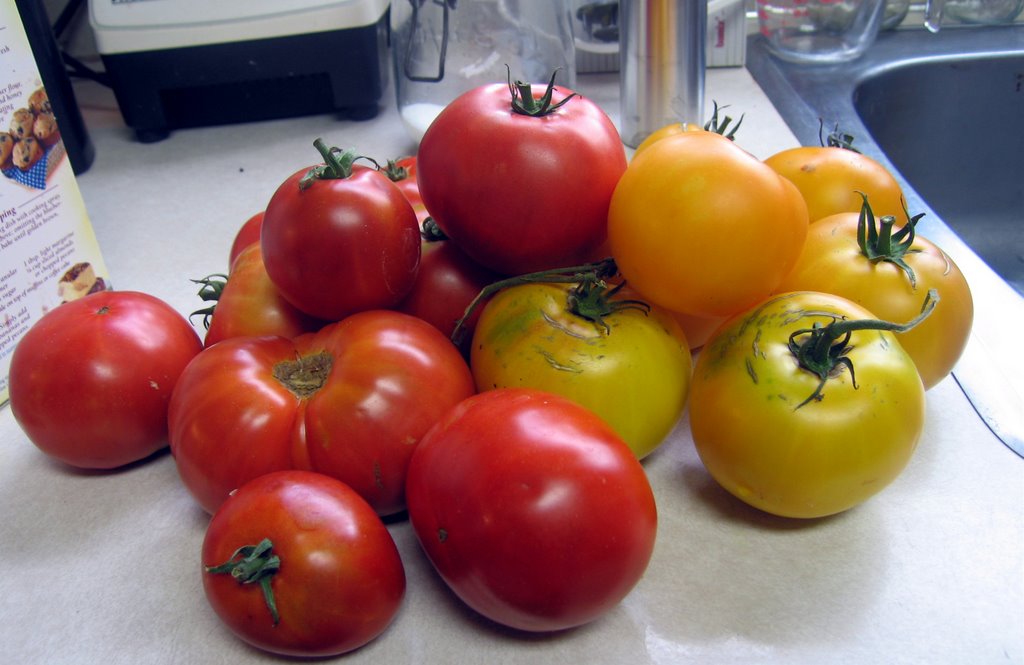
I don't know if you can tell from this photo, but there are 4 different varieties here of tomatoes here, all from my garden. The bushes are going crazy right now and it is all I can do to keep up with the harvest. This family LOVES tomatoes. No tomato, whether red, yellow, or purple, raw or cooked, whole, sliced, or chopped that is safe from any of us. However, even our greedy appetities can't keep up with this year's bountiful harvest, so I am making soup base this week.

A pot like this will make enough base for 2 or 3 meals next winter, all tasting just like the jewels of summer these beauties are. Can you see how good they smell?? A steaming bowl of tomato soup with a warm slice of garlic bread on a cold evening... Yum!

In the meantime, I am slicing and dicing as fast as I can. Thank goodness the weather is cooling and I'm not pouring hot steam into an already hot kitchen!

Monday, September 11, 2006

It has begun...

The corn trucks started rolling in bright and early this morning. That means that controlled chaos will reign at Cascade View Dairy for the next week or so. Sigh... This is my 23rd corn silage season. You'd think I'd be better able to cope with it by now!


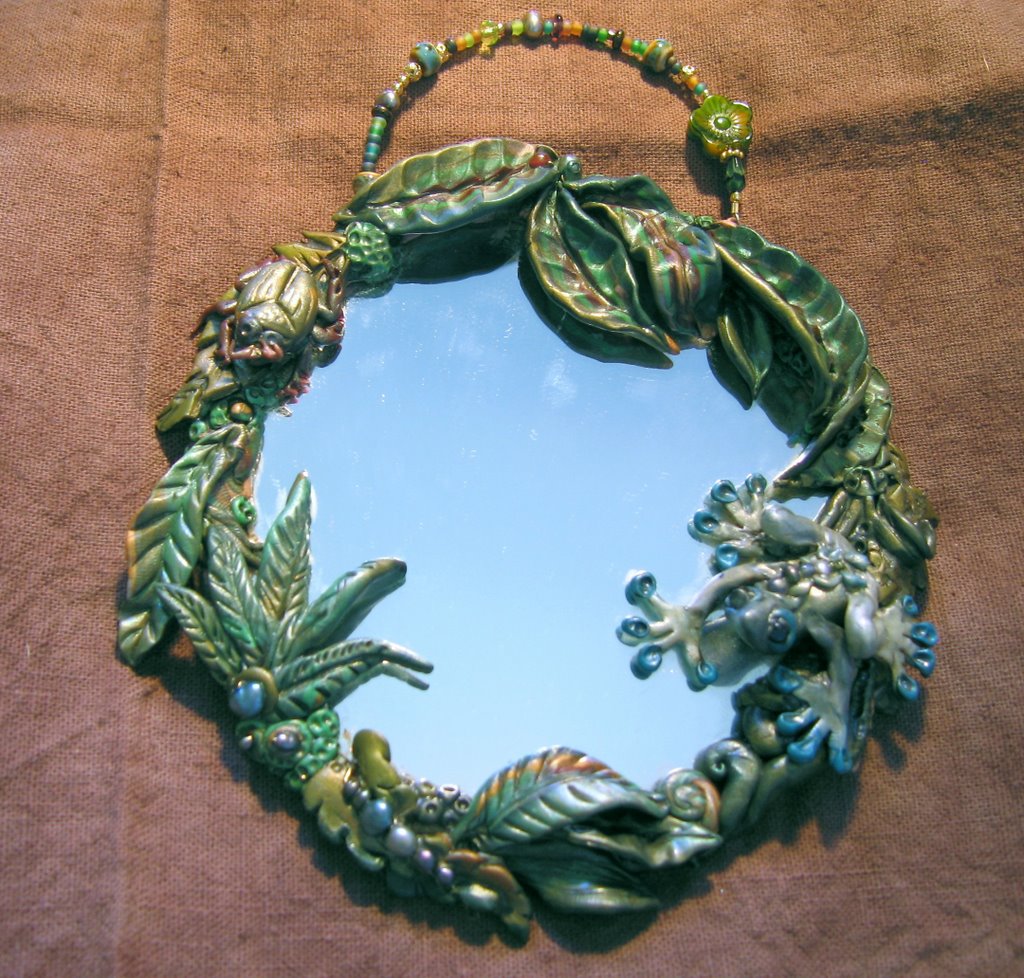
Here you see the results of my playday last week. I took all the "CF style" leaves I had made and positioned them around the edge of a little craft mirror. It still needed something though, so I went ahead and made the little frog to sit on a boring stretch of clay.

The detail in the photo isn't as clear as I'd like -- it is very difficult to photograph a mirror! -- but if you look close you can see him looking up at you with the most quizzical expression on his face.

Ribbit!

Saturday, September 09, 2006

Clay lessons

I had a nice long afternoon to play yesterday. I made up a few armatures, conditioned some clay, and decided to let my fingers come up with whatever they wanted.

This is the first head I made. Just look at those moonies! I intend to make a mold from this one, so the moonies don't matter so much in this particular piece, but I can tell you I won't make faces from anything other than ProSculpt ever again. This head was made from a flesh/translucent blend of Premo Sculpey. I've never had this problem with sculpey before, so I'm not sure what happened.


This photo was taken in the light of a north window. There are more wrinkles in her than show up in the photo. You can still see the rough spots where she wasn't smoothed properly before baking however. Go figure!


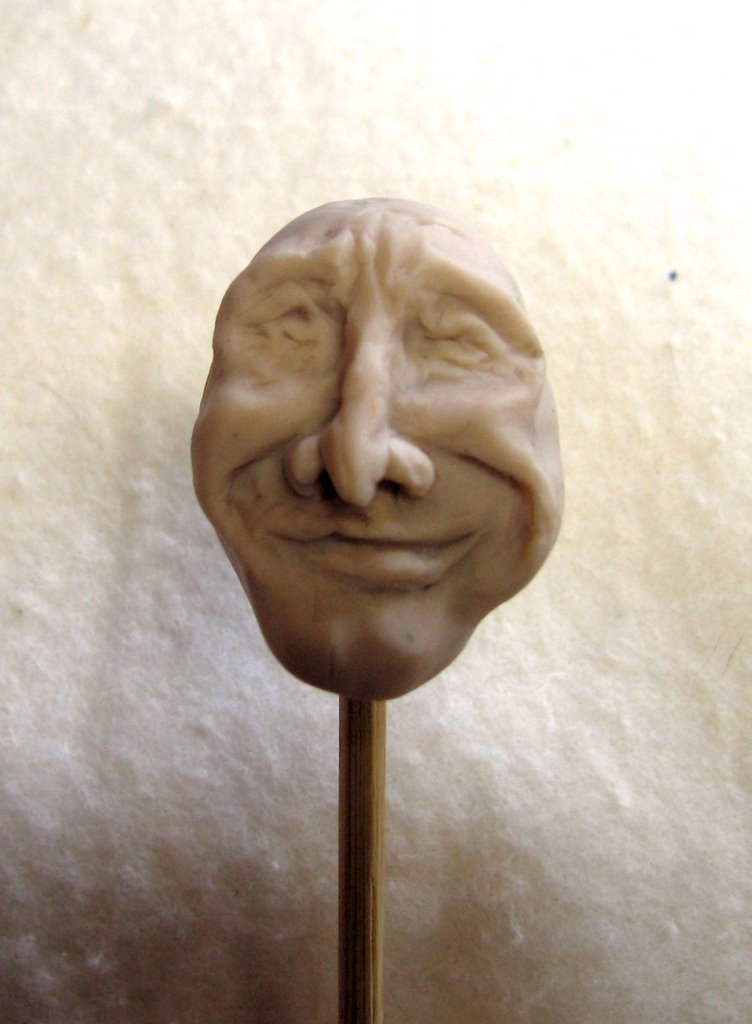
I really like this guy, even though his eyes aren't set evenly into his head. (If you look carefully, you can see that the eye in the right of the photo is set noticeably deeper into the skull.) I think I feel a Santa figure coming on, even if he does look more like Jack Elam than a jolly old elf. Maybe if I give him an eye patch... Just dig that nose though!

I now know that there is more to making a wrinkle though than just carving a line in the clay. If I could only just figure out what it is!

Anyone got any hints??

Thursday, September 07, 2006

I have been home alone pretty much all day today. It's a lovely September day, and I feel great, so I put on some music and went upstairs to play with some clay... and stopped cold at the door to the room. Couldn't even get IN to the room.

Sigh...

It took quite a while, but the light in that room is fantastic, and I was enjoying the music too, so it felt good to clean and it REALLY feels good to be able to move and find things in there again!

I decided to save the face sculpt I had intended to work on for tomorrow, and instead sat down to practice some techniques I have been learning by reading Christi Friesen's books. I admire her style so much!

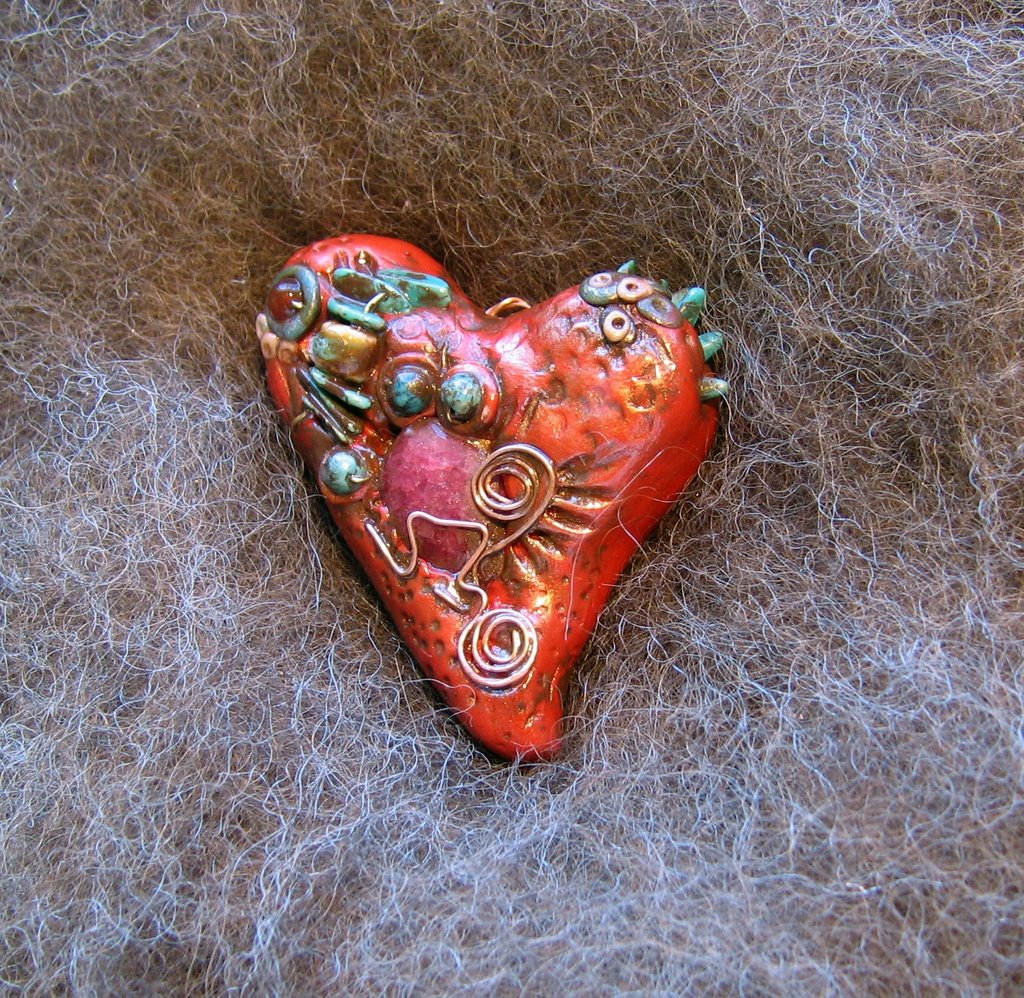
This red heart just sort of formed under my fingers. It's pretty big -- about 2" square, and has a chunkiness and carved-from-rock feel to it that made me reach for copper wire for the embellishments instead of the gold I usually use.

The small stones are turquoise and carnelian. The central faceted stone is a ruby briolette that I broke yesterday trying to thread it onto a too-large piece of wire. (Stupid! Stupid! Stupid!!!) I had no way of wiring it into the clay, so I made a "cage" for it out of more copper wire. One beautiful ruby saved!

(Whew!)

It must have been one of those things that was Meant To Be, as I very rarely work with red.

Monday, September 04, 2006

It is a relief to the mind to actually be *finishing* a few of the things I have bought supplies for and put so much time in to. The paper dolls ARE finished for the Doll Street swap -- I never want to touch them again, even though I can think of a few touches I'd like to make... No No NONONONONONONOOOOOO! No more!


I've been on another bead kick lately too. This time it's stones and silver. Yum!!
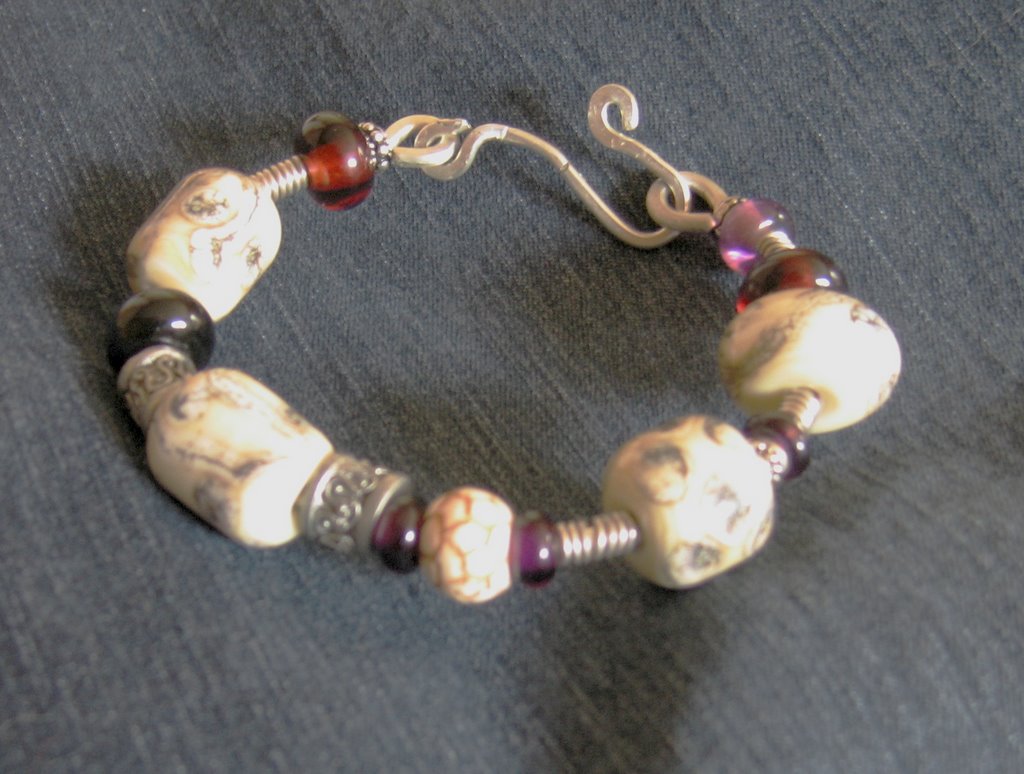
This bangle is the first wire piece I made. As you can see it is VERY simple. I learned that I prefer more ornate styles, and I DON'T like working with 12 gauge wire. Never again!

I have some of those white marbled lampwork beads left over. I am going to try again -- I can do better.

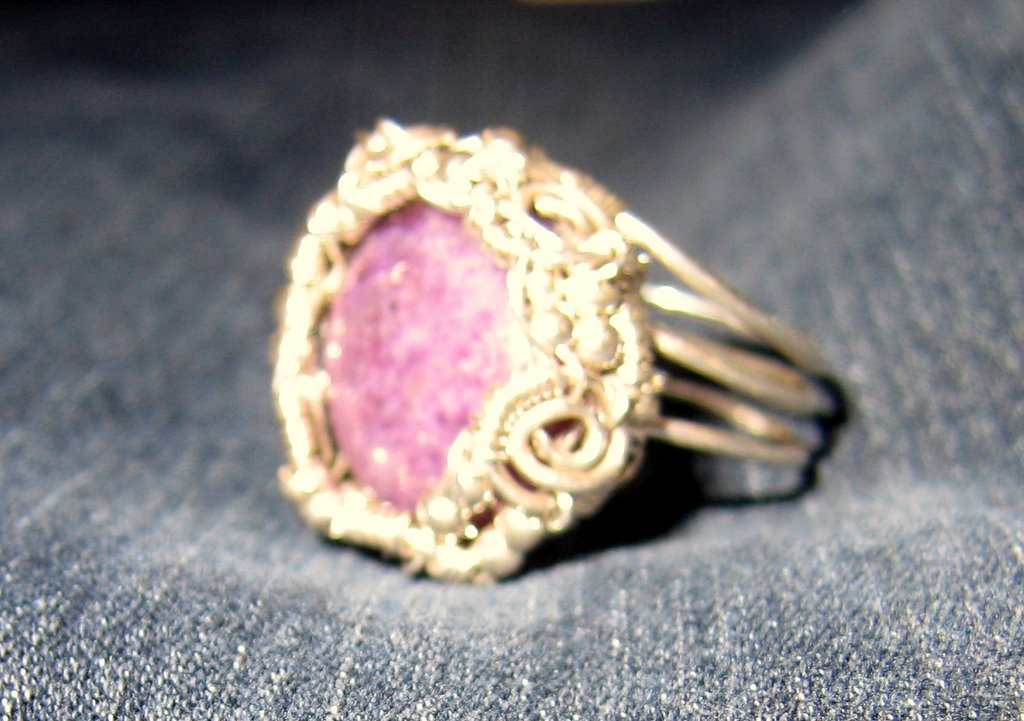
This ring is made using the instructions from a tutorial on Eni Oken's site. Such eye candy!
I think I want to blacken the silver, but I don't have the chemical to do that yet. I've also heard that it smells dreadful, so maybe I will just let it tarnish the old fashioned way. Heaven knows, the climate here is damp enough!

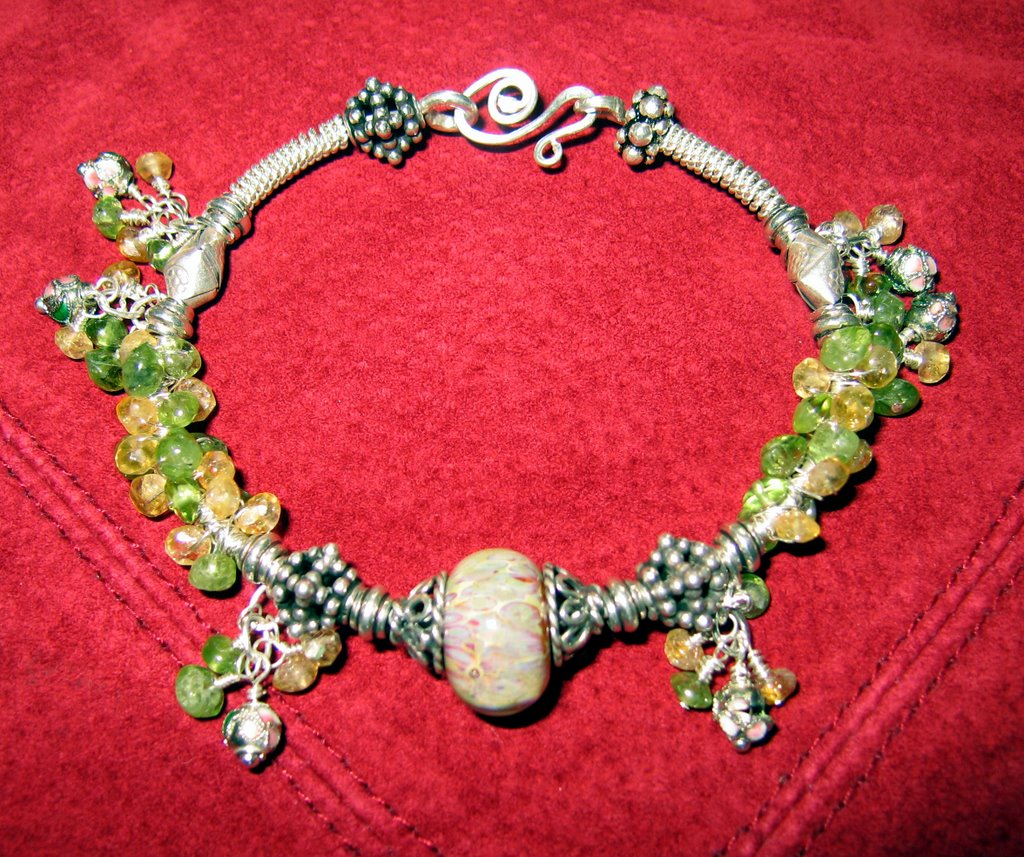
I just finished this bangle this morning. It is made of sterling and Balinese silver on 14 gauge wire (MUCH better!) featuring a lampwork bead, and set with citrine and peridot faceted rondelles.

The lampwork is a little washed out in the flash. In normal light it picks up and tosses back the colors of the stones beautifully. I almost hope this one doesn't sell!

Friday, September 01, 2006

Life is Good!

It has become a tradition in this family to spend the last few days of summer break before Labor Day at the beach in Lincoln City. There is an outlet mall there, so we also do some back-to-school shopping, but the main purpose is to goof off before the mad rush of September begins.

We all agree that it's a Very Good Idea.

Although the girls did drag us through 5 consecutive hours of "Project Runway" one night, we spent most of our time on the beach. The water was way too cold for swimming, but the tide pools are always fun to explore. We never disturb anything beyond teasing the sea anemones a little bit, although Lydia has been known to try to feed things to the crabs.

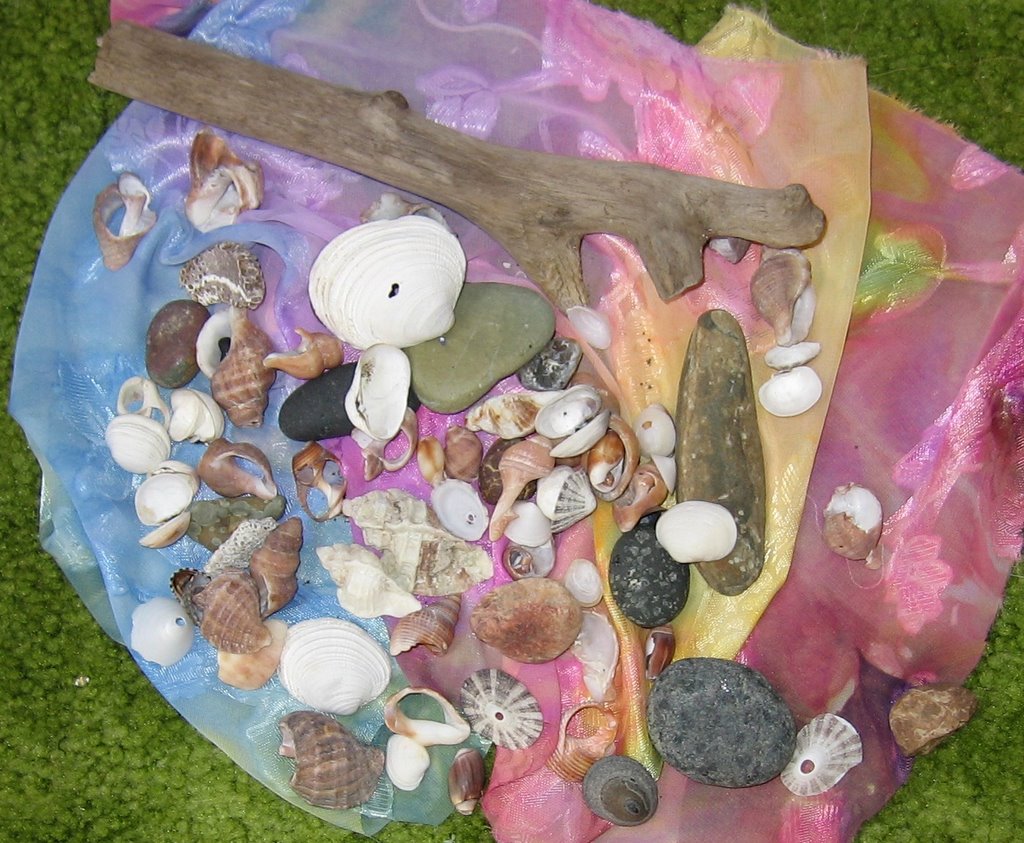
I had my best trip ever for beach combing. I have loved sea shells since I was very little, and this year I found a bunch of intact shells of species I have never collected before, which was pretty exciting. I kept a bunch of broken ones too -- they "broke pretty" into lovely spiral designs. Very idea stimulating!


The sun decided to show off in a major way on Wednesday evening. We took advantage of the incredible light conditions to play with some portrait photography. Lydia snapped this shot of Jake and I after I decided it had gotten too dark for photography. What do I know???


Time to get back to Real Life now!

Friday, August 25, 2006

I have set the white/white doll aside in disgust... I began the work on her so long ago and my tastes have changed SO much (not to mention my skills!) that I don't even like it anymore. Maybe once I finish her and achieve some distance I might learn to like her again, but for now... ick!

So, what to do???

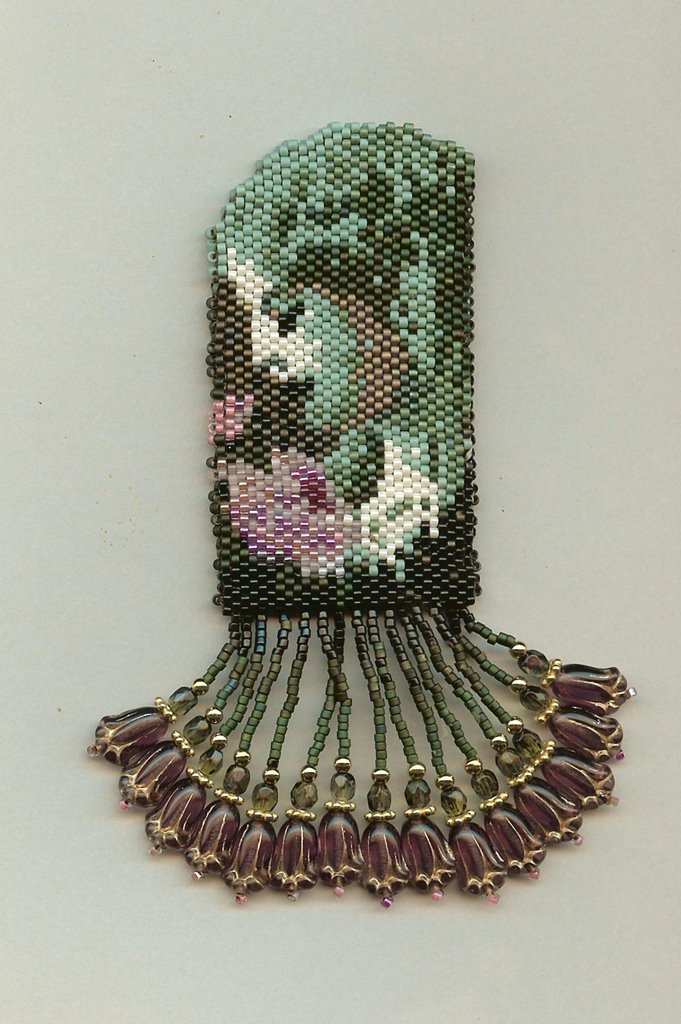
This little amulet bag is a project I started very enthusiastically ages ago when I was heavily into beading. It is a free pattern available on the 'net by Cheryl Assemi .

So, I ran out of the black Delicas for the background. I went to town and bought some more black "Japanese seed beads", but didn't notice until I got them home that they were 15's rather than 11's -- waaaayyyyy too small. Arghhhhh! That pretty much took the oomph out of my motivation to work on it for... um... several years at least.

"She Who Has the Attention Span of a Grasshopper" is my real name I think...

Anyway, in the fit of disgust the followed the last work session on the white/white doll, I decided to tidy up my bead table to prepare for work on the domino necklaces and I found her again. (I have long since aquired the necessary black beads for other projects...) It only took 2 days of beading to finish her, including the fringe. I was SO CLOSE -- WHY do I do this to myself???

I am happy to have redeemed all those hours and hours of work and taken the project this far. I wish I had the eyesight to keep up with the beadwork, but alas, even with my bifocals, it just isn't happening anymore. Sigh... it's a good thing I have so many hobbies!

Anyway, all she needs now is her strap and she's ready to wear. She is so NOT for sale!

Monday, August 21, 2006

Back to Doll Making

Jake is at a meeting in Corvallis all day today, so after getting a little housework done, I took the opportunity to gorge my brain on a bunch of "Lord of the Rings" extras and get some work done on some real dolls. I especially wanted to complete the work on a round robin piece that will need to hit the mail soon. I won't post photos of her because I don't want her "Mom" to see her.

I was on a roll (and only about half way through the DVD I was watching,) so I grabbed my white-on-white doll and attacked her clothes. I have found over and over again when working with other designers' patterns that the doll I make doesn't fit the clothes patterns. This was the case with this doll as well. All her lovely dresses looked like ill-fitting pajamas on her. I used some rather expensive fabric on them though, so no way was I going to start over!

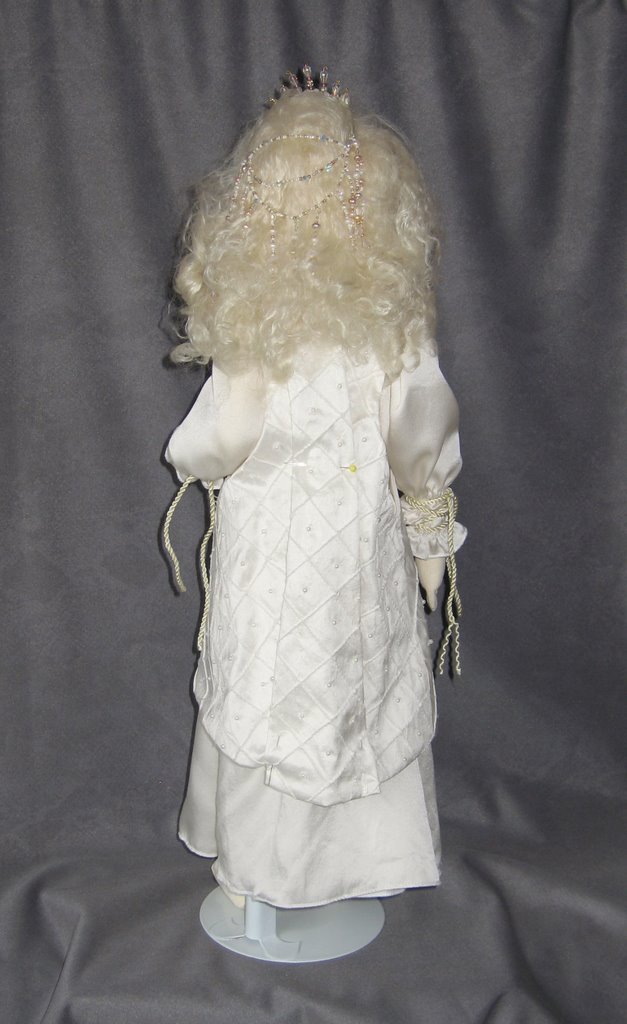
Here she is so far. First I gave her a petticoat to hold out the silk of her undergown, which is very fluid but hung like a limp rag from her body -- not attractive. Then I took in the undergown by wrapping a shape into the bodice with some satin cord. She has such a beautiful figure and it was nearly completely hidden under those shapeless clothes.

I added some of the same cord to the sleeves to add a little more color and texture. I am discovering that adding some darker shades of white really wakes up the monochromatic color scheme. I haven't trimmed the ends yet because I haven't decided exactly what to do with them. Now that I see the photos, I think I will cut them off. They just look messy to me now.

From the back she is looking pretty good! I have pinned in a HUGE pleat at the waist of the overgown -- now I just need to make up some kind of accent to hold it in place. Probably beads to match her head piece.


I have no idea whatsoever why Blogger decided to rotate this photo... Anyway, this is a closeup of her headpiece. It looks beautiful in her hair. If I had somewhere appropriate to go I would wear it myself!


By adding a handle to the mask instead of attaching it to her face, I have convinced her that yes, it does too look good with her outfit. Unfortunately, she is one of the few dolls I have ever made without wired fingers, so I will have to work out a way to make it stay in her hands.

This pattern is the most bizarre blend of engineering technicalities and utterly simple "rag doll" parts. Odd...

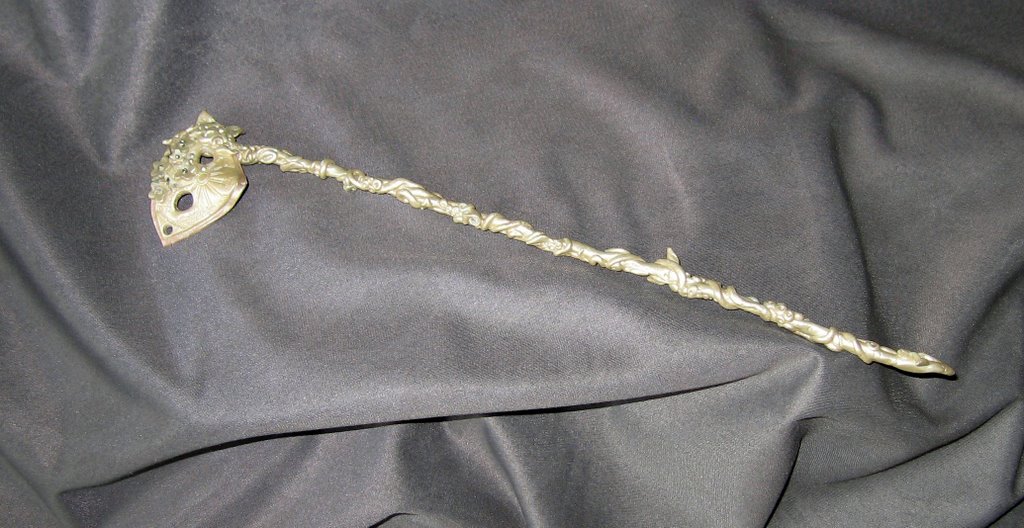
The handle of the mask is just wire with Apoxie Sculpt wrapped around it, then painted Champagne metallic. I want to try a little watered down burnt umber on a small corner to see if it brings out the details or just ruins it, but I am done for today.

Wednesday, August 16, 2006

I had an idea...

I have been wondering just how I was going to set all the dominoes I have been stamping. Necklaces? Key rings? Parachute clips? Just as a pendant that customers could hang themselves? I may do a few of each yet, BUT ...

... while looking for something else, I found Chinese Knots for Beaded Jewellery, (sic) a book I had nearly forgotten I owned. It contains instructions for a bunch of decorative knots. The diagrams are extremely easy to read, and once my fingers got the hang of what they were doing, I found even the more complicated knots are easier than they look, as long as I pay attention.


The red knot was the most fun to tie. The little blue one... well, it looks like the picture in the book, but I am still not quite sure how exactly that one works! The 2 colored one on the right was only a little more difficult because it involved working with more ends. It's my favorite so far.

I practiced using some of my not-so-favorite dominoes. Now I wish I had been brave enough to use my favorites. I really like this look. If I can find a source of nice rattail cord that doesn't cost an arm and a leg, I am going to play around with this some more.

Once I get dinner started, I will be eager to try a few more new knots!

Monday, August 14, 2006

I am too easily distracted...!

While working on the second paper doll I need for the Doll Street swap, I came to a point where I had to let some glue dry.

I am having fun with this one -- she was a bit of an engineering challenge, but now all her pieces fit together and move properly. I am quite satisfied. I need to finish her hair style yet, and add some clothing by way of embellishments. I have some interesting fibers in my stash that should work well.

OK, so... while waiting for the glue to dry, I decided to clean my studio a bit. I came across a box of dominoes I bought intending to make pendants out of them. I stalled out working on them because drilling the holes for the bails was annoying.

Hmmmmm... how to drill those holes without drilling any holes in ME... A drill press maybe? Do we have one out in the shop? No, darn it. Back to cleaning...

Later that day we went to town. We just happened (honest!) to be walking through the Sears store so I thought I would just *look* at the drill presses. Gads -- those monsters would need a whole room of their own! A salesman happened by and asked if there was anything in particular we were looking for, so I asked if they had drill presses in a bench top size. Well, yes they did, but did I have a Dremel tool? There is a press attachment available for the Dremel tool! How cool is that???

I didn't actually buy the press attachment, but it did give me the idea to try the Dremel instead of my power drill to make the holes. HUGE improvement. The dremel goes through the acrylic like butter. I am happy now!

I drilled holes to my heart's content. There is something very satisfying at an elemental level in operating power tools.

By now the glue on my paper doll was long dry, but I was on a roll with the dominoes. I got out my inks and started stamping. Then embossing. Stamping some more. More embossing. (Heat guns aren't *quite* as much fun as drills, but they come close.) These are turning out pretty cool.

I am going to make these into pendants to sell at our church's Holiday Bazaar in November. I have been doing jewelry the last few years, but a bunch of others have sort of jumped on that bandwagon as well, so I am looking to add something new and a little different.

I also want something I can sell cheap to impulse shoppers. My friend Judi Wellnitz wrote a tutorial a while back for doing Altered Business Card magnets and posted it to her blog here . I think they might sell pretty well in a bazaar setting. Hope so anyway... I'll try a few this year to see how they do.
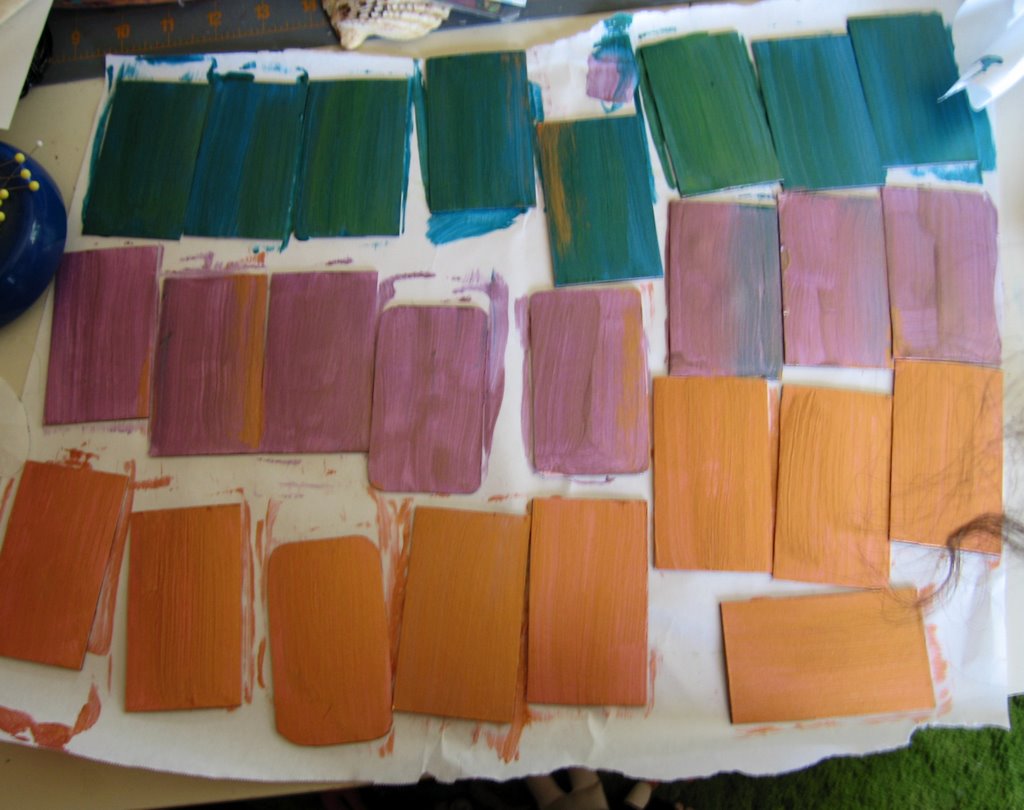
These are what I have so far. The colors aren't very true in this picture -- my camera didn't capture the "halo" effect of the paint I used. Can't wait for the paint to dry!

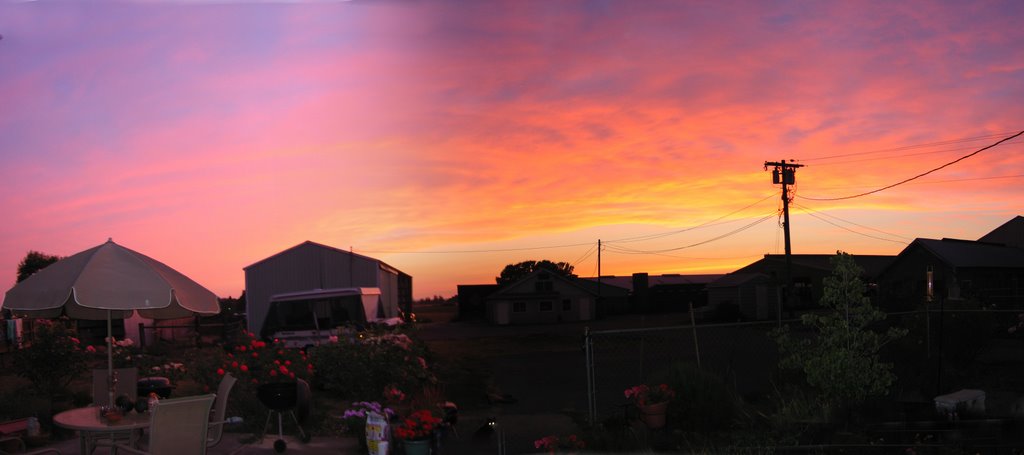
I have one last photo to share. This is the view from my back door the other evening. It has taken me a while to figure out how to load a panoramic photo to Blogger. But can you believe that sky? I wish I could paint like that!

Wednesday, August 09, 2006

One down!

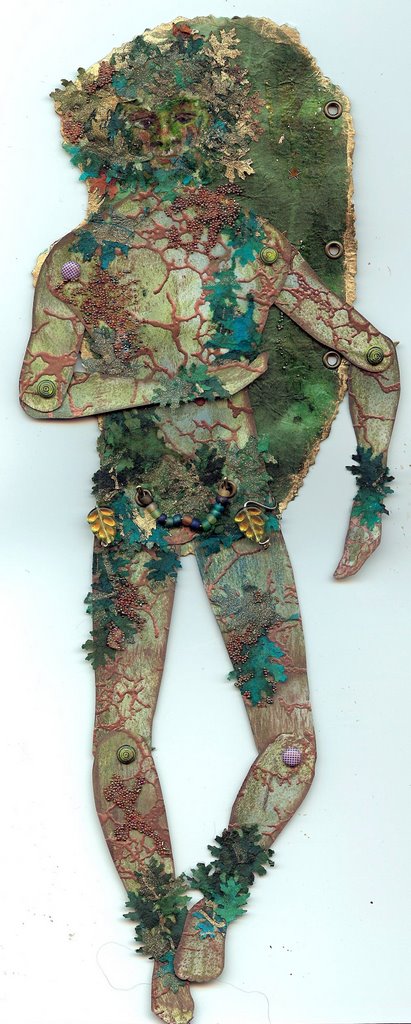
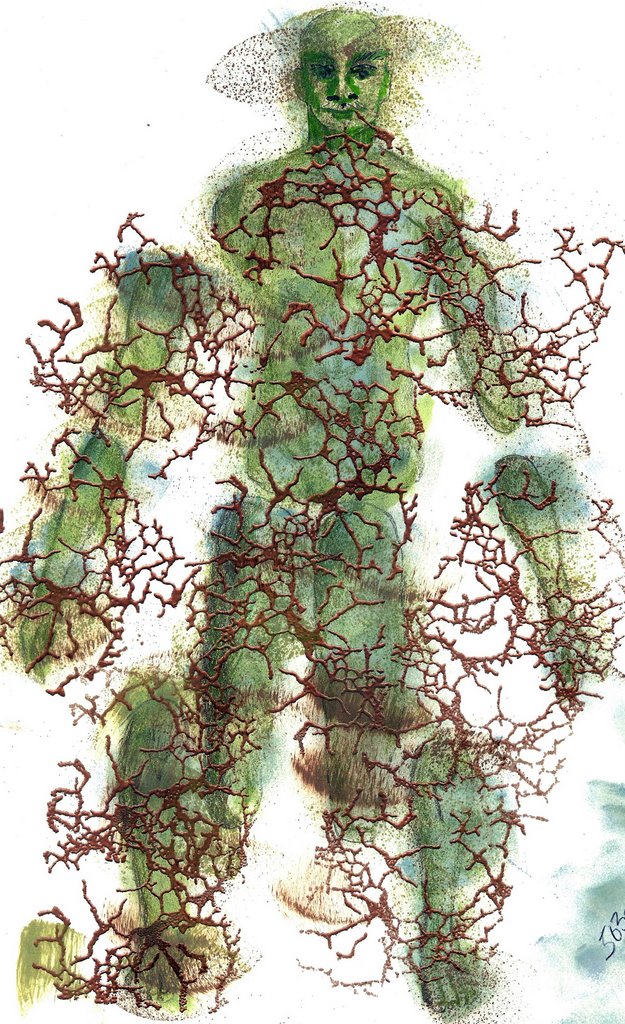
Here is my Green Man paper doll, finished at last. I spent all day on this guy. He sort of just kept WANTING stuff, and a little more inking, and then more stuff. For a nature spirit, he has a consumerist attitude!

I wish I had used heavier cardstock for him. He is a little flimsier than I would like, which is why I made the support card for his torso. I like the way it looks, and it also provides some protection for his crown of leaves. These leaves were punched from a soft hand made paper and are not up to much wear.

He also sports a beaded belt, but that doesn't show up so well in this scan.

One down, 2 more to go...

Playing Paper Dolls

I am comitted to making 3 paper dolls for a swap on the Doll Street Journal this month, so I thought I had better get them done and get them out of the way. I gave myself an afternoon to do it, but here I am, 4 days later, still far from finished. Sigh...

Will it *always* be this way?


This little mermaid is based on a drawing I did last winter. I still haven't decided what to do with her head, but at least the rest of her pieces fit together.

Patti Culea has some rubber stamps out for making paper dolls, they are so cute and so evocative of her marvelous style... Mine must be my own and not look anything like hers. Hence, no head yet.


The doll at left has been so much fun to design. I think I am going to print out another copy of her pieces, as I have learned that it is easier to color the pieces before cutting them out, as long as the lines are dark enough to see through the color.

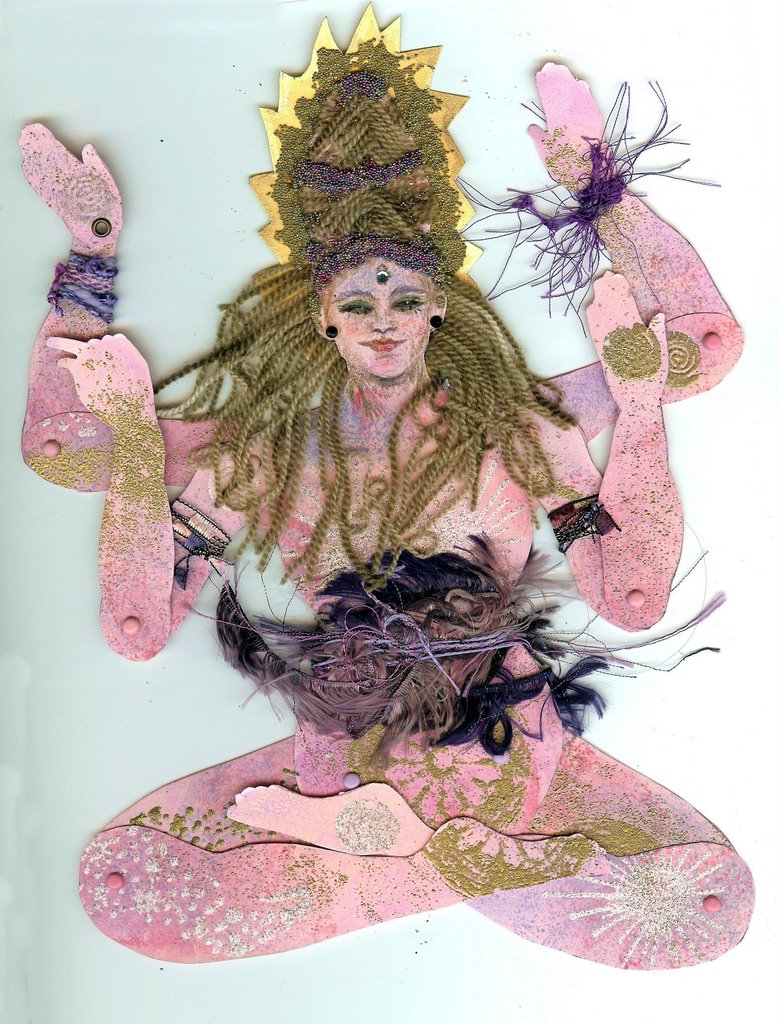
She is based on the Hindu goddess Shiva, the one with four arms. She will be jointed, but is intended to be posed sitting in lotus posture. I am saving her embellishments for last. I don't want to ruin her and I need more practice at this!


This guy on the right is colored, partially embellished, and ready to cut out. He is a paper doll version of a Green Man. I have some very neat hand made papers to make his leafy crown and accessories from. I even found a little oak leaf punch so I don't have to cut them all out by hand, thank goodness!

I just wish I had made his outlines a little darker -- he is going to be a challenge to cut out in a few places.

Now I just need to hunt down my paper punch and assemble the pieces before I forget which is supposed to go where.

Monday, August 07, 2006

Just a Beautiful Day

Unlike much of the rest of the country, we are having a perfect summer here in Oregon. Can you believe how beautiful these photos are?

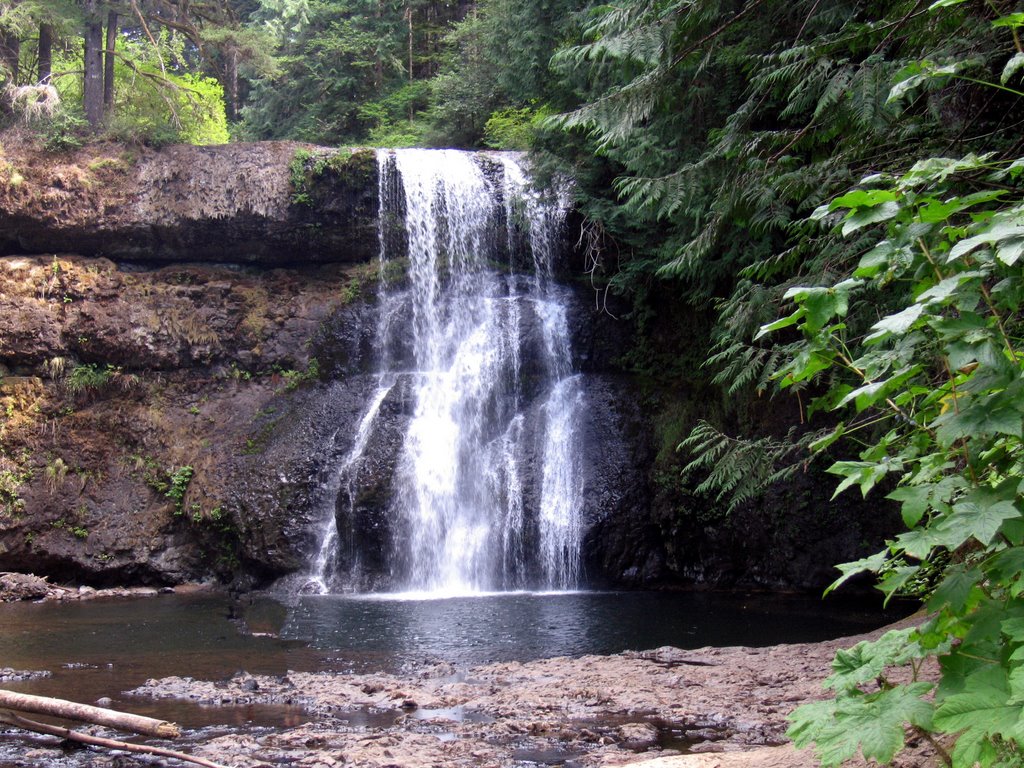
Thursday was our 22nd wedding anniversary. To celebrate, we packed up a picnic and hiked "The Trail of Ten Falls" at Silver Creek Falls State Park. It's a 7 mile hike that goes up and down and around some of the most beautiful landscape I have ever seen .

This is Lower South Falls, one of the prettier and easier to photograph falls.


The path goes behind the Fall -- you can actually put your hand in the cascade. The mist is also very refreshing, especially on a warm day.


While crossing the river, I couldn't help but be struck by the lucious color of the reflected sky in the water. Of course, I HAD to snap a photo. Who knew it would turn out so well?


This is North Falls, probably the most visible of the Falls on the Trail. You can see it from half a mile a way, as well as from each side and from behind. Not many are so accessible. It's not the tallest, the widest, the laciest, or anything-else-ist, but it is still my favorite. The energy there is so peaceful. Ahhhhh...


If you want to visit Meditation Falls (also known as Upper North Falls -- who thinks of these horrible boring names??!) you need to count on adding at least another half mile to your hiking distance. Not a small consideration on this trail, especially if your feet hurt already. I wouldn't miss it though.


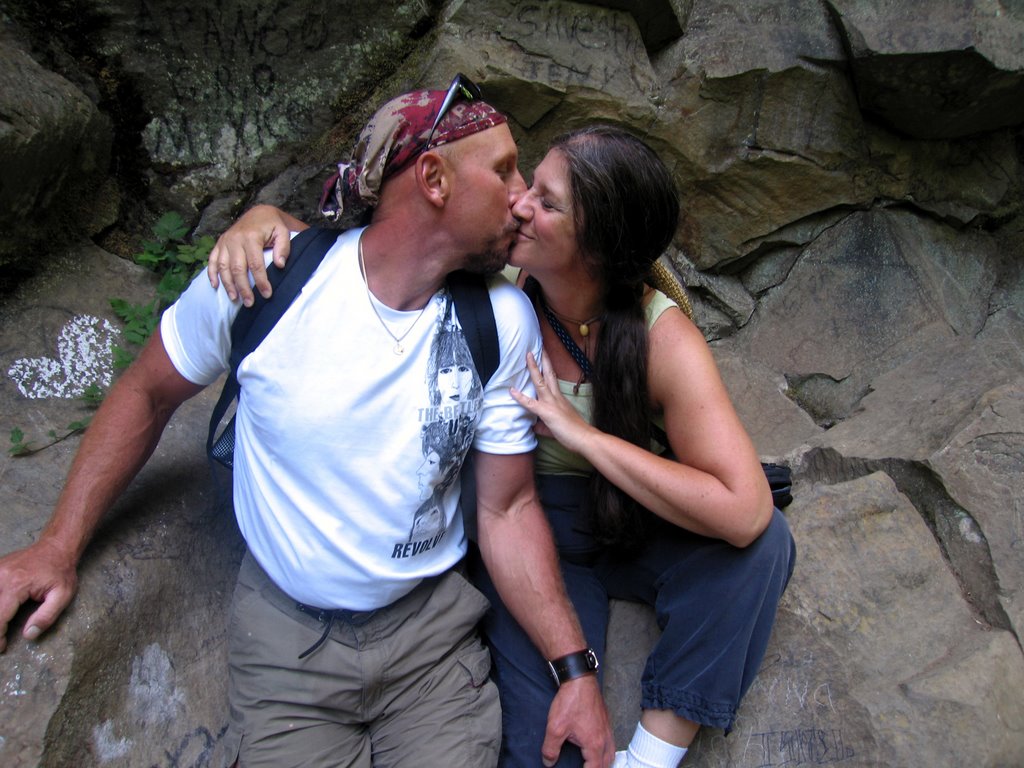
22 years ago, I married my very best friend. I can't imagine what my life would be like without him.

Monday, July 31, 2006

And, Lastly...

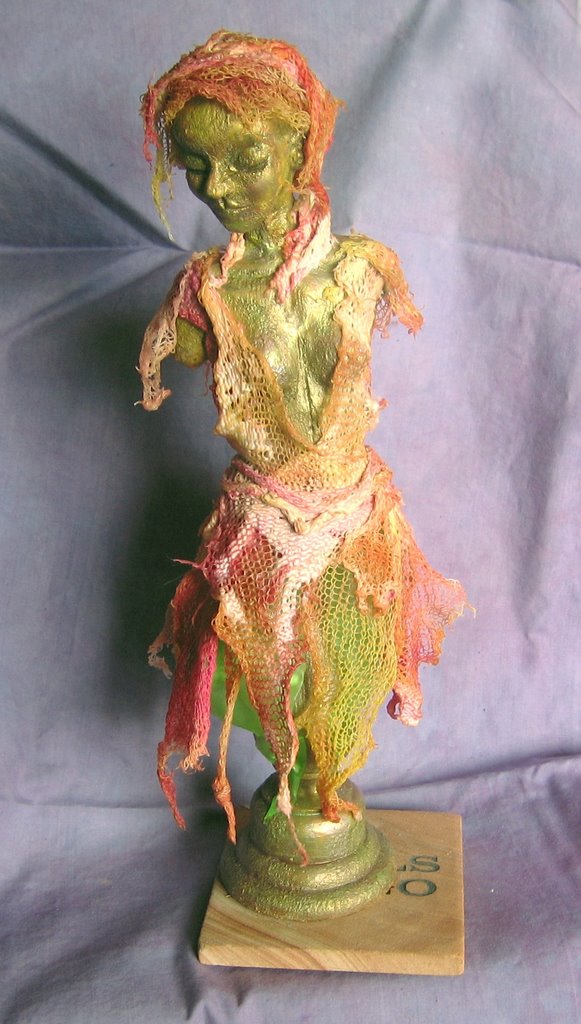
I had fully intended to do a lot more embellishment. I even made wings and some beaded strands, but everything I added took away from what was already there. So...

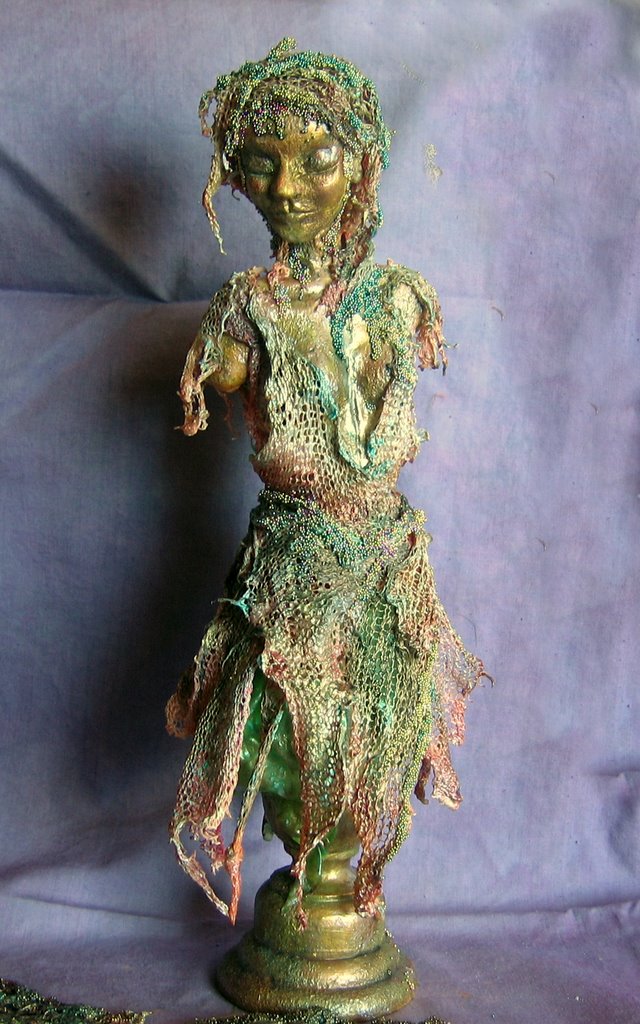
...she is finished. Her colors aren't anything like the "Peace" rose I began with as inspiration, but I LOVE them.

Now if only I could figure out what is causing that annoying little shadow on her upper lip. It is simply NOT THERE in real life.

I don't remember the last time I have been so completely caught up on a project. OR had one with so few snags! I need to get back to my dressing project now. Good! I am actually looking forward to have a project that is something more "cut and dried"!

Sunday, July 30, 2006

Toning it down

Yes, now we're getting somewhere! Remember I said not to worry if you don't like something because you can just add more layers. Let's see... today she got a layer of champagne metallic acrylic paint, some pearl metallic paint, and then Pearl-Ex/Varnish mix in layers of Interference Gold, Antique Gold, and Interference Blue. I think I want to add another layer yet of the mix in a rose color, but maybe not. I need to sleep on that one.

Now, if I can just remember what I did so I can make wings that look as if they belong with her. What color???

THEN I get to start with the embellishments. Can't wait to get out the beads!

Saturday, July 29, 2006

More layers

She just keeps going and going...

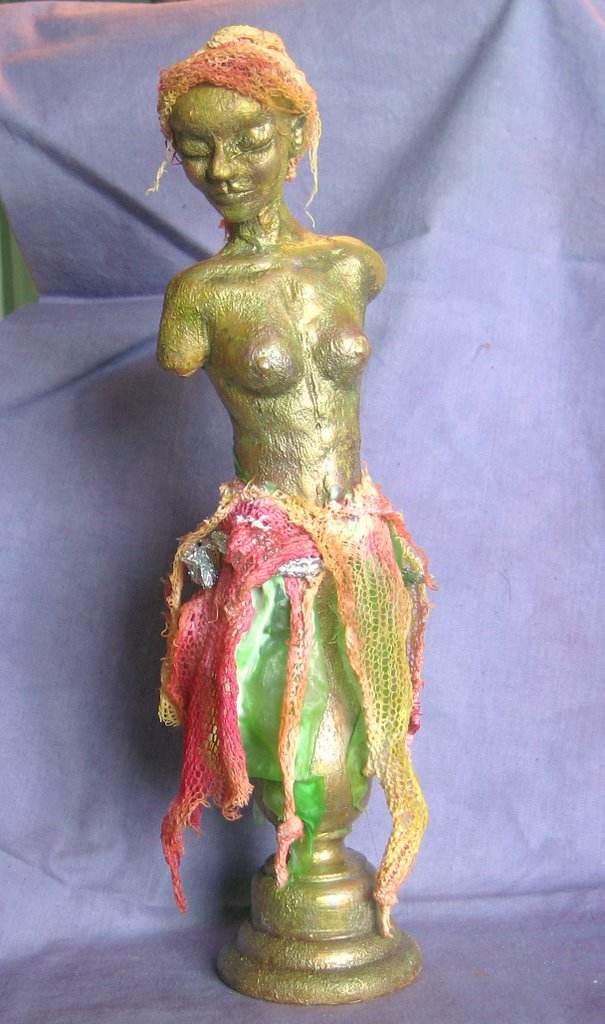
The photo at left shows her with yet another coat of paint (4 colors for highlighting) and varnish mixed with several different colors of Pearl-Ex powder. There is no way to pick up the glow the powders give her with my camera. A very subtle and beautiful effect.

Had to wait for the paint to dry.

Then had to wait for the varnish to dry.


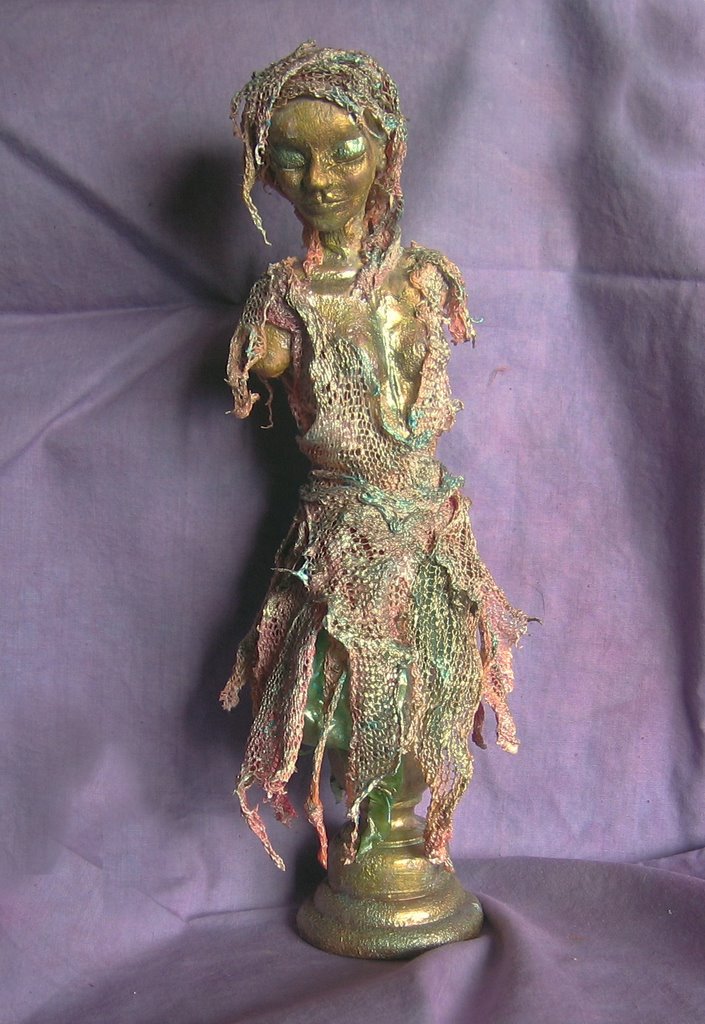
Then it was time to begin layering on some clothing. The lowest layer of her skirt is made of petal shapes of green silk dipped in Paverpol and attached at the hip line. The headpiece and the colored layers of the skirt are made of a piece of knit cotton stockinette. Oooooh, this stuff almost made me say some bad words. Very difficult to control.

Ok... you know what comes next don't you? Wait for the Paverpol to dry. This is getting annoying!


A third layers of stockinette soaked in Paverpol and she is beginning to look properly clothed for a fairy.

I had intended to dress her in colors to make her resemble the colors of a "Peace" rose. Too much fuschia, too much green, not enough yellow, and EVERYTHING is just too vivid. (The whitish color on the skirt is the wet Paverpol. Have to let that dry now. Sigh...)

Will I EVER be able to make something turn out the way I plan in the beginning?? Nevertheless, I am still pleased with the way she is progressing. She still needs wings, another coat of Paverpol, and some embellishments. If I have learned anything at all beyond how to play with some new techniques, it is that I mustn't worry so much if something isn't looking as good as I'd like. I can just keep adding more and more layers of "stuff" and it will look totally different in the end anyway!

Ohhhhhhh, I really REALLY want to add her wings, but no -- they aren't dry yet either!

Friday, July 28, 2006

More Progress

If only paint dried instantly...! I could have gotten so much more done on her today if I hadn't had to wait for paint to dry. As it is, she is now ready for embellishment.

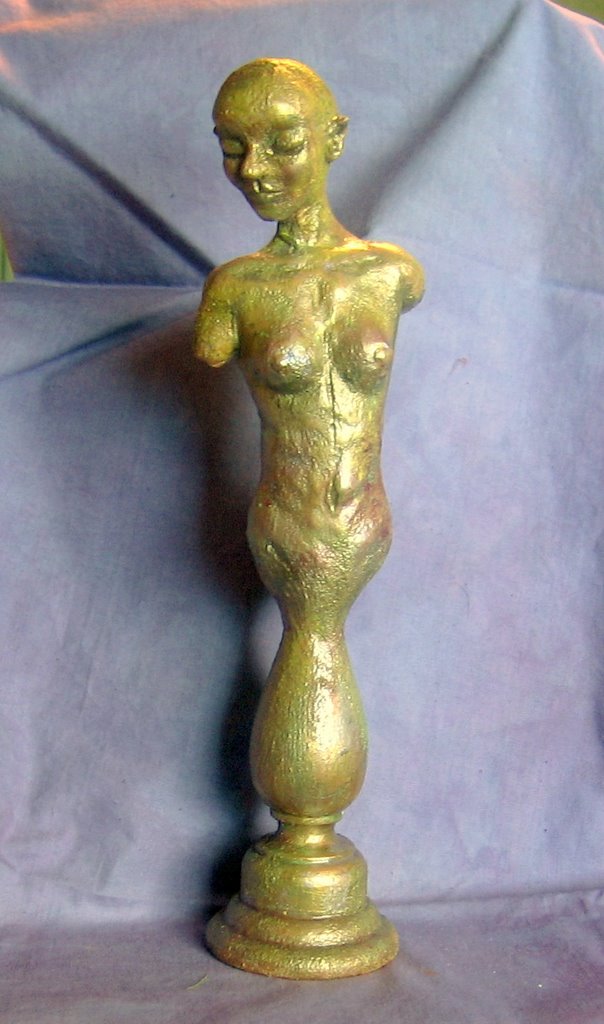
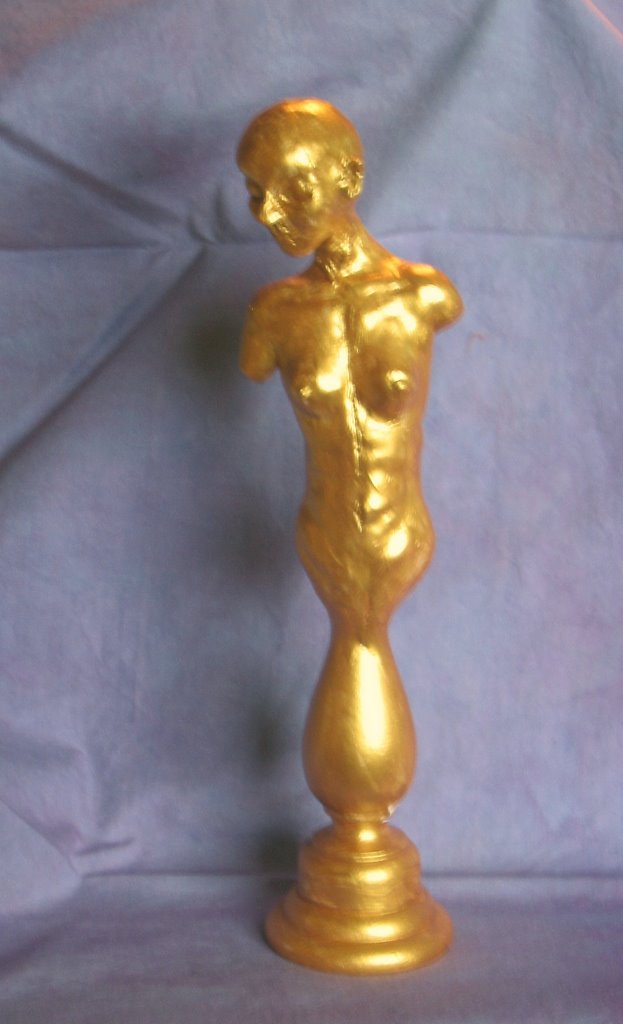
After 2 coats of gold paint she looked like this.

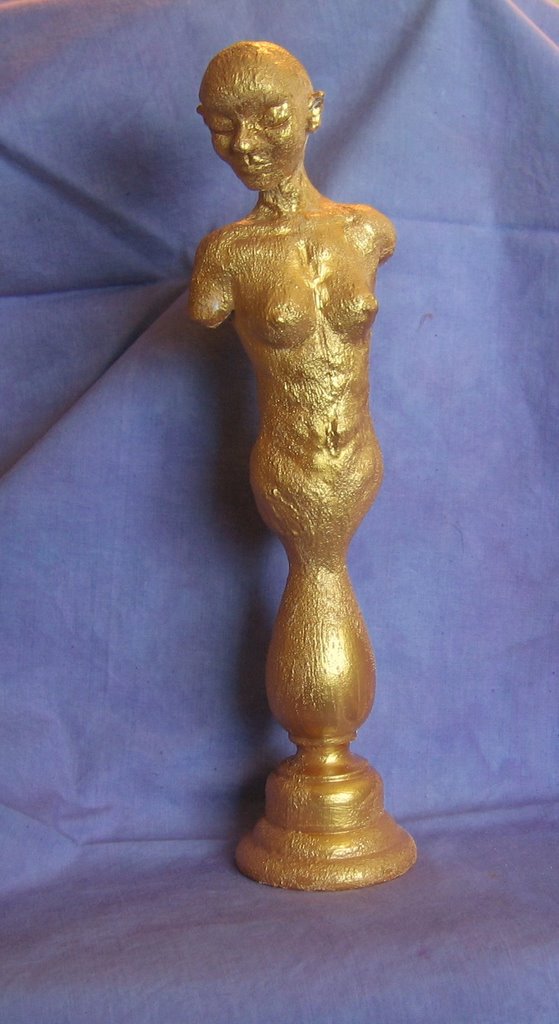
Then I added a layer of texturizing medium. Cool stuff! I will have to play with that some more.

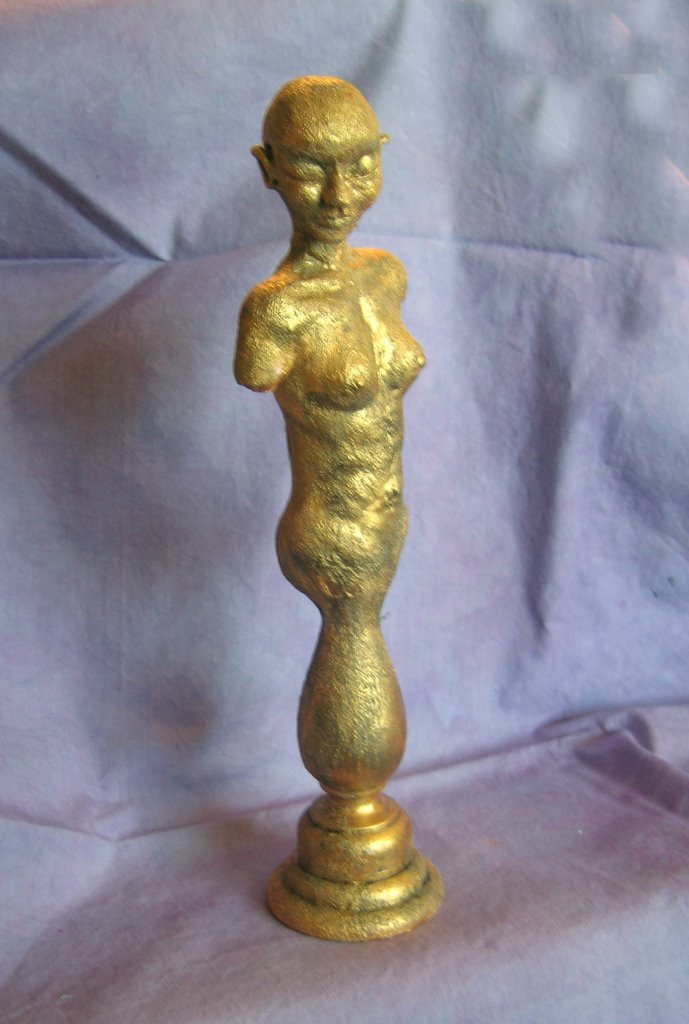
Another layer of gold paint to blend it all together...

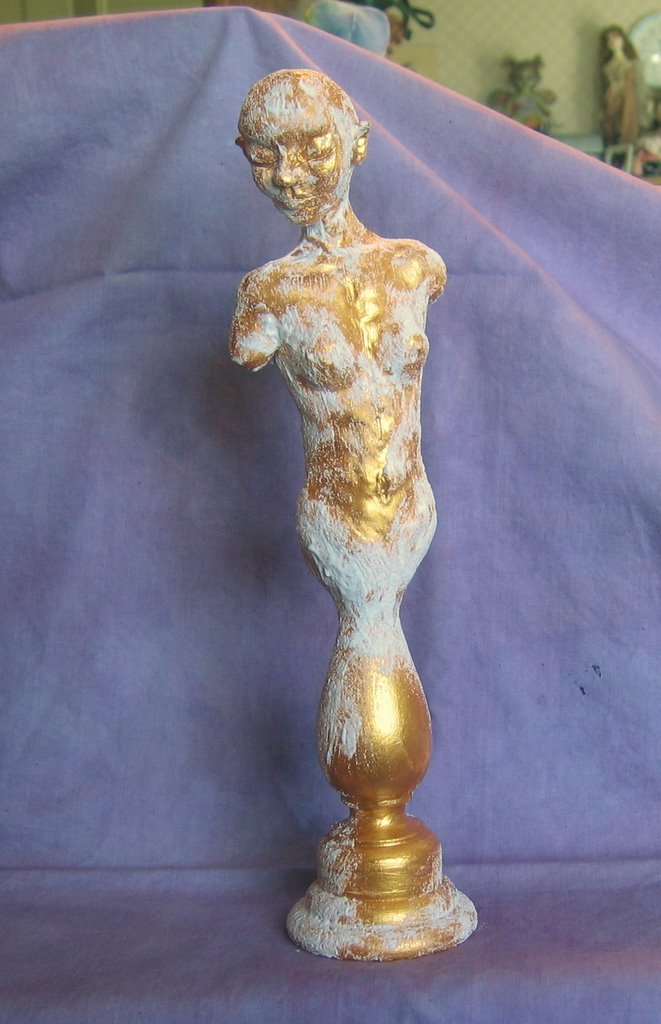
...followed by a wash of watered down black paint. I am REALLY likeing how she looks right now. The next step in the class calls for working her over with some sand paper, but I'm not sure I want to do that. I'll just let the idea percolate a bit. The teacher's sample looked great after the sanding, but I don't want to ruin what I have started!.

Uhuh... I confess. I'm a chicken.